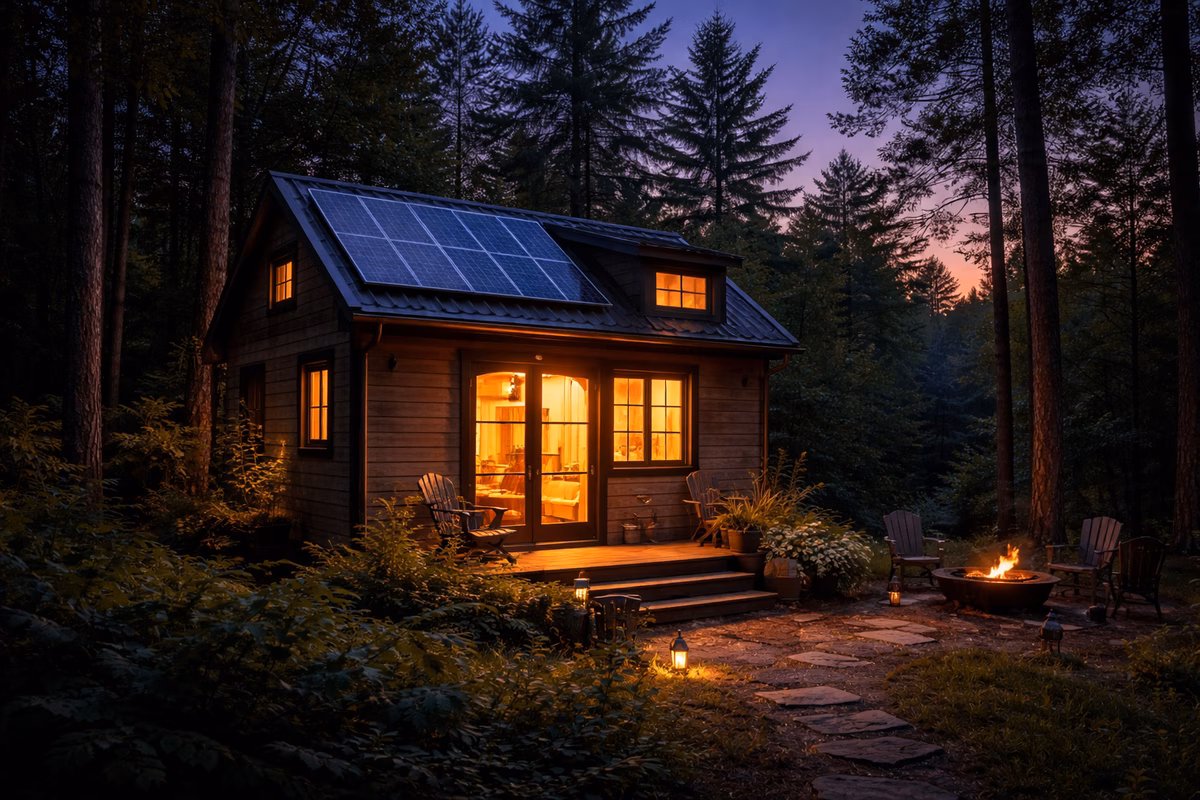
Solar is one of the most attractive parts of tiny-home living: independence, lower ongoing costs, and the deep satisfaction of running your life off the sun. There’s something almost magical about watching your battery fill up on a clear afternoon, knowing the grid is miles away and you just don’t need it. But here’s the thing—solar is also one of the easiest places to overspend or underbuild if you don’t have a solid plan.
Most solar systems don’t fail because the components are bad. They fail because the plan was vague. People guess their loads instead of measuring them. They buy too little battery and wonder why the lights dim at 2 a.m. They underestimate how brutal winter sun hours can be, especially in northern climates. And they completely forget about peak power draw and inverter limits until a fridge compressor kicks on and the whole system trips. Sound familiar? Don’t worry—this guide is going to walk you through a practical, no-nonsense way to size a system that actually fits your real life.
By the time you finish reading, you’ll have a simple load inventory method you can do on a napkin, a battery sizing approach based on days of autonomy (not guesswork), a realistic panel sizing method that respects seasons, clear guidance for inverter sizing and that tricky “surge” problem, and a solid list of common mistakes so you can dodge them before they cost you money.
Step 0: Decide what “off-grid” means for you
Before we touch a single number, let’s get philosophical for a moment. What does “off-grid” actually mean to you? Because the answer changes everything about how you size your system.
Mode A: Grid-tied with solar supplement
Maybe you’re parked somewhere with a grid hookup most of the time. In this scenario, solar is your sidekick—it reduces your bills and adds resilience for those occasional outages. You don’t need to go big on batteries because the grid is always there as your safety net. This is the easiest and cheapest mode to build, and it still feels great watching your meter spin backward on a sunny day.
Mode B: Off-grid most of the time
This is where things get interesting. You rely on solar and batteries for your day-to-day life, but you keep a generator tucked away for those really ugly stretches of weather. You’re living on sunshine the vast majority of the time, but you’re practical enough to know that a week of overcast skies in November isn’t worth bankrupting yourself over.
Mode C: Fully off-grid, winter-capable
This is the ambitious one. You expect the system to handle the deep winter months when the sun barely shows its face. No generator, no grid—just you and your panels against the shortest days of the year. This is the hardest and most expensive mode to design for, and honestly, it’s where most people run into trouble if they haven’t done their homework.
Most tiny home owners are realistically Mode B: off-grid often, with backup for the tough stretches. And there’s absolutely nothing wrong with that. In fact, it’s usually the smartest play.
Step 1: Make a load list (the only honest starting point)
Here’s where the rubber meets the road. A load list is simply a table of what you actually run in your home, and it’s the single most important step in this entire process. Skip this, and you’re building on sand.
For each appliance or device, you need to estimate two things: how many watts it draws (W) and how many hours per day you use it (h). Then you multiply those together to get watt-hours per day (Wh/day = W × h). That’s it. You don’t need lab-grade precision here—you just need numbers that are “good enough to design.”
A practical load inventory approach
The easiest way to tackle this is to think in categories. Start with the always-on stuff: your fridge, your internet router, any small standby loads that are quietly sipping power around the clock. These are your baseline, your non-negotiables. Next, think about your daily essentials—lights, laptop, phone charger, water pump. These are the things that make your tiny home actually livable. Then there are the big comfort loads, the ones that can make or break a solar budget: HVAC, cooking appliances, and hot water heating. Finally, consider your seasonal loads—fans humming through summer, maybe an extra heater pulling hard during those cold winter evenings.
Typical tiny-home loads (rough guidance)
Let’s talk real numbers to give you a ballpark. LED lighting is wonderfully efficient and usually only draws about 5 to 30 watts total per room depending on your fixtures. A laptop typically pulls somewhere around 30 to 100 watts while you’re charging or working on it. Starlink and router combos can actually be surprisingly significant energy consumers depending on your equipment—don’t overlook them. Your water pump draws high watts but only runs for short bursts, so its daily impact is moderate. A 12V fridge is often quite efficient, but because it runs around the clock, it still ends up being one of your major daily energy users.
And here’s the big warning that catches almost everyone off guard: electric heating and electric water heating can absolutely dominate your entire system. We’ll come back to this, because it’s important enough to deserve its own section.
Step 2: Calculate daily energy use
Alright, now it’s time to add everything up. Take all those Wh/day values from your load list and sum them into a daily total.
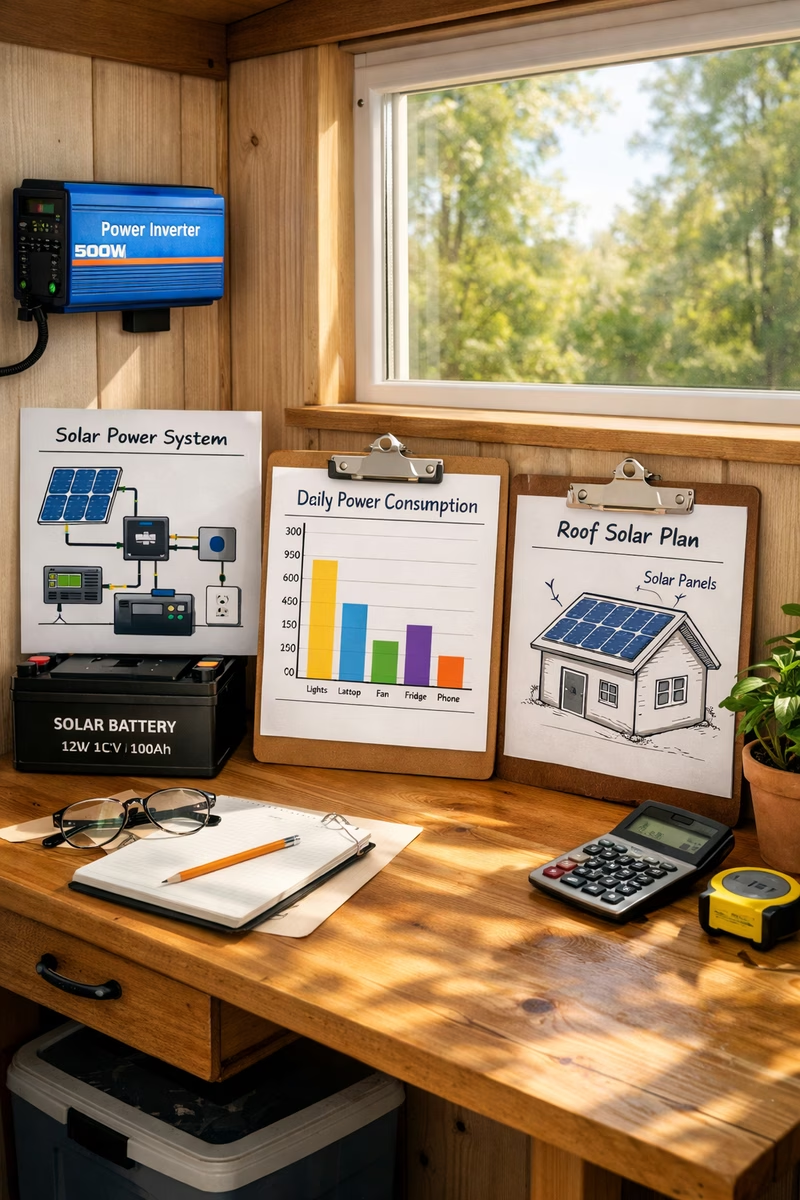
Here’s what a pretty typical tiny home breakdown might look like: your lights come in around 100 Wh/day, your laptop and phone charging add roughly 400 Wh/day, the fridge is a big chunk at about 1,000 Wh/day, the water pump contributes around 100 Wh/day, and if you’re running fans, that’s another 300 Wh/day or so. Add it all up and you land at about 1,900 Wh/day, or roughly 1.9 kWh/day.
Now, your number might be quite different. Depending on your appliances and lifestyle, you could land anywhere from 2 to 6 kWh/day. The point isn’t to hit a magic number—it’s to have your number, based on your life, written down where you can actually use it.
Step 3: Battery sizing (energy storage)
Think of your batteries as your “night and cloudy day” buffer. When the sun goes down or the clouds roll in, your batteries are what keep everything humming. Getting this right is absolutely critical—too small and you’re waking up to a dead system, too big and you’ve spent a fortune on storage you’ll never use.
The approach is beautifully simple. First, decide how many days of autonomy you want—that’s how long you can go with minimal or no sun before things get uncomfortable. Then multiply your daily use by that autonomy number. Finally, add a reserve margin so you’re not riding the razor’s edge.
Choose your autonomy
This is really a comfort and lifestyle decision. One day of autonomy is the bare minimum—it requires frequent sun and leaves almost no room for bad weather. Two days is a practical baseline that gives you breathing room for the occasional overcast stretch. Three or more days gives you real comfort and resilience, the kind where you can ride out a storm without even thinking about your power situation. Most Mode B tiny homers land somewhere around two days as their sweet spot.
Battery math
Here’s the formula: battery capacity needed (in kWh) equals your daily kWh multiplied by your autonomy days, multiplied by a reserve factor. That reserve factor is typically somewhere between 1.2 and 1.5, depending on how conservative you want to be. A higher reserve factor means more margin for the unexpected—think of it as insurance you carry in lithium cells.
Depth of discharge matters
Modern lithium batteries are wonderfully forgiving compared to older chemistries—you can discharge them much deeper without damaging them. But even with lithium, you still want to maintain a buffer. It extends battery longevity significantly, and it gives you a cushion for those unexpected weather patterns that catch everyone by surprise.
A reality check for electric heat
Okay, let’s talk about the elephant in the room. If you’re planning to heat your tiny home with electricity while off-grid, brace yourself—battery size balloons fast. A small space heater draws about 1,500 watts. Run that for just six hours overnight and you’ve consumed 9,000 Wh, or 9 kWh. That’s just one night of heat. For context, that’s roughly five times the total daily energy use of many tiny homes for everything else combined.
Off-grid electric heat is absolutely possible, but it is decidedly not “small.” This is why so many off-grid tiny homes turn to alternatives: propane heating with proper venting, diesel heaters that sip fuel incredibly efficiently, or wood stoves paired with careful safety planning. Once you move heating off the electrical system, solar becomes beautifully manageable—covering your lights, electronics, fans, and general daily living without breaking a sweat.
Step 4: Panel sizing (energy production)
Now for the fun part—the panels on your roof that turn sunshine into independence. Your panels need to accomplish two things every day: run your current loads and refill your batteries after overnight use. Miss either one of those targets and your system slowly drains itself into oblivion.
How much your panels actually produce depends on several factors that are all about where and how you live. Sun hours vary dramatically by location and season—a rooftop in Arizona lives a very different life than one in Oregon. Panel orientation and shading matter enormously, and we’ll dig into that in a moment. And don’t forget system losses from your inverter, wiring, and temperature effects, which nibble away at your theoretical output.
The simple panel sizing formula
Here’s the formula that makes it all click: panel watts needed equals your daily watt-hours divided by your effective sun hours, divided again by your system efficiency. System efficiency typically falls between 0.7 and 0.85—that accounts for all those real-world losses that manufacturer spec sheets conveniently ignore.
Let’s run through an example. Say your daily use is 2,000 Wh, you get about 4 effective sun hours per day, and your system efficiency is 0.75. That gives you 2,000 divided by 4, divided by 0.75, which equals roughly 667 watts. So you’d want to target somewhere around 700 to 900 watts of panel capacity to give yourself comfortable margin. See? Not rocket science—just honest math.
The winter problem
Here’s where a lot of people get tripped up. In many locations, winter sun hours drop dramatically. If your summer gives you 4 effective hours but winter only delivers 2, you suddenly need roughly double the panel capacity to produce the same daily energy. That math can get uncomfortable fast.
This is exactly why fully off-grid winter systems often look oversized to the uninitiated. They need more panels than feels intuitive for summer, they typically include a backup generator for the worst stretches, and their owners often adopt a lifestyle plan that deliberately lowers electrical loads during the darker months. It’s not suffering—it’s smart design that acknowledges reality.
Shading is a deal-breaker
Let’s be blunt: even partial shading can reduce your panel output far more than most people expect. A shadow across just one panel in a string can drag down the performance of the entire array. For tiny homes, the best practices are straightforward. Prioritize completely unshaded roof areas for your panels. Avoid mounting them where vents, AC units, or any other rooftop equipment might cast shadows at certain times of day. And if you regularly park under trees, expect significant performance losses—this is one of those situations where a beautiful parking spot and good solar production are fundamentally at odds.
Step 5: Inverter sizing (peak power)
Energy capacity in kWh is one dimension of your system, but peak power in watts is a completely different beast—and it catches people off guard all the time. Your inverter is the device that converts your battery’s DC power into the AC power your household appliances expect, and it needs to handle two very different demands.
First, there’s the continuous wattage of all your running loads added together. But then there’s the surge wattage—that brief but intense spike of power that motors and compressors demand when they first kick on.
Continuous vs surge
Think about what surges in a typical tiny home: the fridge compressor fires up every hour or so, the water pump kicks on whenever you turn a tap, power tools draw hard when they spin up, and some air conditioners have startup surges that would make your hair stand on end. A system can have plenty of battery energy stored up and still trip and shut down if the inverter can’t handle that momentary surge when the fridge and water pump happen to kick on at the same instant.
Practical inverter approach
The smart way to size your inverter is to think about worst-case simultaneous use. List out the highest loads that could realistically run at the same time, add in the surge requirements for anything with a motor or compressor, and then choose an inverter with margin above that total. If your life includes an induction cooktop, power tools, or air conditioning, plan for those peak demands upfront. It’s much cheaper to buy the right inverter once than to replace an undersized one after it lets the smoke out.
Step 6: Charge controller and system voltage
Your solar charge controller is the unsung hero sitting between your panels and your batteries, managing the charging process so your batteries stay healthy and happy. Tiny homes commonly use 12V, 24V, or 48V battery systems, and the choice matters more than you might think.
The general principle is that higher voltage systems reduce the current flowing through your wires for the same amount of power. Lower current means you can use thinner wiring with less energy lost to heat along the way. For smaller, simpler systems, 12V works fine and keeps things straightforward. But as systems grow larger, 24V or 48V starts making a lot more sense from both an efficiency and a wiring cost perspective.
You absolutely don’t have to design this part alone—but knowing it exists means you can ask the right questions when talking to solar installers or browsing equipment online.
Step 7: A “load plan” that makes solar easier
Here’s a secret that seasoned off-gridders know: the cheapest solar upgrade isn’t a new panel or a bigger battery. It’s behavior.
Creating a simple daily load plan can make a modest solar system perform like one twice its size. The idea is straightforward: run your high-power loads when the sun is strong, typically around midday when your panels are cranking out maximum power. Charge your devices and run your laptop during peak production hours so that energy flows straight from panels to loads without ever touching the battery. And perhaps most importantly, avoid stacking your peak loads—running the microwave, water pump, and hair dryer all at the same time is a recipe for tripping your inverter and cursing at the ceiling.
This isn’t deprivation. It’s scheduling. It’s the same way you might run the dishwasher at night when grid electricity is cheaper—except here, you run the heavy stuff at noon when your solar is cheapest (free, actually). Once it becomes habit, you won’t even think about it.
Optional but powerful: generator as a tool, not a failure
Some people in the off-grid community view generators with a kind of moral disdain, as if plugging one in means you’ve somehow failed at solar. Let’s put that notion to rest right now.
A much healthier framing goes like this: solar is your daily system, the thing that powers your life 95% of the time. A generator is your storm insurance—the thing you pull out during that freak week of clouds in January or when you’ve got guests staying and your loads are temporarily doubled.
If you try to size your solar system for the absolute worst-case winter week in recorded history, you’ll spend an absurd amount of money on panels and batteries that sit mostly idle the other 51 weeks of the year. Sizing solar for normal use and keeping a generator for the extremes is almost always the rational, cost-effective choice. There’s no shame in it. It’s just smart engineering.
Common mistakes (and how to avoid them)
Mistake 1: Forgetting the fridge is a big load
Your fridge doesn’t look like much—it just sits there quietly humming. But it runs 24 hours a day, 7 days a week, 365 days a year. That makes it one of the single largest energy consumers in a tiny home. Invest in an efficient model and your entire solar system gets easier. Skimp on the fridge and you’ll pay for it in panels and batteries forever.
Mistake 2: Underestimating winter and shade
This one bites people hard. If you park in a shaded spot, your beautiful solar array becomes essentially part-time. And winter sun hours in many locations are half or even a third of what summer delivers. Design for the season you’ll actually be living through, not the sunny afternoon when you first got excited about solar.
Mistake 3: Trying to do electric heat off-grid without math
We talked about this earlier, but it bears repeating because it’s the single most expensive mistake in tiny home solar. Electric heat is the fastest way to build a solar system that costs more than the tiny home itself. Do the math before you commit, and seriously consider propane, diesel, or wood as your heating source.
Mistake 4: Buying components before a plan
It’s so tempting to grab that deal on panels you saw online, or pick up a battery because it was on sale. Resist the urge. Start with your load list, work through the sizing math, and then go shopping. Components bought without a plan have a funny way of not fitting together—wrong voltages, mismatched capacities, or an inverter that can’t keep up with the rest of the system.
Mistake 5: Skipping safety
Solar systems involve high current and sometimes high voltage, and they deserve the same respect as any other electrical installation. Use proper fusing on every circuit so a short doesn’t become a fire. Use the correct wire gauge for the current you’re carrying—undersized wires get hot, and hot wires in a tiny home are terrifying. Install disconnects so you can safely service the system. And follow electrical code and best practices even if nobody’s checking, because the person those rules protect is you and the people sleeping under your roof.
A realistic example system (conceptual)
Let’s paint a picture of what a real system might look like for a typical tiny home consuming around 2 to 4 kWh per day with moderate comfort loads.
For batteries, you’d want enough capacity for roughly 2 days of autonomy, which translates to somewhere around 4 to 10 kWh of usable storage depending on your specific lifestyle and comfort preferences. On the panel side, you’d need enough to cover your daily use plus some recharge margin, which often lands in the 800W to 2,000W range depending on your location’s sun hours. Your inverter would be sized for your actual peak loads with a healthy surge margin built in.
The specifics always depend on your climate, your parking situation, and whether you’re running power-hungry appliances like air conditioning or an induction cooktop. But this gives you a conceptual framework to start from—a skeleton you can flesh out with your own numbers.
Your next step: build your one-page solar plan
Here’s your homework, and I promise it’s worth doing. Sit down and create a single-page document that captures five key things: your daily kWh estimate from the load list you built, your peak watt estimate for simultaneous loads, your autonomy target in days, your climate notes including realistic winter sun hours and the honest truth about shading where you park, and finally your “non-solar” choices—how you plan to handle heat, hot water, and cooking.
With that one page in hand, you can walk into a conversation with any solar installer or equipment supplier and immediately tell if they’re giving you good advice or trying to upsell you. It’s your cheat sheet, your BS detector, and your design blueprint all rolled into one.
The takeaway
A tiny-home solar system succeeds when you know your daily kWh inside and out, when you size your batteries for the comfort and resilience you actually need, when you size your panels for your real season and parking situation rather than some idealized summer day, when you choose an inverter that can handle both your continuous loads and those gnarly startup surges, and when you treat a backup generator as optional resilience rather than a source of shame.
Do the math once, get it right, and your system will feel boring—in the absolute best way possible. It just works. Day after day, season after season, your lights come on, your fridge hums, your phone charges, and you barely think about it. And that quiet, effortless reliability? That’s the whole point. That’s what good solar design feels like.