Tiny homes are small, so people assume heating and cooling them is a breeze. And honestly? Sometimes it is. A well-insulated tiny home can be surprisingly comfortable with pretty modest equipment. But here’s the thing nobody warns you about: small spaces can also feel extreme. That big south-facing window you love? It can turn your living room into a greenhouse by noon. A stiff winter wind finds every thermal bridge and cold-stripes your floor before you can reach for a blanket. And if you’re not managing humidity, you’ll wake up to foggy windows and that unmistakable clammy feeling that makes you wonder whether you accidentally moved into a submarine.
HVAC in a tiny home is less about raw power and more about stability, safety, and moisture control. This guide is here to help you pick a heating and cooling strategy that matches your climate, whether you’re plugged into the grid or living off it, what kind of build you’re working with (wheels versus foundation), and — perhaps most importantly — how picky you are about comfort.
Quick decision map (pick a direction fast)
If you want a simple starting point before diving into the details, here’s the cheat sheet. On-grid and want one system that handles both heating and AC? Start with a mini-split heat pump — it’s the Swiss Army knife of tiny-home climate control. Off-grid and winters are legit cold? Look at vented propane or a diesel heater, then layer in a ventilation strategy and some smart fan placement. Mild climate where you only need occasional help? Focus on nailing the building envelope, then lean on small electric backup heat and fans or natural venting to smooth out the edges. And if you’re dreaming of crackling flames and the smell of burning pine? A properly installed small wood stove can be magical — but only if you respect the clearances, shielding, and alarm requirements that come with putting fire inside a very small box.
No matter which path you choose, almost every good plan also includes controlled ventilation (so humidity doesn’t quietly take over your home) and a backup heat option (because tiny homes are sensitive to equipment failures — when your one heater dies at 2 AM in January, you’ll wish you had a Plan B).
Start with the truth: insulation and air sealing are the real heater
Before you spend a dime on equipment, fix the envelope. Seriously. A tiny home’s comfort is dominated by four things: insulation quality, air sealing, window performance, and thermal bridging (think trailer frames, metal members, and all those sneaky spots where cold finds a shortcut inside). If your home leaks air and has cold bridges running through the structure, you’ll chase comfort forever — tossing money at bigger heaters and fancier gadgets while the real problem hides behind the walls.
The “envelope-first” checklist
Start by sealing the obvious air leaks around doors, windows, and penetrations. Next, insulate the roof generously — heat rises, the sun hammers down on it, and an under-insulated roof is basically an invitation for misery from both directions. Manage thermal bridging wherever you can, and don’t sleep on window coverings in extreme climates. A set of insulated curtains or reflective shades can make a shockingly big difference for a few bucks. The bottom line is simple: good HVAC equipment can’t compensate for a leaky shell.
Tiny-home-specific trouble spots to watch
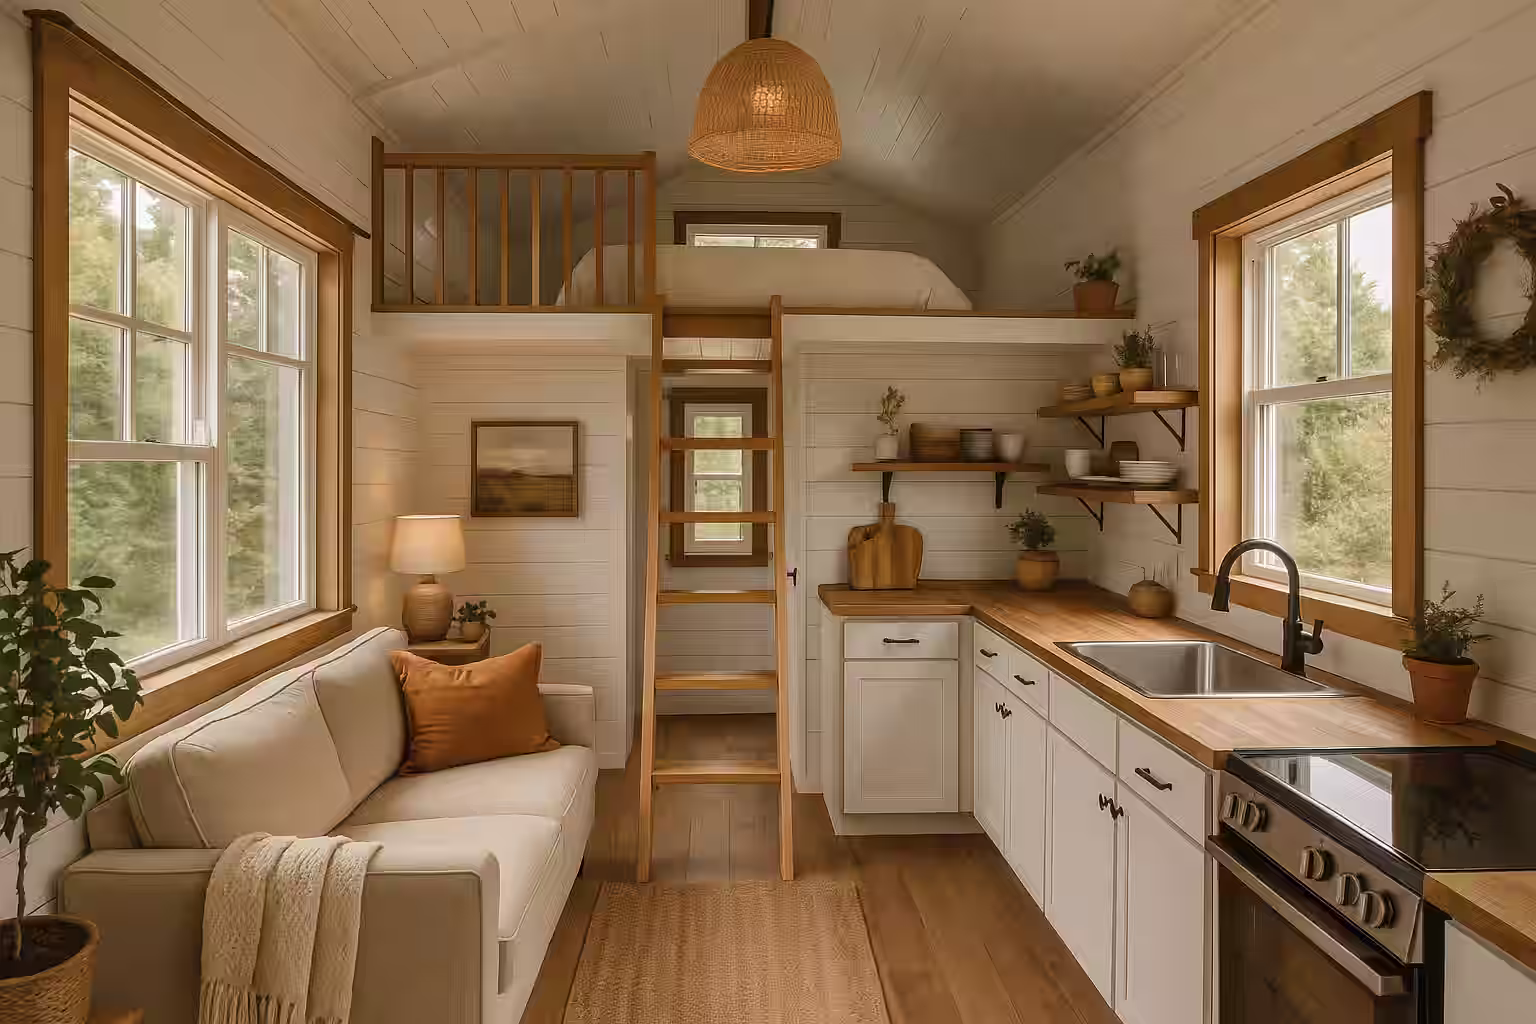
Every build type has its quirks, but tiny homes on wheels have a few classics. The trailer frame and metal members are notorious for creating cold stripes, condensation, and floor discomfort — metal is a fantastic thermal conductor, which is exactly what you don’t want between your warm toes and the frozen ground. The underbelly is another weak point: wind washing can steal heat fast if the underside isn’t well insulated and protected from the elements. Up top, the loft ceiling is easy to under-insulate, and then you’ve created a tiny oven right where you sleep in summer. And then there are windows — they’re your biggest comfort swing lever. They let solar gain roast you in summer and radiant chill creep in during winter. Love them, but manage them.
Decide your operating mode
This is where things get personal. Your power situation dictates which heating and cooling options actually make sense.
Mode A: Mostly on-grid
If you’re plugged in, congratulations — you can use electric solutions easily. Mini-splits, space heaters, window AC units… the electrical grid is your best friend, and your options are wide open.
Mode B: Off-grid with solar
Here’s where it gets interesting. Heating choices matter a lot because electric heat is an absolute energy monster. Running a space heater off solar panels and batteries is like trying to fill a swimming pool with a garden hose. It technically works, but you’ll run out of patience (and stored energy) long before you’re comfortable.
Mode C: Off-grid with fuel
When electricity is scarce, propane, diesel, and wood become much more attractive. They pack a ton of energy into a relatively small, portable package, and they don’t care whether the sun is shining or the wind is blowing.
The “right” system is always the one that matches your power reality. Don’t fall in love with a solution that doesn’t fit your energy budget.
Redundancy matters more in tiny homes
A standard house can coast for hours when something goes wrong. A tiny home? It can go from “fine” to “unlivable” alarmingly fast when a heater dies, the power goes out, or a condensate drain freezes solid. Even if you pick a rock-solid primary system, plan a backup. That might be a small electric heater for shoulder seasons if you’re on-grid, a safe fuel-based heater when power is limited off-grid, or simply a way to keep pipes from freezing if you have plumbing. Redundancy isn’t paranoia in a tiny home — it’s just good planning.
Heating options (pros, cons, and who they fit)
1) Mini-split heat pump (often the best all-around)
The mini-split is the darling of the tiny home world, and for good reason. It provides both heating and cooling from a single system. It’s efficient (dramatically more so than resistance heat), quiet, controllable, and relatively low-maintenance once installed. On the flip side, it does need electricity, the installation can be more complex than you’d expect, and performance depends on choosing a model rated for your actual winter lows — not all mini-splits are created equal when the thermometer drops.
Mini-splits are best for on-grid tiny homes, mild-to-cold climates (with the right cold-climate-rated model), and people who just want clean, set-it-and-forget-it comfort. When you’re shopping, look for a unit designed for your specific winter lows — many “cold climate” models maintain usable heating output even at seriously low outdoor temperatures. And think carefully about where you mount the indoor head: if it can’t actually circulate air to your loft or past closed doors, you’ll end up with a warm living room and an icy bedroom.
2) Electric resistance heat (space heaters)
Simple, cheap upfront, and available at any hardware store. Space heaters have a lot going for them in the convenience department — low cost, easy to use, no venting required. The catch? They’re energy hogs. Running one for extended periods can strain your electrical system and run up your utility bill fast. They’re best for on-grid use as occasional backup heat or for taking the edge off during shoulder seasons. If you’re off-grid with solar, resistance heat is usually impractical unless your system is massively oversized.
3) Vented propane heat
Propane is incredibly common in the tiny home world, and it’s easy to see why. It delivers strong heat output and works beautifully off-grid. The downsides are that it requires safe venting and careful combustion air planning, and you’ll need to think through fuel logistics — where your tank lives, how you refill it, and how the regulator and shutoffs are laid out.
Vented propane is best for off-grid tiny homes and cold climates where electric options are limited. Plan your propane storage, regulator placement, and shutoffs early in the design process — retrofitting is always harder. And treat CO and propane detection as part of the system, not an afterthought accessory.
4) Diesel heater
Diesel heaters crossed over from the van life world and have found a loyal following in some tiny homes. They’re efficient, deliver strong heat, and diesel’s energy density means a little fuel goes a long way. Installation and exhaust routing absolutely must be done correctly, though — this isn’t a place to cut corners. Noise and maintenance vary quite a bit by model, so do your research.
These are best for off-grid builds in cold climates. One thing to know: the fuel pump “tick” and fan sound can be noticeable in a small space, especially at night. Some people find it soothing; others find it maddening. Exhaust routing and combustion air management are non-negotiable safety items — period.
5) Wood stove
Ah, the wood stove. Romantic, powerful, and deeply satisfying on a cold night. It works completely off-grid and delivers that cozy, radiant warmth that nothing else quite replicates. But let’s be real: it’s a serious commitment. Fire safety and clearance requirements in a tiny space are no joke. You’ll need to manage ash, store wood somewhere (without tracking snow and mud through your living area), and accept that a wood stove can easily overheat a tiny space if you’re not careful.
Wood stoves are best for foundation tiny homes or very carefully designed THOWs, and they’re really only suitable for people comfortable with the ongoing responsibility. Choose a stove sized for small volumes — not the one that looks coolest — and plan for controllability. Being able to dial back the burn matters when your entire home is 200 square feet.
6) A note on “electric heat” beyond space heaters
Baseboards, wall heaters, radiant panels — they all exist, and they’re all still resistance heat at their core. Simple, yes, but energy hungry. If you’re on-grid, resistance heat can make a perfectly fine backup or shoulder-season solution. If you’re off-grid, it usually becomes the single biggest power draw you own, and that’s a tough pill to swallow when your battery bank is finite.
Cooling options
Cooling is not optional in many climates. Tiny homes can heat up fast — that compact volume that’s so easy to warm in winter becomes an oven in summer with remarkable speed.
1) Mini-split (again)
If you already have a mini-split for heating, you’re covered. It’s the most efficient and comfortable cooling option for a tiny home, full stop.
2) Window AC or portable AC
A window AC unit can be surprisingly effective and simple — just mount it and go. Portable AC units, on the other hand, often perform worse than you’d hope unless the ducting is excellent. That single-hose design most portables use creates negative pressure in your space, pulling hot air in through every crack. If you go portable, invest in good ducting and sealing.
3) Fans + ventilation (helpful, not always sufficient)
Fans improve perceived comfort by moving air across your skin, but they don’t actually remove heat from the space. In dry climates, good airflow and strategic ventilation can be enough. But if humidity is high, airflow helps but doesn’t solve that sticky, oppressive feeling. Think of fans as a complement to your cooling strategy, not a replacement for one.
Moisture, comfort, and “why does it feel clammy?”
Here’s a truth that catches a lot of tiny home owners off guard: heating and cooling are deeply connected to moisture. Warm air can hold more moisture than cold air. Cold surfaces cause condensation when warm, humid air touches them. And combustion appliances (like that unvented propane heater) can actively add water vapor to your indoor air. Put it all together and you’ve got a recipe for that damp, clammy feeling that makes an otherwise lovely tiny home feel like a cave.
If your space feels clammy, start by checking humidity with a cheap hygrometer — you can’t manage what you can’t measure. Then improve ventilation and consider dehumidification. Your AC actually dehumidifies as it cools, which is one of its secret superpowers.
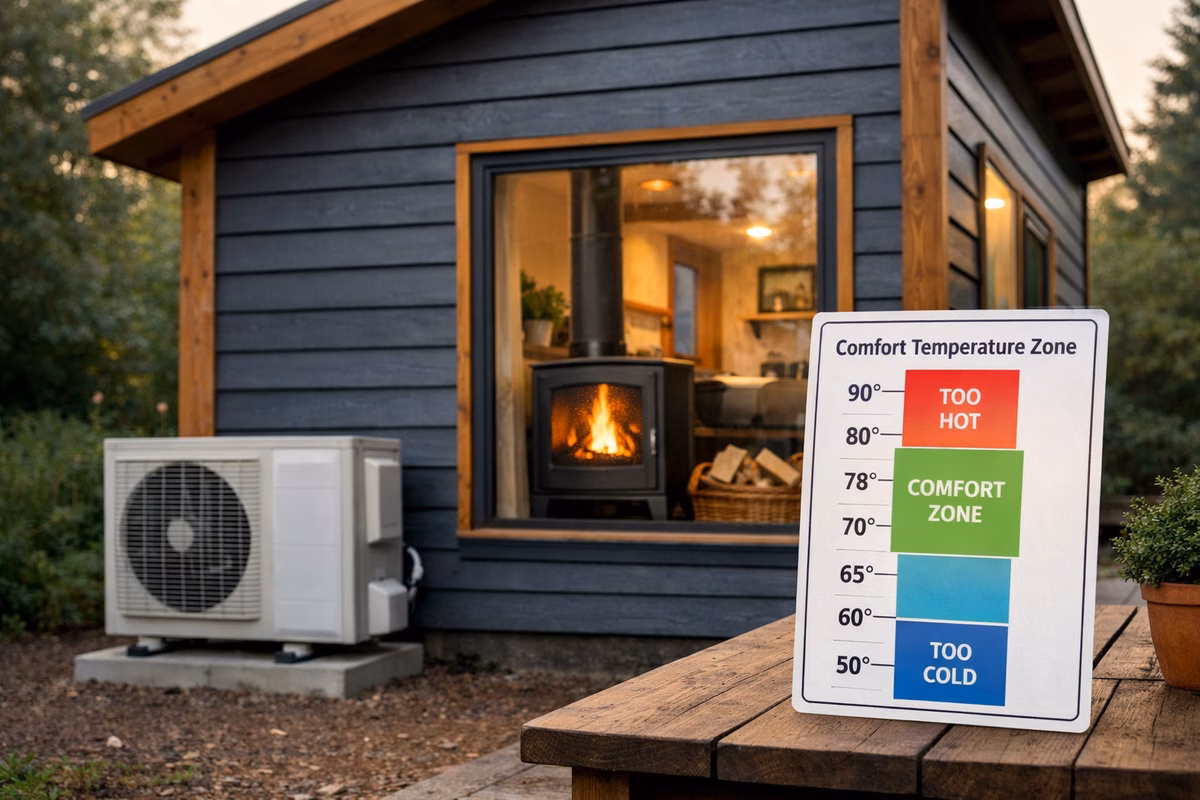
A practical humidity target
You don’t need laboratory-perfect numbers, but you do want to avoid the extremes. Too humid means condensation on windows, musty smells, mold risk, and that “sticky” discomfort that makes everything feel gross. Too dry brings irritated sinuses and skin, static electricity, and uncomfortable sleep. As a rough comfort range, most people feel best with indoor relative humidity around 30–55%, adjusted for season and climate.
Condensation troubleshooting (tiny-home edition)
If you’re seeing wet windows, damp corners, or mildew, work through this sequence in order. First, stop adding moisture — avoid unvented combustion, vent your showers and cooking steam outside, and cover boiling pots. Second, move air — stagnant air sitting against cold surfaces is a condensation magnet, so get it circulating. Third, ventilate intentionally — a controlled exhaust and fresh-air strategy beats “just crack a window” in most climates. Fourth, dehumidify if needed — your AC handles this while cooling, and a dedicated dehumidifier can be a lifesaver in humid climates or during shoulder seasons. Finally, find the cold bridge — persistent wet spots almost always point to missing insulation or a thermal bridge hiding in the structure.
Ventilation and indoor air quality (IAQ) basics
Tiny homes tend to be tighter than older houses, which is great for energy efficiency but means you absolutely need a plan for fresh air and moisture removal. Without one, you’re essentially living inside a sealed container that fills up with cooking moisture, shower steam, and your own exhaled breath.
At minimum, most builds benefit from a quality bath fan vented to the outdoors (showers are a huge moisture event in a tiny space), a way to vent cooking moisture through a range hood or dedicated exhaust fan, and a clear path for makeup air so your exhaust fans can actually do their job. If you want true “set and forget” comfort, consider balanced ventilation like an HRV or ERV sized for small spaces and installed correctly. It’s an investment, but it takes the guesswork out of air quality management.
Sizing: small homes still need planning
Here’s a common misconception: because tiny homes are small, you can just eyeball the HVAC sizing. In reality, a tiny home can be easy to heat (small volume, less air to condition) and hard to keep stable (fast temperature swings because there’s so little thermal mass). Oversized heating or cooling equipment leads to short cycling — frequent on/off behavior that hurts both comfort and humidity control. Your AC might cool the air before it has time to pull moisture out, leaving you cold and clammy.
If you’re hiring a professional, ask them about load calculations, what insulation values they’re assuming, and how they’re accounting for your windows and air sealing. These details matter more in a tiny home than in a conventional house because the margins are thinner.
Rules of thumb (use carefully)
Tiny homes vary wildly, so take any rule of thumb with a grain of salt. A shaded, well-insulated 250 square foot build is a completely different animal from a window-heavy, poorly insulated 250 square foot build. That said, if you need a starting point for conversations with HVAC folks, many tiny homes land in the 6,000–12,000 BTU/h range for heating and cooling equipment. But the right answer depends entirely on your climate, insulation, air sealing, and window design. When in doubt, a proper load calculation beats guessing every single time.
What systems cost (rough ranges)
Costs vary by region, installation complexity, and how much work you’re willing to DIY. But having rough “order of magnitude” numbers helps set expectations so you don’t get sticker shock — or underspend and regret it later. These ranges are intentionally wide:
| Option | Rough upfront range (USD) | Notes |
|---|---|---|
| Mini-split heat pump | $1,500–$6,000+ | Equipment + line set + electrical + mounting; pro install often costs more than the unit. |
| Window AC | $150–$600 | Simple cooling; doesn’t solve winter heating. |
| Portable AC | $250–$700 | Convenience tradeoff; ducting quality heavily affects performance. |
| Electric resistance heat | $20–$300 | Cheap upfront; expensive to run, especially off-grid. |
| Vented propane heater | $800–$3,500+ | Heater + venting + propane hardware; fuel cost varies. |
| Diesel heater | $200–$1,500+ | Big spread by brand and install quality; plan for safe exhaust routing. |
| Small wood stove | $1,000–$5,000+ | Stove + chimney + shielding/clearances; safety details add up. |
Treat any specific quote as local pricing, and always plan budget for the parts people forget — venting, shielding, electrical work, condensate management, permits, and alarms. Those “extras” add up faster than you’d think.
Practical comfort upgrades (high leverage)
Sometimes the biggest comfort gains come from the smallest investments. Here are a few high-leverage moves that punch way above their weight.
Window management
Sun through windows can absolutely dominate your indoor temperature. In hot climates, exterior shading is your best friend — even a simple awning or shade sail can drop interior temperatures dramatically. Reflective window coverings bounce solar heat before it enters the space. In cold climates, insulated curtains trap a layer of still air against the glass and cut radiant chill. The key insight is that managing your windows is often cheaper and more effective than upgrading your HVAC equipment.
Air sealing around doors
Drafts make small spaces feel much colder than the thermometer suggests. Weatherstripping and door sweeps are dirt cheap, take minutes to install, and can transform how your home feels on a windy night. This is one of those “why didn’t I do this sooner?” upgrades.
Zoning inside the tiny home
If you have a loft, heat will pool up there like it’s trying to escape. Meanwhile, your main living level stays cooler than you’d like. Small circulation fans can mix the air between levels and even out temperatures dramatically. Pay attention to vent placement, too — pointing your mini-split head straight at the loft ladder opening is a small detail that makes a real difference.
Controls and airflow (small details, big comfort)
Put your thermostat or temperature sensor where you actually live and spend time — not tucked up in a hot loft corner where it reads 10 degrees warmer than reality. Don’t block supply air with furniture or curtains; give your system room to breathe. And when temperatures start stratifying between levels, a small fan moving air between the loft and main floor can be the difference between “this is great” and “why is it so uneven?”
Common mistakes
Mistake: relying on a single space heater for off-grid winter
It sounds reasonable on paper, but it’s usually an energy mismatch. A space heater draws serious wattage, and your battery bank or solar system probably can’t sustain it through a long, cold night. You’ll wake up to dead batteries and a freezing home.
Mistake: ignoring ventilation
A tight, well-sealed home without controlled ventilation becomes humid, stuffy, and mold-prone faster than you’d believe. All that moisture from cooking, showering, and simply breathing has nowhere to go. Build ventilation into the plan from day one.
Mistake: unvented propane heat
It feels like an easy solution, but unvented combustion dumps moisture and combustion byproducts directly into your living space. The result? Condensation problems, poor air quality, and sometimes headaches or worse. Always choose vented, sealed combustion.
Mistake: oversized AC
Bigger isn’t better when it comes to cooling a tiny home. An oversized AC unit cools the air too quickly, cycling off before it’s had time to properly dehumidify. You end up cold but still clammy — the worst of both worlds.
Mistake: forgetting safety hardware
CO and smoke alarms, a fire extinguisher, and properly installed venting aren’t optional luxuries in a small space. They’re essential. When you’re sleeping ten feet from a combustion appliance, there’s zero margin for error.
Example strategies (choose your lane)
Strategy 1: On-grid comfort
This is the “just make it work beautifully” approach. Install a mini-split for year-round heating and cooling, pair it with good ventilation for moisture and air quality control, and add window management (shades, curtains, awnings) to handle solar gain. It’s clean, efficient, and low-drama once it’s set up.
Strategy 2: Off-grid practical
When you’re living without the grid, your strategy shifts to fuel-based heating — a diesel or vented propane heater for the cold months, supplemented by fans and intentional ventilation for air quality. If your power system can handle it, a small AC unit for extreme heat rounds out the package. This approach prioritizes reliability and energy independence over convenience.
Strategy 3: Mild climate minimalist
If you’re lucky enough to live somewhere without extreme temperatures, your best investment is a great building envelope. Nail the insulation, air sealing, and window design, then keep a small electric heater around for backup on the occasional cold night. Fans and natural ventilation handle most of the cooling. This is the lowest-cost, lowest-complexity approach — and in the right climate, it works beautifully.
Tiny-home HVAC safety checklist
Safety in a tiny home isn’t just a line item — it’s the foundation everything else rests on. Make sure you have smoke and CO alarms installed and tested regularly. All combustion appliances must be vented outdoors, with sealed combustion preferred wherever possible. If you’re running any solid-fuel appliance like a wood stove, clearances and heat shields need to meet or exceed manufacturer specs — no exceptions. Your electrical system should have correct wire sizing, breakers, and GFCI protection where required. Condensate management for AC and heat pumps means routing drains so they won’t freeze in winter or leak inside your home. And keep a fire extinguisher somewhere genuinely accessible — not buried at the bottom of a cabinet behind your cast iron collection.
The takeaway
Tiny-home HVAC is actually pretty simple when you stop thinking about individual gadgets and start thinking about it as a system. Build a good envelope first — that’s your foundation. Choose heating that matches your power reality, whether that’s grid electricity, solar, or fuel. Manage humidity with intentional ventilation so moisture doesn’t quietly wreck your home. And control sun and drafts with window management and air sealing.
Do those four things well, and your tiny home stops feeling like a temperature experiment and starts feeling like what it’s supposed to be: a real, comfortable home.