Split keyboards are easy to misunderstand because they look like a single answer to every comfort problem. They are not magic hardware, and they are not medical treatment. They are a different way to arrange the same basic typing job: put each hand where it naturally wants to sit, reduce unnecessary reach, and make the keyboard serve the body at the desk instead of forcing the body to crowd around a rectangle.
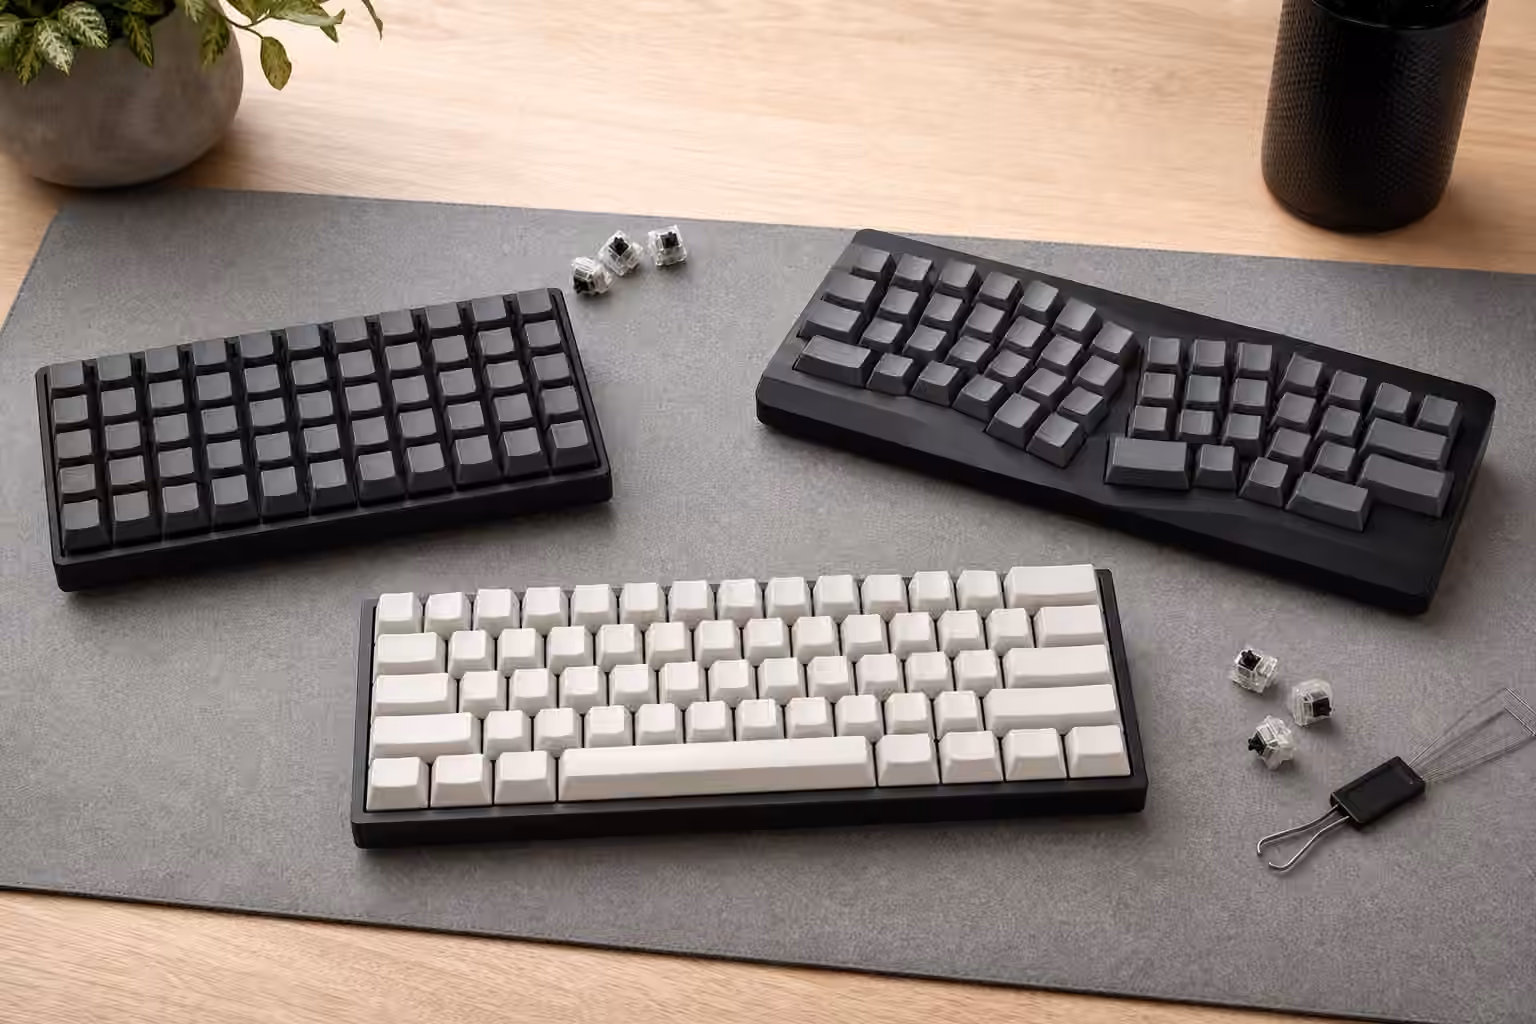
That change can be subtle or dramatic. A one-piece Alice-style board keeps the halves joined in a single case but angles the alphas outward. A true split board separates left and right halves so they can move independently. Some split boards keep a familiar row-staggered layout. Others use columnar stagger, thumb clusters, tenting legs, rotary encoders, small screens, and deep firmware layers. The category is wide enough that “split keyboard” does not describe one experience. It describes a family of choices, each with its own cost in learning, desk setup, and portability.
If you are still choosing between full-size, TKL, 75 percent, and 65 percent boards, start with the Keyboard Layout Guide . Split boards make more sense once you already know which keys you use every day and which ones only feel important because they were always there.
The problem split keyboards try to solve
A standard keyboard asks both hands to meet in front of the body. For many people that is fine, especially for short sessions. Over longer workdays, the geometry can become annoying. The shoulders roll inward, the wrists angle toward the center, and the mouse may sit farther right than it needs to because the keyboard takes up so much width. A compact keyboard can help by bringing the mouse closer, but it still keeps both hands tied to one slab.
A split board separates those problems. The left half can sit under the left hand, the right half can sit under the right hand, and the pointing device can live between them or closer to the dominant hand. The angle can match your shoulder width instead of the other way around. That does not guarantee comfort, because chair height, desk height, typing force, and breaks still matter. It does give you more control over the working position.
The most useful test is simple. Put your hands on the desk without a keyboard and let them rest where they feel relaxed. Notice the angle between your forearms. Notice whether your hands want to be closer together, farther apart, or slightly rotated. A split keyboard lets the board move toward that position. A normal keyboard asks your hands to move toward the board.
One-piece ergonomic boards are the gentle version
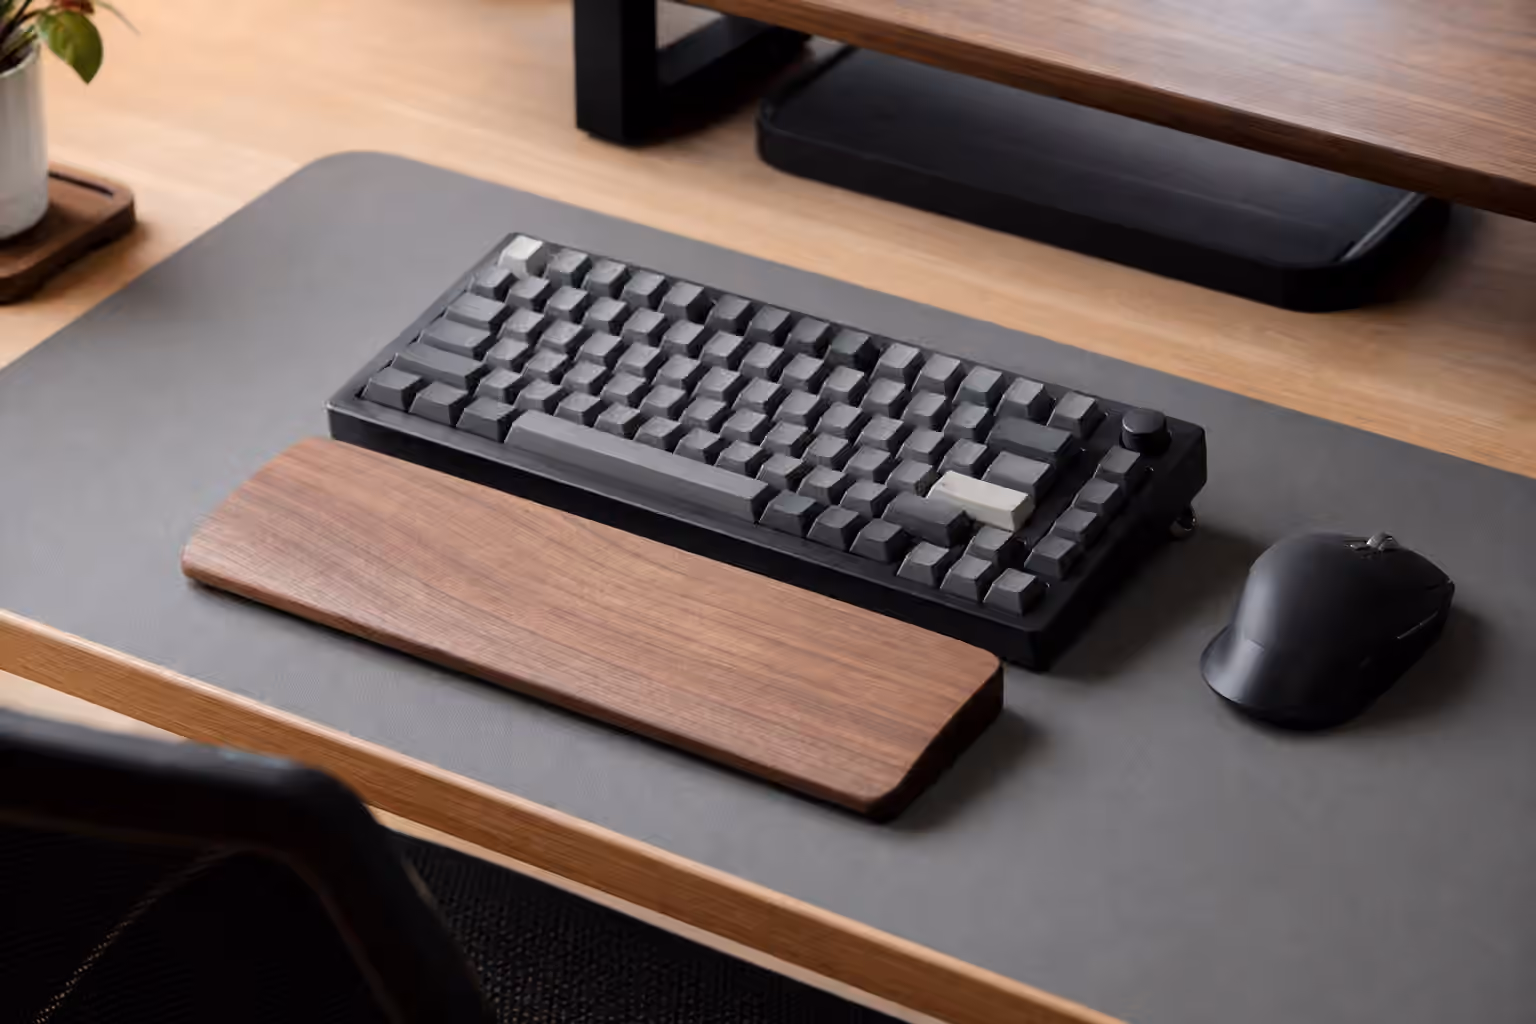
Alice, Arisu, and similar layouts are often the first ergonomic step for mechanical keyboard people. They keep the keyboard in one case, preserve a familiar visual shape, and angle the left and right alpha clusters outward. Many add a split spacebar so the thumbs can do more useful work than hitting one long bar from either side.
The advantage is that the transition is smaller. You can still pick up the board, move it like any other keyboard, and share it with someone who understands normal key positions. The muscle memory shift is real, but it is not as disruptive as moving to two separate halves with thumb clusters and layers. For a desk that needs to look tidy or for a user who wants only a small angle change, a one-piece ergonomic board can be the right compromise.
The limit is that the halves cannot move independently. If your shoulders are wide, the fixed gap may still feel narrow. If you want a pointing device between the halves, the case gets in the way. If you want tenting, the entire board has to support it instead of each half moving on its own. A one-piece board is better understood as an angled keyboard, not a full split system.
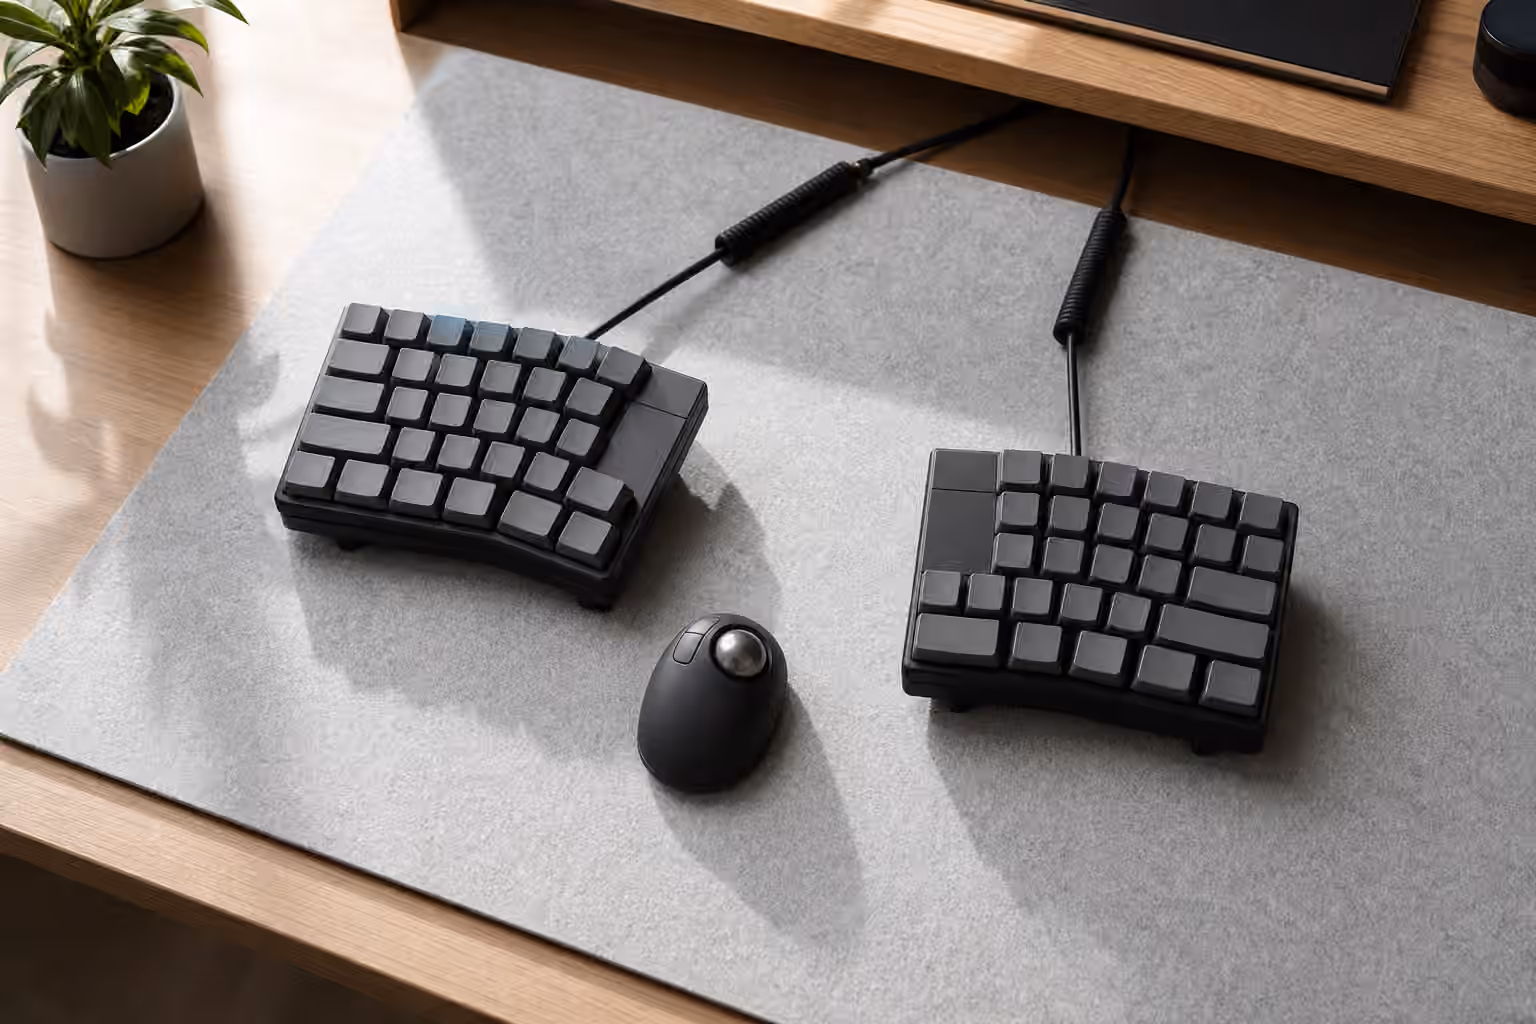
True split boards change the desk
A true split board asks you to design the desk around the hands. The halves can sit shoulder-width apart, closer together for gaming, or asymmetrically around a notebook, tablet, trackball, or mouse. Some people place the mouse between the halves so the right arm does not constantly reach past the keyboard. Others keep the mouse outside the right half but angle that half inward to reduce wrist bend.
This flexibility is the reason split boards can feel so good when the setup is dialed in. It is also the reason they can feel awkward at first. There are more variables. Cable routing matters. The halves may slide unless the desk mat grips well. The board may need tenting legs or mounts. A compact split with few keys demands firmware layers for navigation, function keys, symbols, media controls, and sometimes numbers.
None of that is a flaw if you enjoy tuning your workspace. It is a problem if you want a keyboard that works exactly like a laptop keyboard the moment it leaves the box. The QMK and VIA Firmware Guide becomes more important with split boards because the layout is not only physical. It is also a map of layers, thumb keys, hold-tap behavior, and shortcuts.
Columnar stagger, ortholinear grids, and thumb keys
Most standard keyboards use row stagger because typewriter mechanisms needed the rows offset. Mechanical keyboards inherited the shape. Columnar stagger asks a different question: if each finger mostly moves up and down, why not align keys by finger instead of by row? Ortholinear boards go further and arrange keys in a clean grid. Split ergonomic boards often use one of these patterns because the halves are already being redesigned.
The benefit is that finger travel can become more direct once the pattern is learned. The cost is that the first days can feel wrong. Keys that used to sit diagonally may now sit directly above or below. The B, Y, and number row positions can expose habits you never noticed. A typist who learned by feel rather than formal touch typing may need patience while the hands build a new map.
Thumb clusters are the other major shift. On a standard keyboard, the thumbs mostly hit space. On many split boards, the thumbs handle space, backspace, enter, escape, tab, layer access, or modifier keys. This is powerful because the thumbs are strong and underused, while the pinkies often carry too many awkward shortcuts. It can also be too much if every thumb key has three behaviors and no one can remember them under pressure. Good split layouts make the most common actions easier, not more clever.
Tenting, tilt, and the danger of over-adjusting
Tenting raises the inner edge of each half so the hands sit at an angle instead of flat on the desk. Some people like a mild tent. Others prefer a steeper angle. The useful setting is the one that lets your hands rest without forcing the wrists to twist or hover. More angle is not automatically more ergonomic. Extreme tenting can create its own strain if it makes the hands unstable or pushes the elbows into a strange position.
Tilt is separate from tenting. Many mechanical keyboards already have a front-to-back angle that raises the back edge. That can look familiar, but it can also make the wrists extend upward if the board is tall. Some split users prefer a flatter or slightly negative tilt, where the front is not lower than the back. The right answer depends on desk height, chair height, palm support, and typing style. The point is to test the whole posture, not copy a photograph.
Keycap profile and switch weight matter here too. Tall keycaps can make an already high split board feel bulky. Heavy switches can make an unfamiliar layout tiring because the hands are learning and pressing harder than usual. The Keycaps Guide and Complete Switch Guide are useful companions because comfort is not only about the case shape.
Layers should reduce reach, not become homework
Small split boards often have fewer keys than compact standard layouts. That is part of the appeal. With good layers, arrows, navigation, function keys, symbols, and media controls can move closer to the home row. Instead of reaching to a far corner for backspace or delete, you might hold a thumb key and press a nearby letter. Instead of stretching for arrows, you might use a navigation layer under the right hand.
The failure mode is making the layout too ambitious too quickly. A board can technically support tap-dance, combos, macros, home-row modifiers, mouse keys, and several layers, but that does not mean your first week should use all of them. Start with the daily irritations. Move backspace if it is awkward. Put arrows somewhere memorable. Give each thumb a clear job. Let the layout earn complexity through use.
Split keyboards reward small revisions. Keep notes while working. When a shortcut feels awkward three times in one day, change it. When a layer key causes mistakes, move it. When a clever combo never becomes automatic, remove it. Firmware is not a trophy case for ideas. It is the part of the keyboard that should disappear while you type.
Sound, noise, and shared rooms
Split boards are not automatically quiet. Two small cases can still sound sharp, hollow, or rattly. A tented setup can transmit sound differently through stands or mounts. Thumb keys can make backspace and enter more frequent on stabilized or larger keys, depending on the design. If the board will live near other people, the same low-noise principles still apply: avoid clicky switches in shared rooms, tune the large keys, use a desk mat, and keep the case from ringing.
The Low-Noise Keyboard Setup guide covers that chain in more detail. For split boards, the extra lesson is to listen to each half separately. One side may sit on a different surface, use a different cable route, or flex differently under the hand. If one half sounds louder, the problem may be the desk contact rather than the switches.
Who should wait before switching
A split keyboard is a poor first choice for someone who shares one desk keyboard with several people, depends on a full numpad all day, or cannot spare time for a learning curve. It can also be frustrating for people who move constantly between laptop keyboards, office keyboards, and a home setup without wanting different muscle memory in each place. Split boards are learnable, but they ask for consistency.
They are also not the first fix for every discomfort. If a normal keyboard is too loud, solve sound first. If the board is too tall, check wrist position and keycap profile. If the mouse is too far away, try TKL, 75 percent, or 65 percent before assuming a full split is necessary. If the keyboard itself is fine but the chair and desk are badly matched, a new layout may only move the discomfort around.
Choosing a split board without guessing
The calm path is to choose the smallest change that addresses the clearest problem. If you only want a gentler wrist angle while keeping a familiar desk object, look at one-piece ergonomic layouts. If you want to place the mouse between your hands or set the halves at shoulder width, look at true splits. If you want to reduce pinky reach, pay attention to thumb clusters and firmware support. If you want the easiest transition, avoid changing layout size, key shape, switch feel, and firmware behavior all at once.
For a first split build, hot-swap sockets are helpful because switch weight preferences can change once the hands sit differently. A moderate switch, a familiar keycap profile, and a conservative layer map make the keyboard easier to judge. Once the shape works, then refine sound, plate feel, and case behavior with the same patience you would use in any custom build. The Building Your First Custom Keyboard guide explains that broader parts system.
The best split keyboard is not the strangest one. It is the one that lets your hands settle, keeps frequent keys close, and makes the desk feel less crowded after the novelty wears off. If the board makes ordinary typing calmer without turning every shortcut into a puzzle, the layout is doing its job.