Foam is one of the easiest keyboard mods to try and one of the easiest to misunderstand. A sheet of foam can make a hollow board sound calmer, but it can also flatten a lively board until every switch sounds the same. Tape can add warmth to one PCB and make another board sound papery. Plate foam can clean up a rattly build, then quietly remove the crispness that made the board enjoyable. Dampening is not a universal upgrade. It is a set of filters, and each filter changes a different part of the keyboard.
The useful way to think about dampening is to ask what problem you are trying to solve. A case that rings after each keypress needs a different answer from a spacebar that ticks. A thin plastic board that sounds empty is not the same as an aluminum custom that already has a controlled tone. If your main issue is stabilizer noise, start with the Complete Stabilizer Guide before adding layers everywhere. If you are still learning the broader sound vocabulary, the Keyboard Sound Profiles Guide gives the context that makes foam choices less random.
Foam changes resonance, not quality
A keyboard is a small acoustic chamber. The switches create impact, the plate spreads it, the PCB and case respond, and the desk either absorbs or amplifies what remains. Foam interrupts that chain by absorbing energy, filling empty space, or changing how parts touch. That can be helpful when the case has a hollow echo or when thin parts make the sound feel scattered. It can be unhelpful when the original board already has a clear, pleasant voice.
The word dampening often sounds like quieting, but the two are not identical. Foam may reduce some high frequencies while leaving bottom-out volume nearly the same. It may make the board sound deeper without making it socially quieter. It may reduce case ping but leave switch clack untouched. If the goal is a keyboard that travels less through walls or across an office, read Low-Noise Keyboard Setup alongside this guide. A quiet build usually depends on switch choice, stabilizer tuning, desk surface, typing force, and case treatment working together.
The other important idea is compression. Foam that lightly fills empty space behaves differently from foam squeezed hard between the PCB and case. Light contact can reduce echo while preserving some movement. Heavy compression can make a gasket board feel firmer, reduce flex, and push sound into a dense thud. That may be exactly what you want, but it is no longer just sound tuning. It becomes a feel mod too.
Case foam controls the cavity
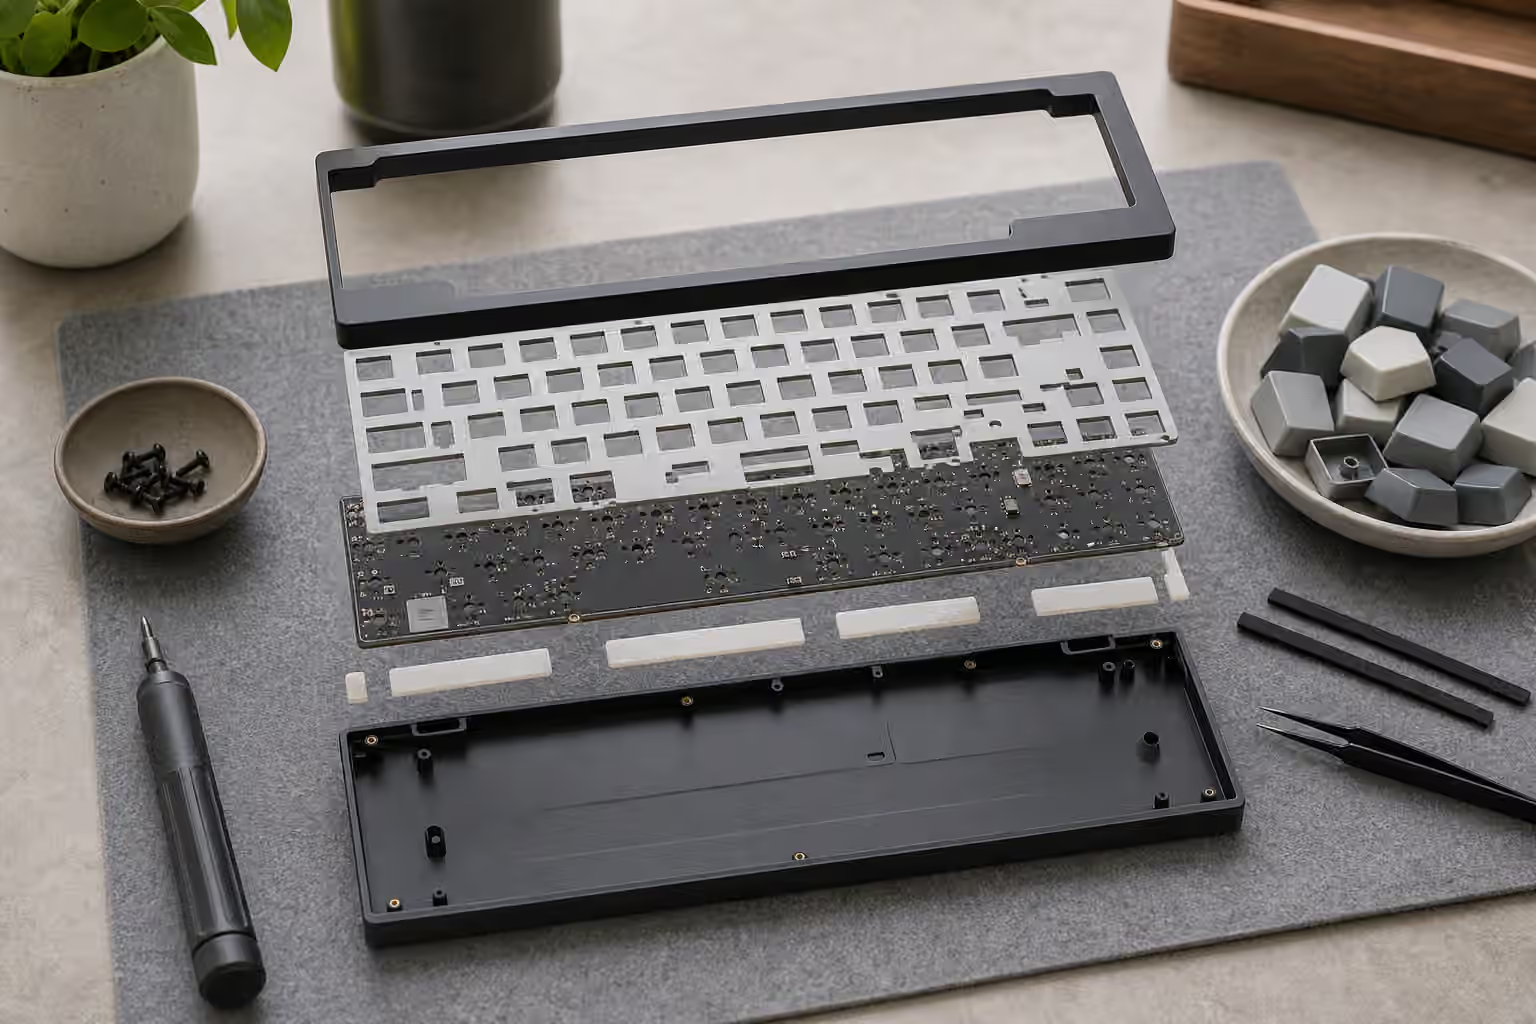
Case foam sits below the PCB, inside the bottom case. Its main job is to reduce the hollow sound created by empty internal volume. It is especially noticeable in thin plastic cases, tray-mount boards with open space under the PCB, and larger layouts where the case has room to resonate. When people describe a stock board as echoey, pingy, or plasticky, case foam is often the first experiment because it addresses the body of the keyboard rather than the switch itself.
Thickness matters more than many beginners expect. A thin sheet can calm the case without changing the typing feel much. A thick sheet can press the PCB upward, interfere with flex cuts, crowd a battery, or make the board feel less suspended. In a gasket board, too much lower foam can defeat the point of the mount by giving the internal assembly a firm floor. The board may sound more controlled, but it may also lose the soft movement that justified the design.
Material matters too, but it should not become mysticism. Poron, EVA, silicone, neoprene, and other foams each absorb and rebound differently. Softer open-cell foams tend to absorb more and feel less structural. Denser materials can block resonance but may add firmness. Silicone sheets can feel more like mass loading than airy absorption. The exact result depends on the case shape and how tightly the material is trapped. A cheap foam sheet cut neatly to size can teach you more than an expensive kit installed blindly.
Be careful around electronics and batteries. Foam should not force components, strain a daughterboard cable, cover a power switch that needs airflow or access, or compress a wireless battery pack. If the board has a battery, treat internal space as functional rather than decorative. The Wireless Mechanical Keyboards guide explains why antenna placement and battery space already create constraints before foam enters the case.
Plate foam changes the strike
Plate foam sits between the plate and PCB, around the switches. It catches energy closer to the keypress itself, so its effect is often more immediate than case foam. A board with plate foam can sound cleaner, more even, and less sharp. It can also feel slightly cushioned because the foam occupies the space where the plate, switches, and PCB would otherwise vibrate more freely.
This is why plate foam is common in factory tuned keyboards. It helps manufacturers produce a consistent sound across many boards, even when tolerances, switches, and cases vary. Consistency is valuable, but it can come at the cost of character. A lively FR4 plate may sound flatter with foam pressed underneath. A soft polycarbonate plate may become too muted if the build already has case foam and thick keycaps. A brass plate may still sound bright, but the edge can be rounded.
Plate foam also interacts with switch seating. In a hot-swap board, the foam must allow switches to sit fully and pins to enter the sockets cleanly. If a key fails right after adding foam, do not assume the socket died. Remove the switch and check whether the foam shifted, pinched, or prevented full seating. The Keyboard PCBs and Hot-Swap Sockets guide is useful here because many apparent foam problems are really alignment problems.
Switch pads and PCB pads are related but more localized. They sit under each switch or on the PCB surface, changing the contact point between switch and board. Their effect is usually smaller than full plate foam, but they can reduce sharpness without filling the whole cavity. They are worth trying when a board feels close to right but has a little too much hard plastic-on-board impact.
PE foam and tape add color
PE foam became popular because it can add a poppy, marbly, or higher-energy sound to many boards. It usually sits between the switches and PCB, often as a thin sheet. Unlike case foam, which mostly reduces cavity resonance, PE foam changes the immediate sound of the switch strike. In some builds, it gives the board a lively and addictive tone. In others, it makes the sound artificial or too similar from key to key.
That similarity is the trade-off. PE foam can make a modest board sound more dramatic, but it can also cover the differences between switches, plates, and case materials. If you enjoy hearing the specific texture of a switch or the natural response of a mount, use PE foam carefully. If you want a particular pop and do not mind a more processed sound, it can be a useful tool.
The tape mod works from the underside of the PCB. Painters tape or masking tape is applied in layers to the back of the PCB, usually with cutouts or caution around components. The effect varies widely, but it often adds warmth, focus, or a slightly deeper attack. It can also create a papery resonance if overdone, and it is not automatically harmless. Adhesive can leave residue, trap heat in odd places, or conflict with components, sockets, reset buttons, and underglow LEDs.
Use tape as a reversible experiment, not as a ritual. One or two layers may tell you what the mod is doing. If the board improves, stop before the sound becomes exaggerated. If it gets dull or strange, remove it. The best modding habit from the Keyboard Modding Guide applies here perfectly: change one variable, test it, and keep notes before adding the next layer.
Dampening can hide other problems
Foam can make a keyboard more pleasant, but it can also conceal issues that deserve direct repair. A ticking stabilizer will still be a ticking stabilizer after case foam; it may just sit inside a softer background. A scratchy switch will not become smooth because the cavity is filled. A loose switch in a plate may sound less chaotic with foam nearby, but the fit problem remains. If a board has a specific noise from one key, diagnose that key before treating the whole case.
This matters because whole-board mods are seductive. They are fast, visible, and easy to photograph. Real tuning is often more boring. Straighten a warped spacebar. Seat a switch properly. Tighten a case screw that was left uneven. Reinstall a stabilizer wire. Check whether a desk mat changes the tone before opening the case. The broad layer should come after the obvious source has been handled.
There is also a feel cost to too much dampening. A heavily foamed board can feel dense and controlled, which some typists love. It can also feel lifeless, especially if the switches are already silent, the plate is soft, and the mount is cushioned. When people say a build sounds muted in a bad way, they often mean the board lost contrast. The alphas, modifiers, and stabilized keys all collapse into the same soft thud, with little sense of material or motion.
A practical order for experimenting
Start outside the keyboard. Put the board on a desk mat and type normally. A surprising amount of harshness comes from the desk acting as a sounding board. Then tune stabilizers if the large keys dominate the sound. After that, add or remove case foam because it is usually the easiest internal layer to understand. If the board still sounds too sharp or uneven, try plate foam or switch pads. Save PE foam and tape for the moment when you want a distinct color rather than simple cleanup.
Try to keep each test reversible. Cut foam so it fits without force. Avoid covering ports, switches, batteries, and sockets. Photograph the inside before you change it, especially if daughterboard cables or wireless parts are involved. When you close the case, test every key before declaring the mod finished. A single shifted sheet can create a dead key on a hot-swap board, and catching it early is much easier than troubleshooting after all the keycaps are back on.
The right amount of dampening is the amount that solves the problem while leaving the keyboard recognizable. A hollow entry-level board may benefit from several layers because it needs help becoming coherent. A carefully designed custom may need no foam at all, or only a thin sheet in the case. The goal is not to make every build converge on the same soft sound. The goal is to hear what the keyboard is doing, decide which part is getting in the way, and use the lightest material that moves it in the direction you actually want.