An under-sink leak rarely begins as a dramatic emergency. More often it starts as a warped cabinet floor, a sour smell, a towel that always feels damp, or one bead of water hanging from a plastic trap. The Keepers Guild approach is to slow the scene down before naming the repair. A drip from a drain joint, a loose sprayer hose, a failed supply line, and condensation on a cold pipe can all leave water in the same place, but they do not ask for the same response.
What this guide helps with
This guide helps with the first half hour after you find water under a sink. It is not trying to turn a beginner into a plumber. It is trying to protect the cabinet, preserve evidence, separate drain-side leaks from supply-side leaks, and keep a small fix from becoming a hidden bigger one. If you already have water spraying, a cabinet floor swelling, or a shutoff valve that feels frozen, the useful move is not clever diagnosis. It is containment, documentation, and outside help.
Under-sink spaces are confusing because gravity lies by omission. Water runs along pipes, down the back wall, across a shelf liner, around stored bottles, and through old screw holes before it finally gathers where you notice it. A wet spot under the trap does not prove the trap is the source. A puddle beside the cabinet door does not prove the door side is leaking. Treat the first puddle as evidence of where water ended, not where it began.
Make the cabinet safe to inspect
Start by clearing the cabinet without turning it into a rummage pile. Cleaning bottles, bags, sponges, recycling, and spare parts can hide the real path of the water. Put them on a towel outside the cabinet and notice which items are wet, stained, or sticky. A dry bottle with a wet bottom tells a different story from a soaked paper bag pressed against the back wall. This is the same discipline behind Clean First : remove the noise before you decide what failed.
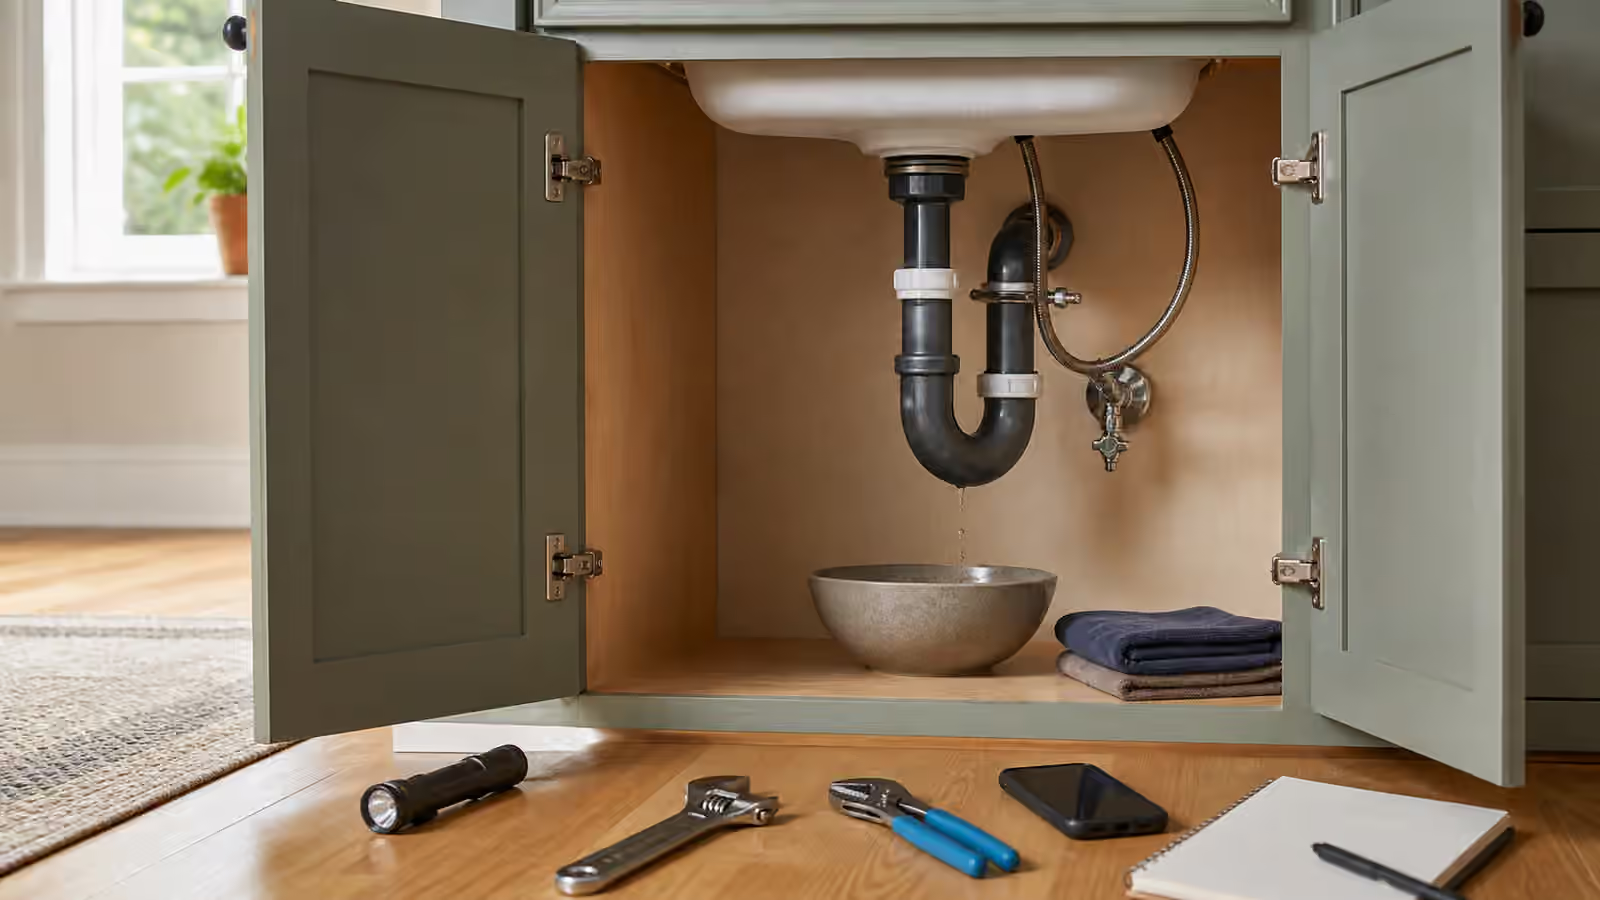
Use a bowl, shallow tray, or baking sheet to catch an active drip while you inspect. Wipe the cabinet floor dry enough that new water is visible. Do not cram towels around the pipes so tightly that they hide the leak. A towel is useful for protection, but it is poor evidence. If the leak is slow, a dry paper towel placed under a suspected joint can show a fresh drop more clearly than a thick cloth.
Good light matters. A phone flashlight works, but a small standalone light lets both hands stay free. Look before touching. If there is an electrical outlet, disposal cord, dishwasher cord, or extension lead in the cabinet, do not work around wet electrical equipment. Unplugging a wet appliance or reaching into a damp powered space is outside the beginner lane. If the space is already wet near power, stop and get help.
Trace the water before tightening
Most beginner mistakes under a sink come from tightening the first thing that looks adjustable. Tightening can help when a slip nut has loosened, but it can also crack old plastic, distort a washer, or mask the actual source. A better first move is to dry the visible plumbing, run water in controlled moments, and watch where the first new bead appears.
Begin with the drain side when the leak only happens while the sink is draining. Fill the basin partway, then release water while watching the strainer basket, tailpiece, trap joints, dishwasher branch if present, and the point where the drain enters the wall. A drain leak usually appears when water is moving through the drain. It often drips from a joint, but it may start above the joint and ride the pipe downward. Touching the underside with a dry tissue can show which surface becomes wet first.
Look at the supply side when water appears even when nobody has used the sink. Supply lines are under pressure, so they can leak while the drain is idle. Check the shutoff valves, braided or rigid supply lines, faucet connections, and any sprayer hose. A supply leak deserves more caution because it can continue indefinitely and can worsen when a valve or line is disturbed. If a supply line is bulging, corroded, kinked, frayed, or spraying, the repair path has already moved beyond casual tightening.
Condensation can confuse the picture, especially in humid spaces or when cold water pipes meet warm air. Condensation tends to be more evenly distributed on a cold surface rather than concentrated at one joint. It still needs attention, because damp cabinets grow smells and damage finishes, but it asks for a different response than a failed washer or cracked trap. The practical question is always where the first new water forms after the area has been dried.
What a beginner can reasonably do
There are a few low-risk under-sink moves that fit the Keepers Guild beginner lane. Cleaning out stored items, drying the cabinet, photographing labels and pipe paths, placing a catch tray, and gently checking whether a plastic slip nut is hand-loose are reasonable. Replacing a simple drain washer or trap piece may be reasonable for someone who can identify the exact part, keep the assembly aligned, and test slowly. Even then, the fix should be reversible and observable.
Hand-tight drain fittings are not the same as wrench-tight metal fasteners. Plastic slip nuts often seal by compressing a washer in the right orientation. Over-tightening can make a leak worse by deforming the washer or stressing the trap. If you do adjust a drain-side fitting, use light pressure, stop when the part resists, and test with small amounts of water before filling the sink. The goal is not to prove strength. The goal is to restore a seal without damaging the parts around it.
Do not guess at supply lines. A faucet connector, shutoff valve, or pressurized hose can look simple and still flood a cabinet quickly if it fails. If the valve closes smoothly and the leak stops, you have bought time for documentation and a proper repair. If the valve does not close, turns endlessly, feels crusted in place, or begins leaking at the stem, stop turning it. A stubborn valve is information, not a challenge.
For parts, use the same evidence habit described in Replacement Parts: OEM, Aftermarket, Salvage, and Red Flags . Photograph the existing assembly, measure only after you know what you are measuring, and bring the old washer or trap piece with you if removal is safe. Many under-sink mistakes happen because two parts look similar in a store aisle but differ in diameter, washer shape, thread style, or alignment.
When the problem is bigger than the visible drip
The cabinet tells a story beyond the pipes. Soft flooring, swelling particleboard, black or green staining, a musty smell, peeling laminate, or water coming from behind the wall points to a longer-running problem. A quick trap adjustment may stop one drip while leaving the larger damage hidden. When moisture has entered the cabinet material or the wall, the first repair is not only plumbing. It is drying, assessment, and sometimes removal of damaged material.
Food waste, cleaners, and old shelf liners can make a leak seem dirtier than it is, but mold-like growth and persistent odor should not be shrugged off. Keep the guide’s boundary in mind: beginners can dry, ventilate, photograph, and stop adding water, but they should not seal over suspicious damp material and declare the cabinet repaired. The Keepers Guild guide When Not to DIY is the better companion when the leak has turned into a health, structural, or electrical problem.
Hidden leaks deserve special humility. If water appears from the back wall, under the cabinet base, around a dishwasher line you cannot see, or from the ceiling below, the visible cabinet may only be the exit point. Do not keep running test water to satisfy curiosity. A few photographs and a clear description of when the water appears will help a plumber more than a soaked cabinet will.
Document the repair path
Photograph the dry starting state, the first visible bead of water, the full pipe layout, the shutoff valves, and any part you move. This is exactly the situation where How to Photograph a Problem Before You Take It Apart pays off. The photo does not need to be beautiful. It needs to show which nut faces which direction, where washers sit, which line feeds hot or cold water, and what changed after each test.
Write the symptom in plain language. “Water appears only after draining a full basin” is better than “trap leak” if you are not sure. “Slow drip from the cold supply valve even when the faucet is off” is better than “under-sink wet again.” Good notes keep you from replacing the wrong part and make professional help cheaper to think through because the repairer gets a timeline instead of a vague complaint.
If you do make a small fix, test it in stages. Run a little cold water, then a little hot water, then drain a fuller basin. Dry between tests so new water is visible. Leave the cabinet empty long enough to watch for a delayed drip, and check again after normal use. A repair that looks dry for thirty seconds can still fail after the pipe warms, shifts, or handles a full basin.
Add it to the Save Log
Record the date, sink location, symptom, suspected source, shutoff behavior, parts touched, photos taken, and result after testing. Add the exact part name if you replaced anything and keep the packaging until the repair has survived normal use. If the outcome was “called a plumber,” that belongs in the log too. The repair history will help next time, especially if the same cabinet starts smelling damp months later.
A good under-sink save is not the bravest repair. It is the one that leaves the cabinet dry, the source understood, the next action clear, and the household safer than it was when the first towel went down. Sometimes that means a cleaned trap washer and a calm test. Sometimes it means closing a valve and making the call before the cabinet floor swells. Both choices belong in Keepers Guild when they come from observation rather than guesswork.
Related Keepers Guild guidebooks
Use Clean First before judging the mess, How to Photograph a Problem Before You Take It Apart before moving parts, Replacement Parts: OEM, Aftermarket, Salvage, and Red Flags before buying a washer or trap piece, and When Not to DIY when water, power, mold, hidden damage, or pressurized plumbing changes the risk.