A cabinet door can look wrong in several quiet ways. The top gap widens, the door rubs its neighbor, the latch no longer meets, the soft-close hinge snaps instead of easing shut, or the whole door seems to sag when opened. The temptation is to turn every visible screw until something changes. Cabinet hinges reward a slower method. Each screw has a job, each gap gives evidence, and a loose hinge cup in tired material is not solved by endless adjustment.
Read the gaps before touching a screw
Close the door gently and look at the reveal, the narrow line around the door. Is the gap wider at the top than the bottom? Does the door sit lower than its neighbor? Does it rub the frame, the adjacent door, or a drawer front? Open it and watch the hinge side. Does the door lift, drop, or wobble as soon as it moves? A good adjustment starts with one symptom, not a general dislike of how the door looks.
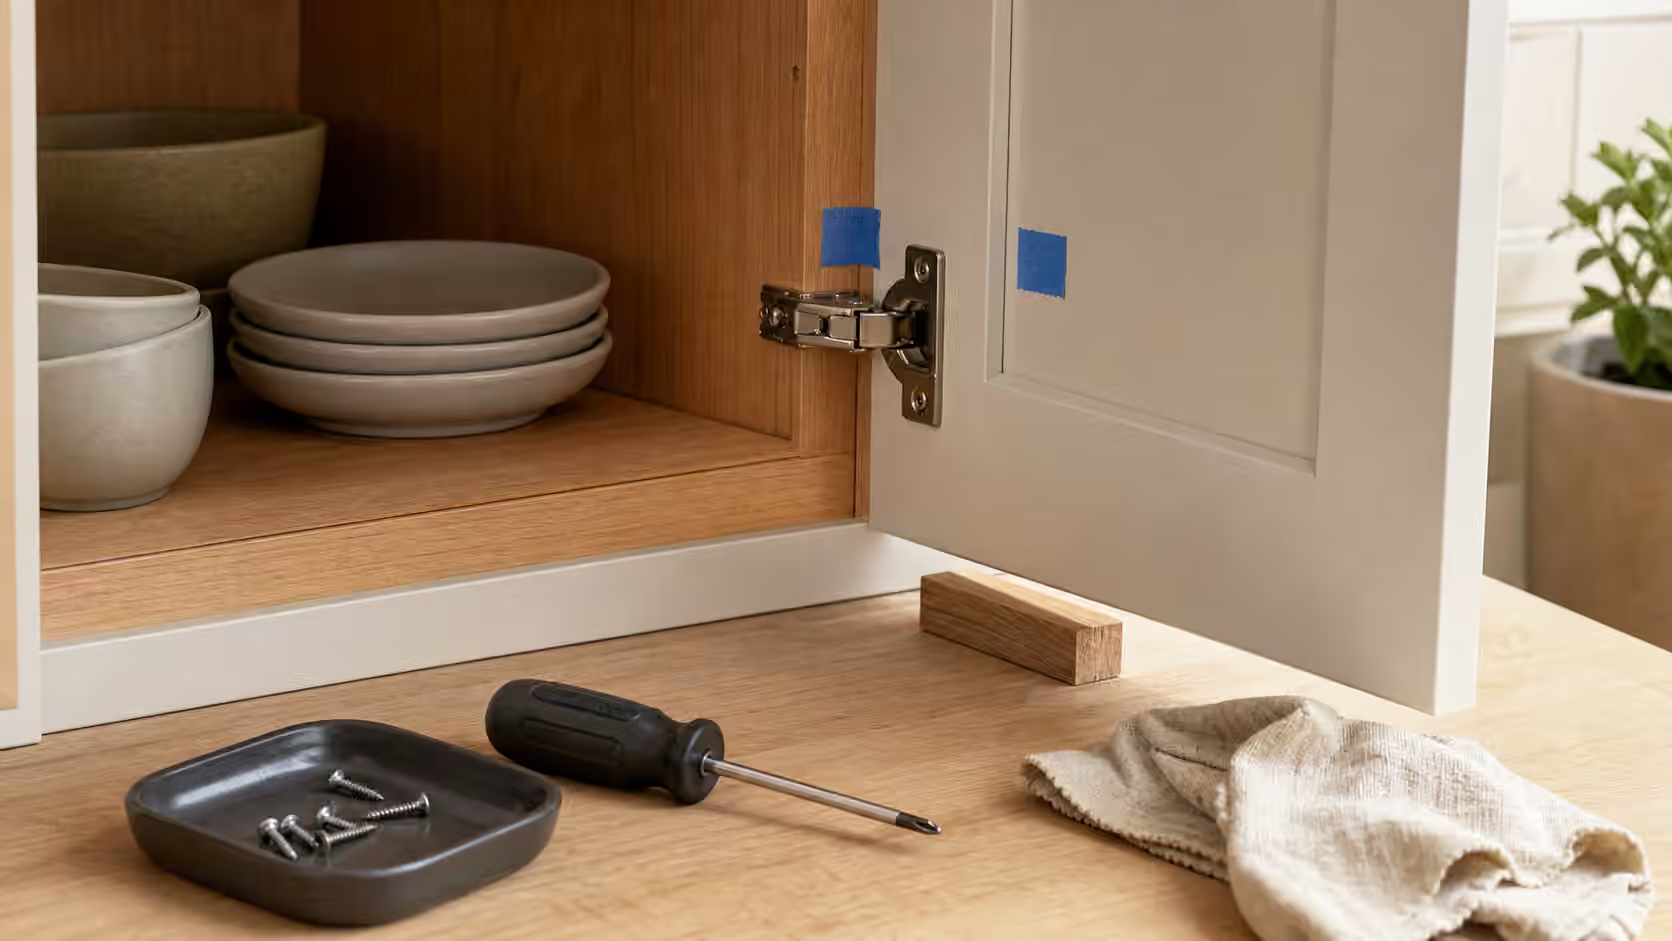
Take a photo straight on before changing anything. Painter’s tape can mark the original door position without writing on the finish. This is the same evidence habit as How to Photograph a Problem Before You Take It Apart . If the first adjustment makes the gap worse, you want a way back.
The door may not be the only object involved. A cabinet box out of square, a swollen door, a warped frame, a loose shelf pin, or a drawer slide pushing forward can mimic hinge trouble. If the door rubbed after a spill, humidity change, or moved appliance, the real issue may be material movement or interference. The 10-Minute Triage is useful because the most visible screw is not always the failed part.
Know what the hinge is trying to do
Many modern cabinets use concealed hinges with a cup set into the door and an arm attached to a mounting plate inside the cabinet. The adjustment screws may move the door left and right, in and out, or up and down. Older face-frame hinges, exposed hinges, and simple butt hinges behave differently. Before turning, look closely and identify which screw holds the hinge to the door, which holds the plate to the cabinet, and which is meant for adjustment.
Do not loosen the main support screws casually. A door can shift suddenly, especially if only one hinge remains firmly attached. If you need to remove a hinge or plate, support the door and keep screws in a parts tray. This is not complicated work, but it is work on a moving panel that can chip finishes, pinch fingers, and crack around screw holes if treated roughly.
Adjustment screws should move in small increments. A quarter turn can be enough. Change one thing, close the door, observe, then change again. If you turn three screws at once, you lose the evidence. If a screw resists, use the correct driver size and keep pressure straight. A stripped screw head turns an alignment job into a removal job.
Tightening is not the same as adjustment
A loose hinge screw may need tightening before alignment matters. Open the door and gently test whether the hinge cup moves in the door or the mounting plate shifts on the cabinet. If screws are slightly loose in sound material, tightening can restore the door’s position. Stop when snug. Overtightening can crush particleboard, strip holes, or pull a hinge cup off center.
If a screw spins without tightening, the material no longer holds it. That is a repair decision, not an invitation to use a larger screw at random. A too-long screw can poke through a cabinet side, interfere with a drawer, or split a stile. A too-wide screw can crack a hinge plate or prevent it from seating. Depending on the cabinet material, the repair may involve proper hole filling, a hinge repair plate, different fasteners, or a professional cabinet repairer. Replacement Parts helps when the hinge itself has a model number, cup size, overlay, or soft-close feature that needs matching.
Loose pulls and knobs can confuse the diagnosis too. A door yanked by a loose handle may twist or slam, making a hinge seem worse. The habits from Loose Handles, Knobs, and Pulls apply before blaming the hinge: tighten accessible hardware, check for missing washers, and avoid crushing the face of the door.
Make alignment changes slowly
Start with the simplest visible problem. If the door rubs the adjacent door, a side-to-side adjustment may open the gap. If the door sits proud of the frame, an in-and-out adjustment may bring it flush. If the whole door hangs low, the mounting plate or hinge position may need vertical correction. Work with the door closed between each change so your eye reads the actual result, not the hinge in isolation.
Do not chase perfection beyond the cabinet’s construction. Older cabinets, painted doors, handmade boxes, and slightly warped panels may never have machine-perfect reveals. The goal is a door that closes cleanly, does not rub, does not stress the hinge, and looks orderly in the room. A tiny uneven line can be acceptable if further turning would strip material or create a new rub.
Soft-close hinges add another layer. A failed damper may let a door slam even when alignment is correct. A sticky bumper, swollen felt pad, or missing rubber stop can also change the closing feel. If the hinge arm is bent, oily, cracked, or no longer dampens, replacement may be more honest than adjustment.
When the cabinet is telling a larger story
A sagging door can be a warning about the cabinet box. Look for widening cracks around hinge screws, a side panel pulling away, water-swollen material under a sink, or a wall cabinet that has shifted. If the cabinet itself moves when the door is opened, stop using the door until the cabinet is evaluated. The risk is no longer a crooked reveal.
Under-sink cabinets deserve extra attention because water damage weakens screw holding. If a hinge plate near a sink is loose and the cabinet floor is stained, swollen, or soft, read Under-Sink Leak Triage before repairing hardware. Hardware repairs do not fix damp material.
Keep children and daily traffic in mind. A door that falls off in a quiet repair session is one problem. A door that fails later during breakfast is another. If a hinge cup is barely holding, remove the door from service or secure the area until the repair path is clear.
Add it to the Save Log
Record which cabinet, which hinge, what gap changed, what screw you turned, and whether any holes felt weak. Photograph the hinge style and any markings before ordering parts. If you added a repair plate, changed screws, or decided the cabinet material is failing, write that down. The next time a door sags, you will know whether it was an adjustment drift, a hardware mismatch, or a cabinet box problem.
Use this guide with Loose Handles, Knobs, and Pulls for related hardware, Replacement Parts before buying hinges, Under-Sink Leak Triage when moisture weakens the cabinet, and When Not to DIY when the cabinet or reach makes the job unsafe.