Fermented hot sauce has a kind of depth that vinegar-only sauces rarely reach. The heat feels rounder. The acidity tastes integrated instead of sharp. Aromas get savory and complex.
It’s also one of the most approachable fermentation projects you can do at home—if you treat it like food preservation, not like a vibes-based craft.
This guide is designed to keep you safe and successful. You’ll learn how to choose peppers and supporting flavors, how to set salt levels (and why salt is the whole game), and how to ferment with minimal equipment. We’ll also cover when to stop fermentation, how to blend, bottle, and store your sauce, and what’s normal versus what’s a genuine red flag.
What fermentation is doing to your sauce
Fermentation is controlled microbial activity. In pepper ferments, the goal is usually to encourage lactic acid bacteria (LAB). These friendly microbes convert sugars into lactic acid, which lowers the pH of your ferment and creates those tangy, complex flavors that make fermented hot sauce so special.
Salt plays a critical role in making this work. It favors the beneficial microbes you want while suppressing many of the undesirable organisms you don’t. The result is a ferment that stays stable and heads in the right direction. In other words, salt isn’t just seasoning—it’s the steering wheel. Without adequate salt, you’re basically hoping for the best, and that’s not a great strategy when it comes to food safety.
Equipment: minimal and reliable
You can keep this wonderfully simple, which is part of what makes fermented hot sauce such a great gateway into the world of home fermentation.
You need
At its core, you really only need a handful of items. A clean jar is your fermentation vessel—a standard mason jar works perfectly. You’ll want a lid, and if you happen to have an airlock lid, that’s even better, though it’s not strictly required. A kitchen scale is strongly recommended because weighing ingredients takes the guesswork out of your brine ratios. You’ll also need something to keep your solids submerged beneath the brine, whether that’s a proper fermentation weight, a small jar nested inside the bigger one, or even a clean zip-lock bag filled with brine. Finally, a blender is essential for turning your finished ferment into an actual sauce.
Helpful extras
Beyond the basics, a few extras can make the process more pleasant. Nitrile gloves are a smart choice because hot peppers can burn your skin in ways you won’t notice until hours later. A funnel makes bottling far less messy, and a fine mesh strainer comes in handy if you prefer an ultra-smooth final product.
The non-negotiable: keep everything submerged
If there’s one rule to tattoo on your brain, it’s this: most fermentation problems come from stuff floating above the brine. Submerged peppers tend to ferment cleanly, developing the tangy flavors you’re after. Floating peppers, on the other hand, tend to mold. It’s really that straightforward. Whatever weight system you use, just make sure those peppers stay down.
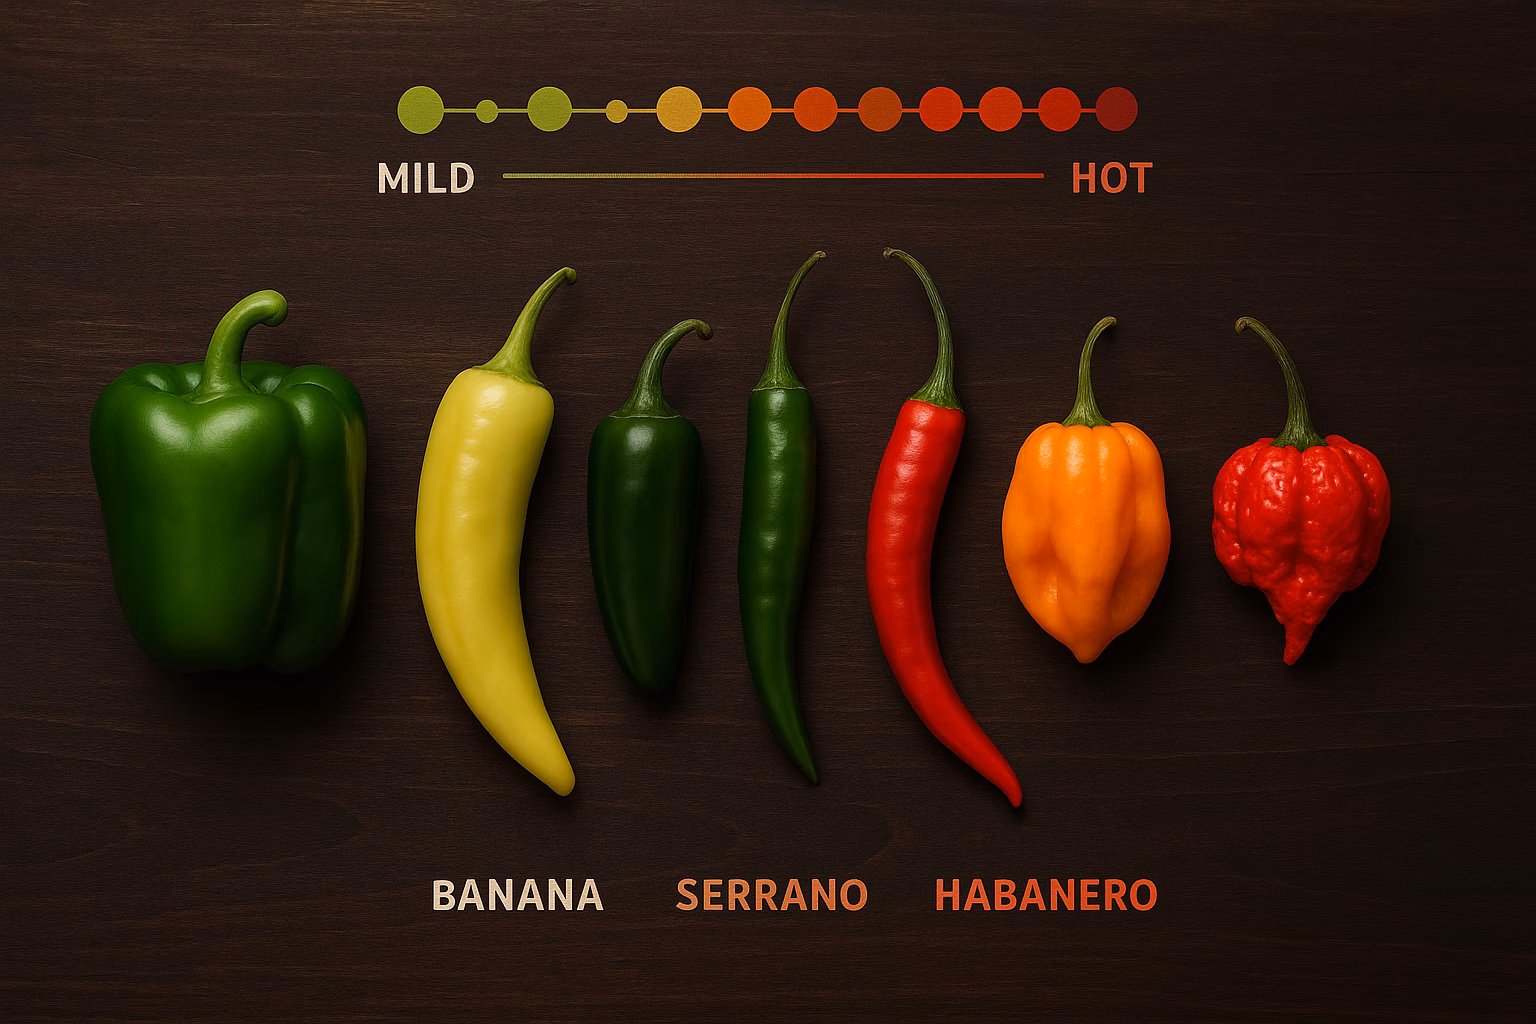
Choosing peppers: flavor first, heat second
A great fermented sauce is built around flavor. Heat matters, of course, but if you chase Scoville units at the expense of taste, you’ll end up with a sauce that’s impressive at parties but doesn’t actually make food better.
Pepper roles
It helps to think about peppers in terms of the roles they play in your sauce. Your base pepper provides the bulk of the volume and the fundamental character. Jalapeños, serranos, and Fresnos are all excellent choices here because they bring reliable flavor and moderate heat. Then you have your aromatic pepper, which adds a distinct personality—think habaneros or Scotch bonnets, which carry those gorgeous fruity, floral notes that can transform a sauce. Finally, there’s your accent pepper, used in small quantities for an extra punch of heat. This is where superhots come in, if you choose to use them at all.
If you want a versatile everyday sauce, the winning formula is a generous base of medium peppers with small amounts of hotter peppers layered in for lift. This gives you complexity without overwhelming heat.
Fresh vs dried
Fresh peppers are the easiest starting point for fermentation. They have the water content and sugar that lactic acid bacteria thrive on. Dried peppers certainly have their place—you can rehydrate them and add them during the blending stage as a secondary flavor element—but for most first ferments, keeping it simple with fresh peppers is the way to go.
Flavor add-ins that ferment well
Once you’ve got your pepper base figured out, the fun really begins with add-ins. Garlic is probably the most popular companion to fermented peppers, and for good reason: it mellows beautifully during fermentation while adding savory depth. Onion works well too, though you’ll want to use it moderately because it can become surprisingly strong after a few weeks in brine.
Carrot is another fantastic addition because it contributes both natural sweetness and body to the finished sauce, giving it a more rounded feel on the palate. If you’re feeling adventurous, fruits like mango or pineapple can add a wonderful tropical dimension, but use them carefully—the extra sugars can cause fermentation to become quite vigorous, and you may end up with more pressure buildup than you expected. Herbs are best added at the blending stage rather than during early fermentation, where they can become dull or bitter.
One thing to avoid: large amounts of oil or fatty ingredients in the ferment itself. Fats can go rancid and create an environment that isn’t ideal for lactic acid fermentation.
Salt: the simplest safe approach
Because pepper ferments vary quite a bit—different peppers have different water content, you might add various vegetables, and your kitchen temperature plays a role—the most repeatable and reliable approach is to use a brine by weight and keep all your solids fully submerged beneath it.
A common home range for brine strength is around 2–5% salt by weight of water. That’s a pretty wide range, and there’s good reason for it: lower percentages produce a faster, more active ferment, while higher percentages slow things down and give you more of a safety buffer. If you want one beginner-friendly target that balances safety with good flavor development, aim for around 3%.
How to make a 3% brine
The math here is refreshingly simple. Start by weighing your water in grams. Then multiply that number by 0.03, and the result is the number of grams of salt you need. So for example, if you’re using 1000 grams of water, you’d multiply by 0.03 to get 30 grams of salt. Stir until dissolved, and you’ve got yourself a perfectly measured brine.
One small note on salt type: use non-iodized salt if possible. Iodized salt can sometimes affect the flavor of your ferment and may inhibit some beneficial bacteria. Kosher salt, sea salt, or pickling salt are all solid choices.
Method A: Brine fermentation (best first method)
This is the approach I recommend for anyone making their first fermented hot sauce. It’s forgiving, it’s straightforward, and it produces excellent results.
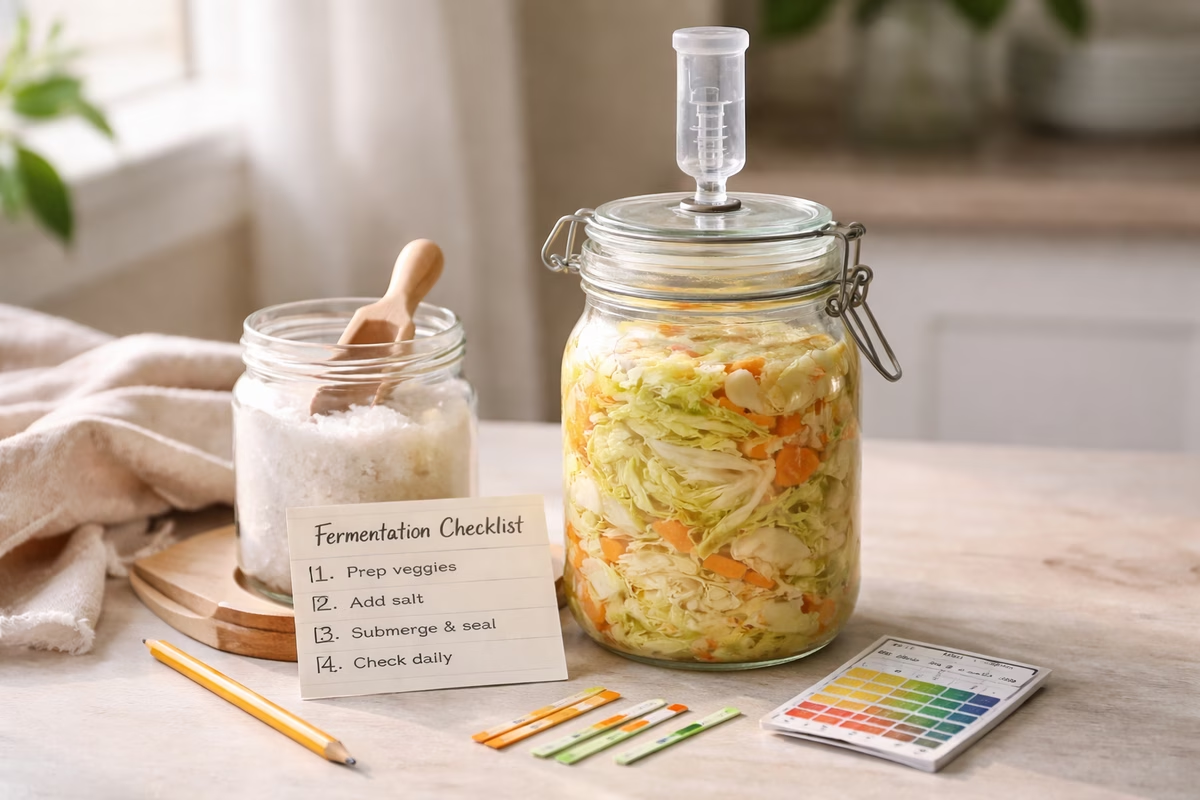
Step 1: Prep
Start by washing your peppers thoroughly, then remove the stems. At this point, you’ll want to decide whether to remove the seeds and inner membranes. Despite what many people believe, seeds don’t actually contribute much heat—it’s the membranes that pack the punch. Removing both the seeds and membranes will give you a gentler, more approachable sauce. And please, if you’re working with hot peppers, wear gloves. Your future self will thank you.
Step 2: Pack the jar
Place your prepped peppers and any add-ins into the jar, but don’t cram it completely full. Leave some headspace at the top, because things will expand a bit as fermentation gets going and you need room for the brine to cover everything.
Step 3: Add brine
Pour your prepared brine over everything until the peppers and add-ins are fully submerged. Then add your weight on top so nothing floats up to the surface. Remember, submerged equals safe; floating equals trouble.
Step 4: Ferment
Put the jar somewhere out of direct sunlight at a stable room temperature. A kitchen counter away from the window or a pantry shelf works perfectly. Then sit back and watch the magic happen.
Over the next few days, you’ll start to see bubbles appearing, which is a great sign that fermentation is underway. The brine may turn cloudy—that’s completely normal and actually a sign of healthy microbial activity. The aromas will gradually shift from raw, sharp pepper to something tangier and more savory. Depending on your room temperature, fermentation tends to be most active in the first few days before gradually settling down.
Step 5: Burp (if needed)
If you used a standard lid rather than an airlock, you’ll need to “burp” the jar by loosening the lid to release built-up CO2 pressure. Early on, when fermentation is most active, you might need to do this once or twice a day. Airlock lids handle this automatically, which is one reason they’re worth picking up if you plan to ferment regularly.
How long to ferment?
There’s no single right answer here, and that’s actually part of the fun. Think of fermentation time in stages. At around one week, you’ll get a sauce with a bright, fresh tang—almost zippy. By two to three weeks, the flavor deepens and rounds out, becoming more complex and integrated. Push past four weeks and you can get very complex results, sometimes with funkier, more pronounced sour notes.
A practical, reliable window for a first sauce is two to three weeks. That’s long enough to develop real depth without venturing into unpredictable territory. The simplest test? If it tastes good to you, you can stop.
When to stop fermentation (the decision point)
Stopping fermentation is really just a matter of deciding that the flavor has arrived where you want it and that you’re ready to blend and bottle. There’s no magic moment or precise measurement required—your palate is the guide.
The easiest way to slow and effectively stop fermentation is to move the ferment to the refrigerator. The cold temperature dramatically slows microbial activity, essentially hitting the pause button on the process.
Blending: turning a ferment into sauce
This is where your jar of funky, bubbly peppers becomes an actual hot sauce. It’s one of the most satisfying steps in the whole process.
Step 1: Separate solids and brine
Start by scooping your fermented peppers and add-ins into a blender. Reserve the brine separately—you’ll be adding it back gradually.
Step 2: Choose your texture
The amount of brine you add back determines the consistency of your sauce. More brine gives you a thinner, more pourable sauce in the style of classic Louisiana-style hot sauces. Less brine produces a thicker, chunkier sauce with more body. Start with less and add more as you blend—it’s much easier to thin a sauce than to thicken one.
Step 3: Add acid (optional but common)
Many fermented sauces benefit from a little vinegar or citrus juice added during blending. This isn’t about making the sauce sour—think of it as seasoning that brightens and stabilizes the overall flavor. A small splash of white vinegar or a squeeze of lime can make all the difference. You don’t need a lot.
Step 4: Blend thoroughly
Blend until smooth. If you’re after an ultra-smooth, restaurant-quality sauce, strain it through a fine mesh strainer after blending. If you like body and texture, keep it unstrained. Both approaches are valid, and it really comes down to personal preference.
Step 5: Taste and adjust
This is the moment of truth. Taste your sauce and adjust as needed. A pinch of salt at a time can bring flavors into sharper focus. Small splashes of vinegar add brightness. And if the sauce seems a touch too acidic or harsh, a tiny bit of sugar or honey can smooth things out beautifully. Go slowly with adjustments—you can always add more, but you can’t take it back.
Bottling and storage
Clean bottles
Use clean bottles or jars for your finished sauce. Many home fermenters sanitize their bottles, but at an absolute minimum, everything should be very clean and dry before the sauce goes in. This isn’t the step to get lazy about hygiene.
Refrigerate for maximum safety and stability
While a well-fermented sauce with good acidity can keep remarkably well, refrigeration is the simplest and safest storage approach for home sauce. It keeps flavors stable, slows any remaining microbial activity, and gives you peace of mind. Unless you’re experienced with shelf-stable preservation techniques, the fridge is your best friend.
Expect continued activity (sometimes)
Here’s something that catches a lot of first-timers off guard: if you bottle a sauce that’s still fermenting vigorously, pressure can build up inside the bottle. This can lead to anything from a fizzy sauce to a minor hot-sauce explosion when you open the cap.
To reduce this risk, make sure you ferment long enough that activity has noticeably slowed before bottling. Refrigerate promptly after bottling to keep things calm. And if you’re unsure about pressure, either use bottles designed to handle it or simply avoid sealing them too tightly until you’re confident the fermentation has wound down.
What’s normal vs what’s a red flag
Learning to read your ferment is one of the most important skills you’ll develop. Fortunately, most of what you’ll encounter is perfectly normal.
Normal
Cloudy brine is absolutely expected and is actually a hallmark of healthy lactic acid fermentation. White sediment settling at the bottom of the jar is similarly normal—it’s just spent yeast and bacteria doing their thing. A tangy, pleasantly sour smell is exactly what you’re hoping for. Even a thin white film on the surface, which can be harmless kahm yeast, isn’t necessarily cause for alarm, especially if something wasn’t perfectly submerged. It doesn’t look pretty, but it’s generally not dangerous.
Red flags
On the other hand, certain signs should send you straight to the trash can. Fuzzy mold—especially anything green, black, or blue growing on the surface—means the batch is done. Not “scrape it off and hope for the best” done. Actually done. Rotten, putrid odors are another clear signal that things have gone wrong. The same goes for slimy textures that just feel wrong when you touch them.
If you see mold or smell rot, discard the entire batch without hesitation. It’s not worth the risk, and peppers are cheap.
Troubleshooting
Even experienced fermenters run into hiccups. Here are the most common issues and how to handle them.
My peppers float no matter what
This is probably the single most common frustration for new fermenters. The solution is straightforward: use a proper fermentation weight designed for the job. If you don’t have one, a smaller jar placed inside the fermentation jar works well as an improvised weight. Another clever trick is to fill a zip-lock bag with brine and use it as a flexible weight that conforms to the shape of your jar. The key is persistence—find a method that works for your particular setup and stick with it.
I’m not seeing bubbles
Bubbles are a common and reassuring sign of active fermentation, but they’re not strictly mandatory. Some ferments are simply quieter than others. Before you worry, check a few things. First, is everything properly submerged? Exposed ingredients can interfere with fermentation. Second, is the room too cold? Fermentation slows dramatically in cool environments. Third, and most importantly, does the brine taste tangy after about a week? If it does, fermentation is happening whether you see bubbles or not.
The ferment tastes too salty
This happens, especially when you’re still dialing in your ratios. The good news is that it’s easily fixed during the blending stage. Use less brine when blending to reduce the overall salt concentration. You can also blend in some fresh peppers or roasted peppers to dilute the saltiness, though keep in mind this changes the fermentation character of the final product. Balancing with extra acidity and a touch of sweetness can also help mask excess salt.
The sauce is too thin
If your blended sauce is runnier than you’d like, try using less brine next time. You can also blend in a small amount of fermented carrot, which adds wonderful body and natural thickness. And if you were planning to strain, consider skipping that step—the pulp adds texture and substance.
The sauce is too thick
The fix here is simple: add brine or vinegar gradually until you reach the consistency you want. Go slowly and blend between additions so you don’t overshoot.
Designing sauces that match food (practical styles)
Once you’ve got the basics down, the real creative playground opens up. Here are a few sauce profiles designed to complement specific types of food.
A “taco” fermented sauce
For a sauce that was practically born to sit next to tortillas, build your base around jalapeños or serranos. Add garlic, onion, and a little carrot during fermentation for depth and body. At blending time, finish with fresh lime juice to bring that bright, citrusy pop that makes everything on a taco plate sing.
A “BBQ-ish” fermented sauce
If you want something with a smoky, savory edge, start with Fresno peppers and red jalapeños as your base. Ferment them with garlic, then add smoked paprika during blending to get that barbecue-adjacent warmth without actually needing a smoker. A splash of vinegar at the end ties it all together and gives it that tangy kick that works beautifully alongside grilled meats.
A tropical heat sauce
For something bright, fruity, and a little exotic, build around habaneros with small amounts of mango or pineapple. Add fresh ginger during fermentation for an aromatic backbone. At blending, balance the natural fruit sweetness with vinegar and careful salt adjustments. The result is a sauce that’s equally at home on fish tacos and jerk chicken.
A repeatable first batch (template)
If you just want to get started without overthinking it, here’s a template that works reliably. Use mostly medium-heat peppers as your base, add a few cloves of garlic and some carrot for body, then submerge everything in a 3% brine. Let it ferment for two to three weeks, then blend with reserved brine and a small splash of vinegar. That’s it. That’s the whole recipe.
But here’s the most important part: write down what you did. Record the types and amounts of peppers, how much salt, how long you fermented, and what you thought of the result. The second batch gets dramatically better because you’re no longer guessing—you’re iterating on real data.
The takeaway
Fermented hot sauce is one of the best “high reward” kitchen projects you can take on. It requires minimal equipment, a handful of ingredients, and a bit of patience. The flavors it produces are genuinely impossible to achieve any other way.
If you remember just three rules, you’ll be in great shape. First, use a measured brine—somewhere around 2–5% salt by weight of water, with 3% being a solid starting point. Second, keep everything submerged beneath the brine at all times. Third, trust your senses and discard anything that smells rotten or grows mold. No batch is worth getting sick over.
Do that and you’ll end up with a sauce that tastes alive: complex tang, integrated heat, and a finish that makes food feel new. And once you’ve tasted what your own kitchen can produce, store-bought hot sauce will never quite be the same again.