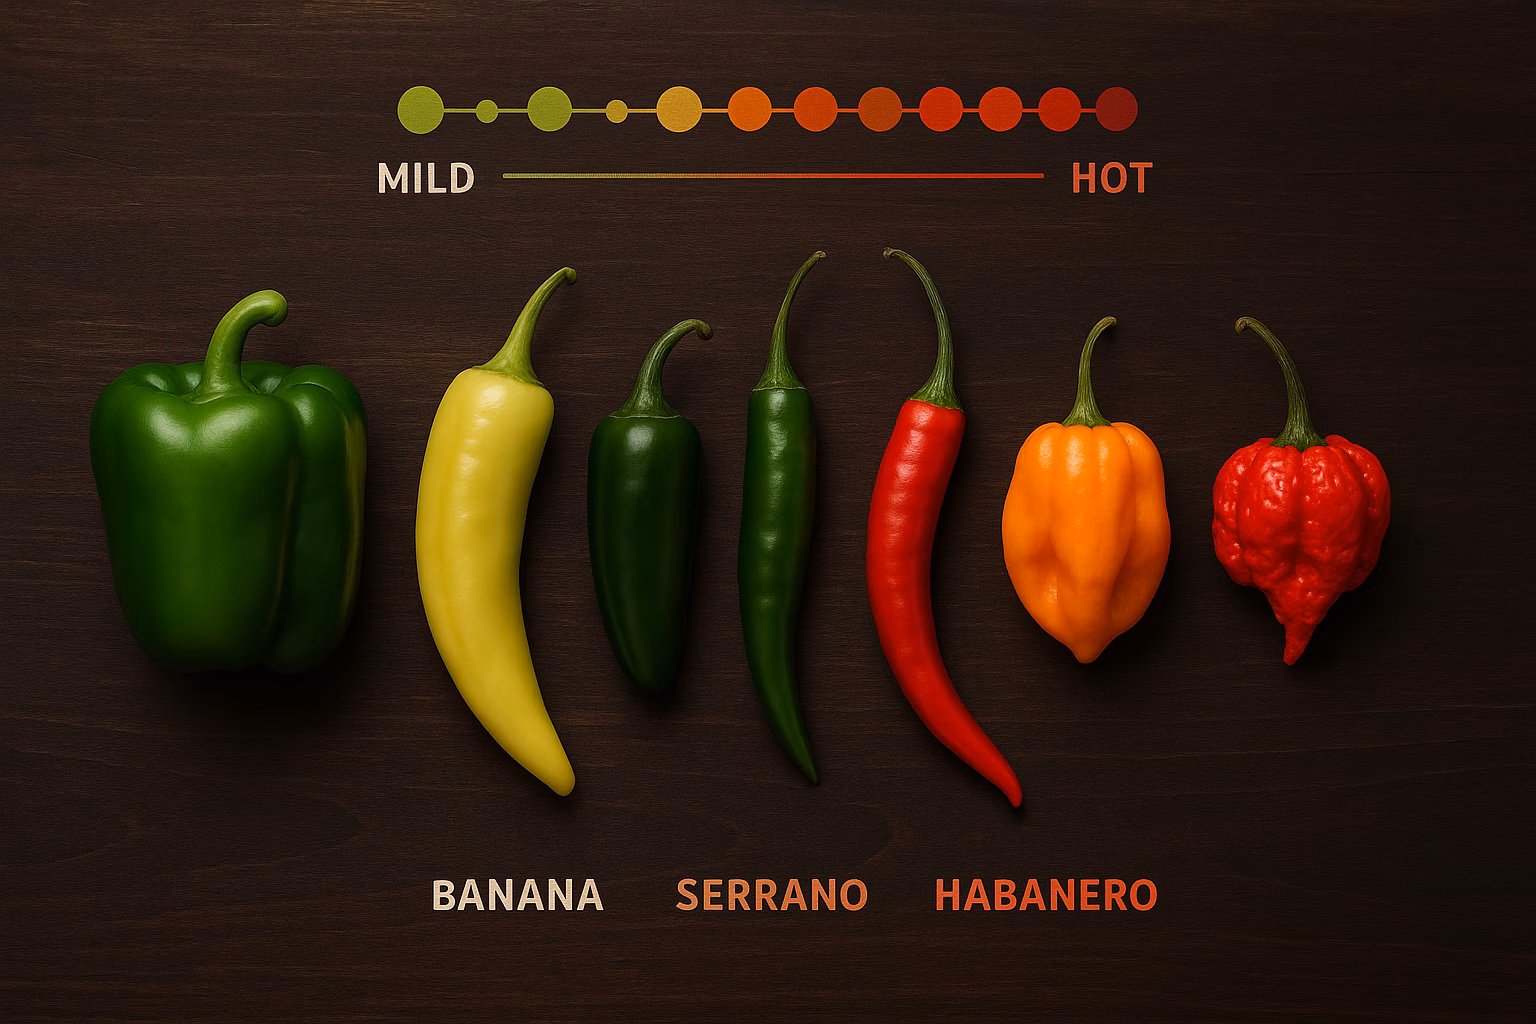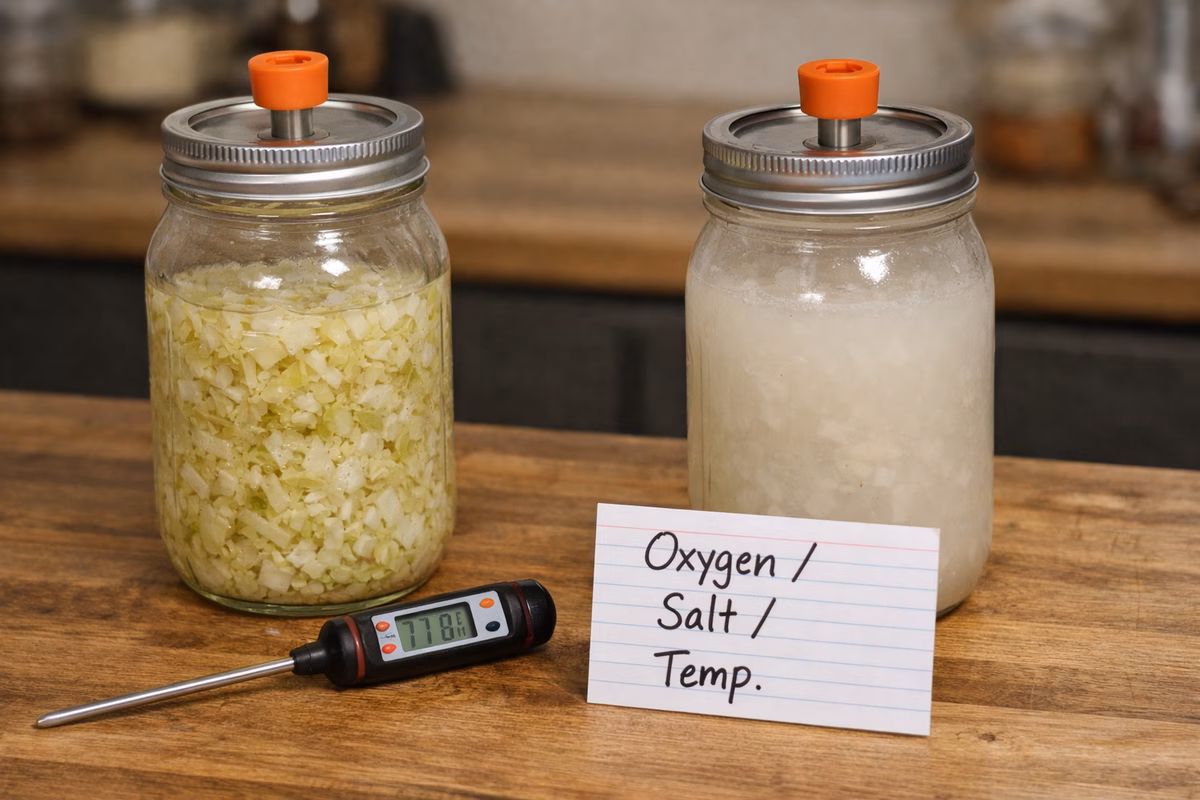
Fermented hot sauce is deceptively simple on paper: peppers, salt, time. Three ingredients. A toddler could list them. But in practice? Most of the “problems” that send people spiraling into late-night internet searches come from the same three culprits: oxygen, inconsistent salt, or temperature swings. There’s also a fourth cause—less dramatic but surprisingly common—and that’s simply not knowing what normal fermentation actually looks and smells like. Once you learn to read the signs, most of the anxiety evaporates.
This guide is built for real kitchens, not sanitized labs. Think of it as your calm, collected friend who’s been through a few funky batches and lived to tell the tale. We’re going to establish a safe baseline so you can stop second-guessing yourself, walk through quick diagnoses for when something looks weird, lay out practical fixes for batches that are still worth saving, and draw clear lines for when it’s time to dump the jar and start fresh. No drama, no gatekeeping—just honest answers.
If you’re brand new, read Fermentation Flavor Design first so you understand what “good” tastes like.
The safe baseline (so you stop guessing)
Here’s the thing about fermentation anxiety: it almost always traces back to one of a handful of fundamentals that wasn’t properly controlled. Let’s nail those down right now so you can breathe easier every time you peek at your jars.
Salt is where it all starts. You want to aim for 2.5–3.5% by weight for most pepper ferments. Whether you’re doing a mash or a brine ferment, your total salinity should land in that same general ballpark. This range gives your friendly lactic acid bacteria room to thrive while keeping the nasty stuff at bay—it’s the Goldilocks zone of fermentation.
Submersion is your next best friend. Solids stay below brine, period. Oxygen is the sworn enemy of clean flavor, and any pepper chunk poking its head above the surface is basically waving a flag that says “colonize me.” We’ll talk more about the mechanics of keeping things down later, but for now, tattoo this on your brain: submerge everything.
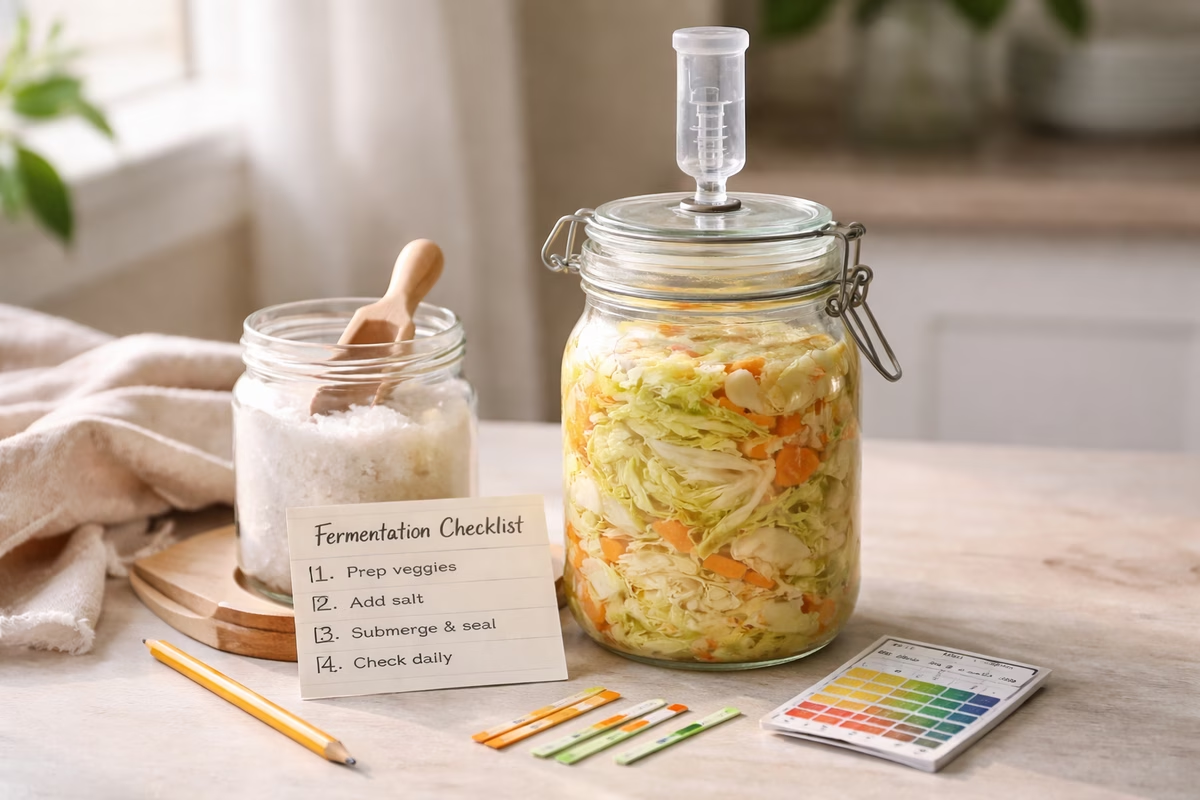
Your container doesn’t need to be fancy, but it does need to be clean. A standard glass jar works beautifully. Pair it with an airlock if you have one, or use a loose lid and commit to burping it daily if it’s sealed tight. The goal is letting CO2 escape without inviting oxygen in for a house party.
Temperature matters more than most beginners realize. The sweet spot is around 18–22°C (that’s 65–72°F for the Fahrenheit crowd), which is a wonderfully forgiving zone. You can push warmer if you want faster results, but know that speed comes with trade-offs—higher temps tend to produce softer textures and harsher flavors. Think of it like driving: you can go faster, but the ride gets bumpier.
Finally, trust your nose. A lactic, tangy smell is perfectly normal—think pickles, yogurt tang, or that gorgeous sourdough aroma wafting from a bakery. If it smells putrid or rotten, though, that’s your sign to stop and reassess.
If you want a single rule that prevents most disasters: keep solids submerged. Seriously. That one habit will save you from about eighty percent of the problems in this guide.
Salt math (the #1 source of confusion)
Let’s be honest: most ferment problems start with the phrase “I eyeballed it.” Measuring salt feels tedious, I know. It’s not glamorous. Nobody’s going to film a TikTok of you weighing salt on a kitchen scale. But that two minutes of measuring buys you weeks of calm confidence, and that’s a trade worth making every single time.
There are two practical approaches, and which one you use depends on how you’re setting up your ferment.
Approach A is for mash ferments, where you chop or blend your peppers and mix salt directly in. The math is simple: weigh all your peppers plus any vegetables or fruit going into the mash, then multiply by your target salt percentage. So if you have 1000 grams of total mash and you’re aiming for 3%, that’s 30 grams of salt. Done. That’s it. No advanced degree required.
Approach B is for brine ferments, where your solids sit submerged in salt water. Here, you make a brine by weight—for example, 30 grams of salt per 1000 grams of water gives you roughly a 3% brine. Pack your jar with peppers, pour the brine over, and make sure everything stays under. The jar won’t be perfectly precise down to the decimal, but a correctly made brine plus good submersion is remarkably forgiving.
If you’re not sure which method to use, go with the brine approach for your first few batches. It’s easier to keep the system stable, and stability is what we’re chasing when we’re learning. You can graduate to mash ferments once you’ve got a few successful brines under your belt and your confidence is up.
What “normal” looks like (and why it matters)
Here’s a little secret that experienced fermenters rarely talk about: fermentation doesn’t always look cinematic. You’ve probably seen those gorgeous time-lapse videos where bubbles cascade dramatically through a crystal-clear jar. That’s the highlight reel. In reality, some batches bubble like a jacuzzi on day two and some barely whisper. Many perfectly successful ferments show almost no visible activity at all—and that’s completely fine.
So what does normal actually look like? You’re looking for a steady, clean lactic smell—that pleasant tang reminiscent of pickles, yogurt, or a good sourdough starter. You might notice a little fizz when you stir or tilt the jar, which is the CO2 produced by your hardworking bacteria saying hello. Color changes are expected as peppers soften and break down over time, and don’t be alarmed by sediment collecting at the bottom of the jar. That’s just the microbial community doing its thing.
On the flip side, there are signs that genuinely warrant attention. Fuzzy growth on the surface is worth investigating (more on that in a moment). A truly rotten or putrid smell—not just “unusual” but genuinely offensive—is a red flag. And if you’re seeing repeated surface growth because solids keep bobbing up above the brine, that’s a mechanical problem you need to solve before it becomes a biological one.
Now, here’s where it gets interesting, because there are a bunch of things that look alarming but are actually totally normal. Cloudy brine in the first week? That’s just bacteria getting busy—it’s a sign of healthy fermentation, not contamination. White sediment pooling at the bottom? Same deal. A dried ring around the inside of the jar where brine splashed and evaporated? Completely harmless. These are all signs of a ferment that’s alive and working, so resist the urge to panic. Your jar is doing exactly what it’s supposed to do.
Kahm yeast vs mold (what you’re actually looking at)
Alright, let’s talk about the moment that strikes fear into every fermenter’s heart: you lift the lid, and there’s something growing on top. Before you hurl the jar into the garbage and swear off fermentation forever, take a breath. Most “mold panic” is actually kahm yeast, and the difference between the two matters enormously.
Kahm yeast
Kahm yeast is a surface yeast that shows up when there’s oxygen access, and while it’s annoying, it’s generally not dangerous. It typically appears as a thin white film—almost like a delicate skin stretched across the surface of your brine. It might look wrinkly or flat, and if you lean in for a sniff, it’ll smell yeasty or slightly funky, but critically, it won’t smell rotten. Think “bread dough left out too long,” not “something died in here.”
So what do you do about it? First, skim it off as thoroughly as you can. A spoon works, a paper towel dragged across the surface works—whatever gets the job done. Then check your setup: make sure solids are fully submerged and the jar isn’t overfilled (overfilling can push brine and solids up to where oxygen lives). Improve your oxygen barrier by switching to an airlock or tightening your sealing game. After all that, taste the ferment later—many batches that developed kahm yeast turn out absolutely excellent once blended into a finished sauce.
The key thing to remember is that kahm is usually a flavor risk, not a safety emergency. It can dull aromas and make the ferment taste a bit “flat” if left unchecked, but it’s not going to send you to the hospital. Treat it like a nuisance, not a catastrophe.
Mold
Mold, on the other hand, is the one thing you should treat with genuine respect. Real mold looks distinctly different from kahm—it’s fuzzy rather than filmy, and it comes in colors that should immediately catch your eye. We’re talking blue, green, black, or pink patches, often growing on exposed solids that are sticking up above the brine line like little islands.
If you spot fuzzy mold, or anything clearly colored and spreading, the safest move is to discard the ferment. Full stop. People love to debate about whether you can scrape it off and salvage the batch, and sure, maybe sometimes you can. But hot sauce is cheap to make, and your health is not something to gamble with. Dump it, sanitize the jar, and start a fresh batch. You’ll sleep better, I promise.
“My brine level dropped” (evaporation, leaks, or absorption)
You check on your ferment one morning and—wait, where did all the liquid go? Don’t panic. Brine levels drop for all sorts of mundane reasons. Vegetables absorb liquid as they ferment (especially denser ones like carrots or onions). The jar might not have been sealed perfectly, allowing slow evaporation. Or maybe your room is warm and dry, and physics is just doing its thing.
What matters isn’t why the level dropped but the outcome: are your solids still submerged? That’s the only question you need to answer. If they are, carry on. If they’re not, top up with a brine of similar salinity—and this is important, don’t just splash in plain water, because that will dilute your salt concentration and potentially destabilize the whole system. While you’re at it, improve the seal or add an airlock to prevent ongoing loss, and use a fermentation weight so solids don’t rise as the liquid level shifts.
“It’s too sour / too sharp”
So you’ve tasted your ferment and your face involuntarily puckered like you bit into a lemon. Relax—sharpness is usually an imbalance, not a failure. It most commonly happens when a ferment ran longer than ideal and accumulated a lot of acid, or when high temperatures sped up microbial activity beyond what the flavor could gracefully handle. Sometimes it’s simply that there isn’t enough sweetness or body in the mix to balance all that acidity.
The good news? There are several fixes that genuinely work. Blending in body ingredients like roasted carrot, red bell pepper, tomato, or cooked onion can beautifully round out sharpness and give the sauce depth. A touch of sweetness—fruit, honey, or even a pinch of sugar—can work wonders, but start tiny, taste, and add more only if needed. You might be tempted to reach for vinegar, and while it can add brightness, be careful: adding more acid to something that already tastes too acidic is a bit like fighting fire with gasoline. If the sauce tastes “thin” and sharp at the same time, what it probably needs is body, not sweetness. Blending a portion of the ferment into a fresh cooked sauce is a fantastic way to keep the complexity while taming the edge.
“It’s not sour enough yet” (underdeveloped ferment)
Picture this: your ferment smells clean, looks fine, but tastes like… salty pepper water. That’s not a problem—that’s a ferment that’s just getting started. Patience, grasshopper.
The best thing you can do is give it more time at a stable, moderate temperature. Keep those solids submerged (broken record, I know, but it matters), and resist the urge to stir excessively—every time you stir, you’re introducing oxygen, which can slow lactic fermentation and invite unwanted guests. Instead, taste every few days and pay attention to the progression. There’s a beautiful moment when a ferment transitions from “pepper” to “pepper plus tang plus depth,” and that inflection point is your flavor peak. It might take five days, it might take three weeks. Every batch has its own timeline, and that’s part of the magic.
“It tastes flat / one-note”
A flat ferment is one of the more frustrating outcomes because everything looks fine—no mold, no off smells—but the flavor just… isn’t there. It’s like a movie with great cinematography but no plot. The most common culprits are under-fermentation (the plot hasn’t developed yet), too much oxygen exposure (which causes aroma loss and dulls complexity), or adding vinegar too early in the process, which can overwhelm the subtle flavors that fermentation creates.
If the ferment is still young and smells clean, more time is often the simplest fix. Make sure conditions are properly anaerobic—submerge those solids, use an airlock if you’ve got one. If you’ve already added vinegar, remember for next time to add it at the very end, in small doses, tasting between each addition. And here’s a pro move: add aromatics after fermentation is complete. Fresh garlic, citrus zest, or herbs can provide the “lift” that makes a sauce go from “technically correct” to genuinely exciting.
One more thing—if the sauce tastes flat because it’s under-salted, fix the salt first before chasing complexity. Salt is a flavor amplifier, and without enough of it, no amount of aromatics will save you.
“The ferment stopped bubbling”
This one triggers more unnecessary worry than almost anything else. You were watching those gorgeous little bubbles percolating through your jar, and then one day… silence. The ferment looks still. Dead, even. Is it ruined?
Almost certainly not. Many ferments are most active in the first few days as bacteria multiply rapidly and produce a burst of CO2. After that initial party, things calm down. The bacteria are still working—they’re just doing it more quietly, like a library study session instead of a frat party.
Here’s what to check: Are your solids still submerged? Does it smell clean—lactic and tangy? Is there still gentle pressure when you crack the lid open? If you answered yes to all three, you’re fine. The fermentation is progressing; it’s just less visually dramatic.
If you want to nudge things along, and the room is cold, try moving the jar to a slightly warmer spot. If you suspect you used too much salt (which can inhibit bacterial activity), that’s a lesson for next time—weigh your salt instead of guessing. And if you used chlorinated tap water, switch to filtered water for your next batch, since chlorine can suppress the very microbes you’re trying to cultivate.
“It tastes alcoholic / boozy”
Every now and then you’ll open a jar and catch a whiff of something suspiciously cider-like or beery. This happens when yeasts become more active than lactic acid bacteria—a microbial power struggle where the wrong team is winning. It’s typically influenced by oxygen exposure, sugar-heavy recipes (especially fruit-forward ones), or warmer fermentation temperatures that favor yeast activity.
The fix is to tighten up your anaerobic setup. Better submersion, a proper airlock, and fermenting cooler can all shift the balance back toward lactic bacteria. For future batches, keep fruit additions modest until you get comfortable managing the sugar they bring to the party. If the batch still smells clean and lactic underneath that boozy top note, there’s a good chance it’ll settle out after blending and a stint in the fridge. Cold temperatures slow yeast activity and let the lactic character reassert itself.
“Soft/mushy peppers” or “slimy brine”
Texture issues are one of those areas where context is everything. Sometimes soft peppers are completely normal—fermentation breaks down cell walls, after all, and that’s literally how you get sauce. But if the texture crosses from “pleasantly soft” into “disturbingly mushy” or the brine develops an unsettling sliminess, it’s worth paying closer attention.
The usual suspects are fermenting too warm for too long (heat accelerates breakdown), certain vegetables naturally releasing pectin and thickening the brine, or in rarer cases, contamination creating genuinely unpleasant textures. If the smell is still clean and lactic, you can often save the batch by blending and straining for a smooth sauce texture, and a splash of vinegar at the finish can tighten the perception nicely. For future batches, ferment cooler and don’t push time past the flavor peak—once it tastes good, pull it.
However, if it smells rotten or the texture is truly revolting, trust your instincts. Discard the batch, give your equipment a thorough cleaning, and start fresh with stricter submersion practices.
“It smells like sulfur / eggs”
Ah, the sulfur bomb. You open the jar expecting that pleasant lactic tang and instead get hit with a wave of rotten eggs. It’s startling, but don’t panic immediately. Sulfur notes are often related to microbial stress—temperature swings, unusual ingredients, or certain yeast strains acting up can all trigger sulfur production.
First, check the fundamentals: is the temperature stable? Is oxygen being managed properly? If the batch smells clean underneath the sulfur note—still lactic, not truly rotten—it’s often fixable with finishing techniques. Blending with roasted aromatics can mask and complement the sulfur, adding a little sweetness or body helps round things out, and time in the fridge does wonders as volatile sulfur compounds gradually dissipate.
But if the smell goes beyond sulfur into territory that’s truly putrid—like something died and was left in the sun—that’s your cue to discard. There’s no saving a ferment that’s gone genuinely rotten.
“It’s too salty”
Over-salting is frustrating but it’s one of the easier problems to solve, and it’s worth noting that excessive salt usually doesn’t make a ferment unsafe—it just makes it slow (because even the beneficial bacteria struggle in hyper-saline conditions) and hard to enjoy straight.
Your best rescue option is to blend the finished ferment with unsalted body ingredients. Roasted peppers, carrots, tomatoes, or even cooked onions can dilute the salt concentration while adding complementary flavors. Alternatively, embrace the intensity and use the sauce as a concentrate—a small spoonful stirred into soups, spooned over beans, or whisked into marinades can add incredible depth without overwhelming anything.
For the next batch, the lesson is simple: weigh your salt with a scale and stop relying on volume measurements. A tablespoon of fine salt and a tablespoon of coarse salt contain very different amounts of actual sodium chloride, and that difference can make or break a ferment.
Brine level, weights, and the float problem
If there’s a single mechanical failure that causes more fermentation headaches than any other, it’s floating solids. The chain reaction is painfully predictable: solids float above the brine, oxygen reaches them, surface growth appears (kahm yeast or worse), and suddenly you’re troubleshooting a problem that should never have existed in the first place. You should be fermenting, not firefighting.
The fix is straightforward. Use a fermentation weight—glass weights designed for mason jars are cheap and effective, or you can improvise with a small zip-lock bag filled with brine. Leave adequate headspace in the jar so brine can expand (it will, especially in the active early days) without pushing solids up above the surface. And if you’re finding that mash ferments are particularly tricky to keep submerged, consider switching to brine ferments for your beginner batches. Having solids fully immersed in liquid is simply easier to manage when you’re starting out.
Sanitizing: clean vs sterile
Let’s clear something up: you do not need a laboratory-grade autoclave to ferment hot sauce. You’re not performing surgery. But you do need to be consistent about basic cleanliness, because sloppy habits compound over time and eventually catch up with you.
The routine is simple. Wash your jars, lids, weights, and utensils with hot soapy water before each use. Rinse everything thoroughly so you don’t leave soap residue behind (soap can interfere with fermentation and affect flavor). Keep your workspace tidy so you’re not constantly introducing random environmental microbes into an ecosystem you’re trying to keep balanced.
Here’s the thing that most guides won’t tell you: the real “sanitation” in fermentation isn’t about sterilizing every surface. It’s about maintaining proper submersion and salinity. A correctly salted, properly submerged ferment creates an environment where the good bacteria outcompete the bad ones. That’s your primary defense. Clean equipment is just the supporting cast.
Bottling: the moment most people ruin a good ferment
You’ve nursed this ferment for days or weeks. You’ve resisted the urge to open the jar every five minutes. The flavor is gorgeous. And now comes the moment where an alarming number of people snatch defeat from the jaws of victory: bottling.
The most common mistake is dumping in a massive glug of vinegar, ignoring salt balance, and bottling without ever tasting the final blend at room temperature. It’s like spending hours cooking a beautiful meal and then drowning it in ketchup without trying it first.
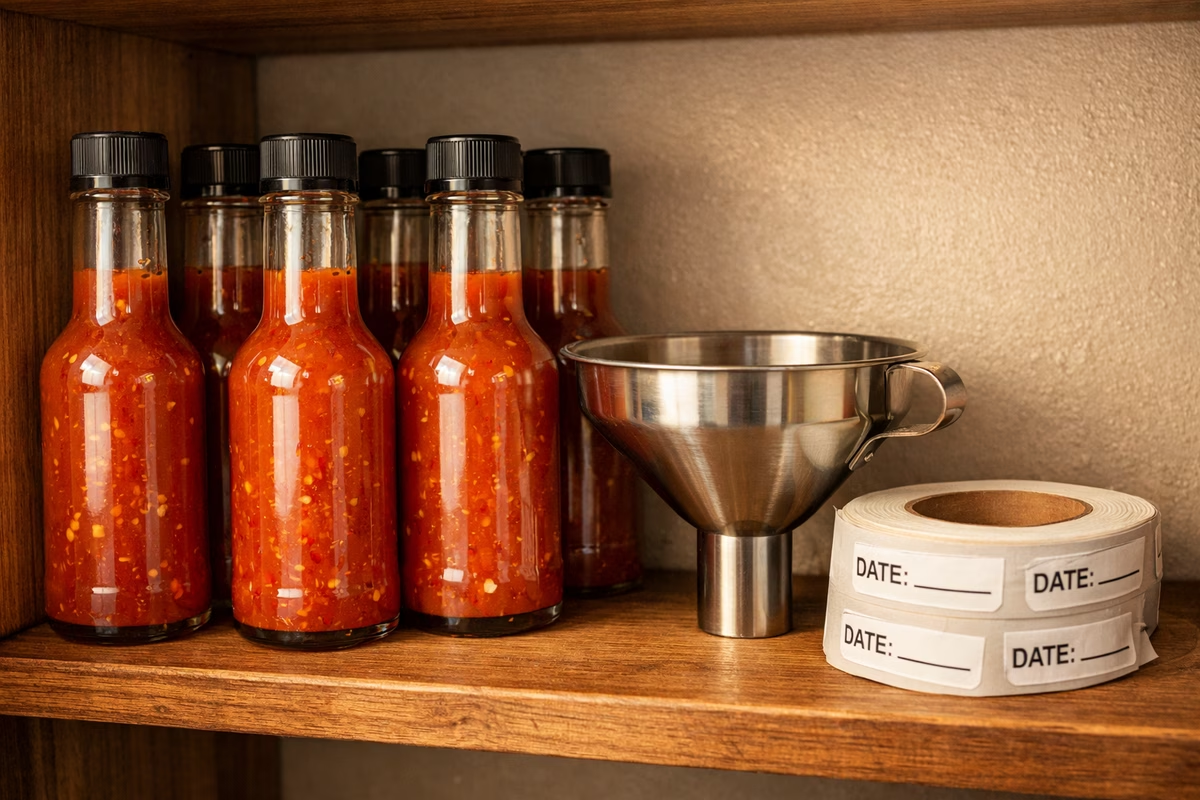
Here’s a calm, methodical workflow that protects your hard work. Start by blending your fermented mash with a small amount of brine—just enough to get things moving in the blender. Taste it and adjust the salt if needed. Then add vinegar in small additions, tasting between each one, until the sauce tastes bright but not thin. If it’s tipping toward sharp, blend in some body—roasted pepper, carrot, or tomato work beautifully. Strain if you want a smoother pour (a fine mesh strainer or cheesecloth does the job). Finally, bottle it up, slap a label with the date on it, and pop it in the fridge.
If you’re aiming for a shelf-stable sauce, you’ll need to be much more deliberate about acidity levels and bottling sanitation—that’s a whole separate conversation. But if you’re keeping it refrigerated for personal use, you have a lot more flexibility to play around and find your preferred balance.
When to stop and start over
Look, sometimes a ferment just doesn’t work out. It happens to everyone, and there’s no shame in it. But you need to know where the line is between “quirky but salvageable” and “genuinely not safe to eat.”
Discard the batch if you see fuzzy or colored mold—the kind with visible texture and pigment, not a smooth white film. Discard it if the smell has crossed from “unusual” into territory that reminds you of rot, sewage, or dead food. And discard it if you simply cannot keep solids submerged and mold keeps returning no matter what you do, because at that point you’re fighting a losing battle against physics and biology.
Fermentation is cheap. Your stomach isn’t. Peppers cost a few dollars. A food-borne illness costs a lot more in every sense. When in doubt, throw it out and start again with fresh ingredients and lessons learned. Every failed batch teaches you something, and your next one will be better for it.
Next steps
Build a deliberate three‑bottle shelf: one bright vinegar sauce, one fermented depth bottle, and one fruity‑hot sauce that climbs without punishing. Use the Hot Sauce Database for profiles, then train instinct with Ferment Frenzy.