A kamado rewards a completely different instinct than the one most grillers bring from a kettle or a gas grill. Those cookers respond quickly, so you learn to nudge them constantly. A kamado responds slowly, so the cooks who fight it hardest do the worst, and the ones who learn to set it and leave it alone get results that seem almost effortless. The heavy ceramic body is the whole story: it is a heat battery that, once charged and stabilized, holds a target for hours with astonishing steadiness. Understanding that mass, and respecting how slowly it changes, is what separates a frustrating kamado from a joy.

Thermal mass is the feature, and the catch
The thick ceramic walls of a kamado store an enormous amount of heat, which is exactly why the cooker is so efficient and so stable. A little charcoal burns a long time because the body radiates heat back inward and loses very little to the outside air, and once the dome settles at a temperature it tends to stay there through wind and cold that would send a thin metal grill wandering. That same mass, though, is why a kamado is unforgiving of overshoot. When you let the temperature climb too high, closing a vent does not cool the cooker quickly, because all that stored heat has nowhere to go but slowly. The ceramic that gives you stability also gives you momentum, and momentum is hard to reverse. The entire discipline of kamado cooking follows from this one fact: it is far easier to walk a cool cooker up to your target than to bring a hot one back down.
Airflow is your only real control
A kamado has essentially two controls, a lower intake vent that feeds oxygen to the fire and a top vent that lets exhaust out, and together they set how hot the fire burns. The counterintuitive part is how little movement it takes. Once the cooker is hot, a vent adjustment of a finger’s width can shift your temperature meaningfully, and the change arrives with a lag, so the classic beginner error is to make a big adjustment, see nothing happen immediately, make another, and then find the cooker sailing past the target with too much air feeding the fire. The habit to build is small movements followed by patience. Nudge a vent, wait, read, and only then decide whether to nudge again. The broader logic of feeding and choking a fire is worth reading in Fire, Airflow, and Fuel , and it all applies here in a slower, more deliberate register.
Burp the grill, and mean it
There is one safety habit a kamado demands that other grills do not, and it is not optional at high heat. When you restrict the vents on a hot cooker, the fire keeps burning down the oxygen inside while heat and unburned gases build up. Fling the lid open all at once and fresh air rushes in across a bed of very hot coals, which can produce a sudden rush of flame right where your face and forearms are. The practice that prevents this, universally called burping the grill, is to crack the lid open just an inch or two first, pause for a moment to let air in gradually, and only then lift it the rest of the way. Wear heat-resistant gloves, keep your face and arms out of the lid’s path, and treat this as reflex rather than an afterthought. The habit matters most when you are running the cooker hot for searing or pizza.
Matching the setup to the cook
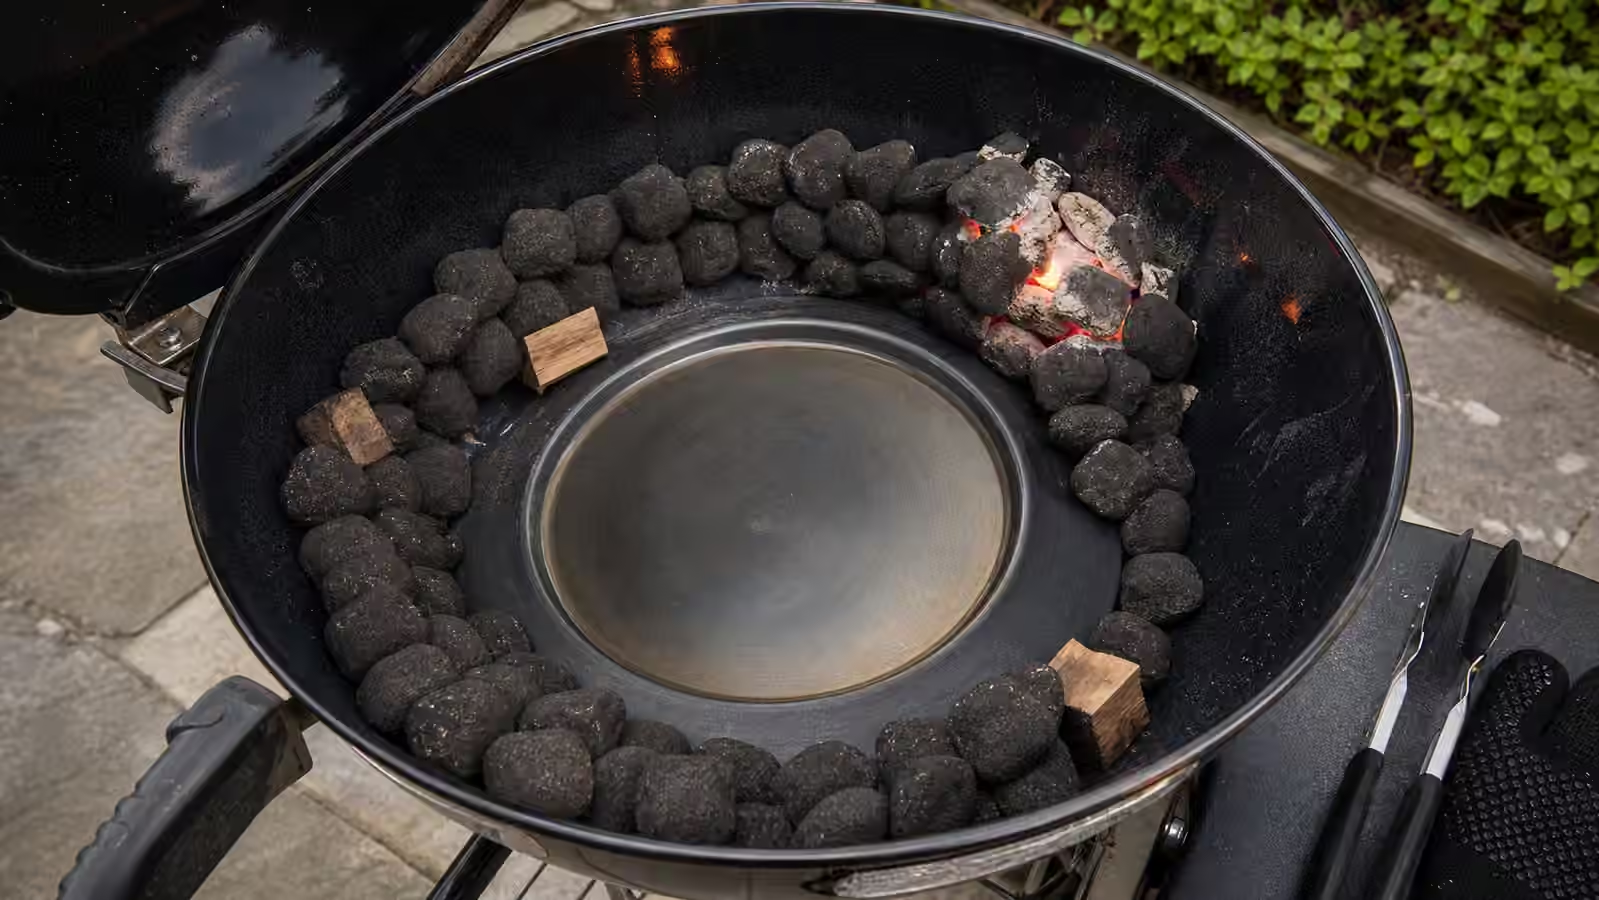
A kamado’s versatility comes from a few internal configurations, and choosing the right one is most of the battle. For low-and-slow smoking, light only a small pocket of charcoal, add a heat deflector to block direct radiant heat from the food, set a drip pan if you like, and use a restrained amount of wood, because a sealed, efficient cooker traps smoke far more effectively than an open grill and it is easy to oversmoke into bitterness. Let the fire stabilize at your target before the food ever goes in. For roasting a chicken or a larger cut, run the deflector with a moderate dome temperature and the lid closed so the cooker behaves like a convection oven. For searing, pull the deflector, let the bare grate soak up heat until it is genuinely hot, and use that intense direct zone with intention and short exposure. Pizza and flatbread want a stone or steel and a stabilized high heat, with a watchful eye on the bottom so it does not scorch before the top is ready, an idea developed further in Pizza, Flatbreads, and Cast Iron on the Grill . The one thing to plan for is that switching modes mid-cook is slow, because all that stored heat has to be added or shed, so decide your setup before you light rather than halfway through.
The mindset that makes a kamado easy
Because a kamado is heavy, holds heat with such thermal momentum, and cools so reluctantly, its placement and cool-down deserve real thought, and a stable, legal, well-ventilated spot matters more here than with a grill you can shove around casually. Care for the gasket and let the cooker cool on its own schedule rather than rushing it. Above all, lean on a thermometer for doneness just as you would on any other cooker, because a beautifully stable smoking temperature tells you nothing about whether the meat inside has reached a safe internal number. Use thermometer-based doneness for meat, poultry, seafood, leftovers, and reheating, keep raw and cooked foods separate, and move perishables toward chilling rather than leaving them out while a long cook winds down. For current reference, keep FoodSafety.gov’s safe minimum internal temperatures and its clean, separate, cook, chill guidance nearby, along with the USDA FSIS grilling food safely resource.
The kamado paradox is that its greatest strength and its most common frustration are the same trait. The thermal mass that makes it hold a temperature for eight unbothered hours is the thermal mass that punishes you for overshooting in the first five minutes. Light less fuel than instinct suggests, walk the temperature up gently, stabilize before you load food, adjust in small movements, and open the lid with care. Do that and the cooker becomes the calm, patient partner it was built to be. From here, the thermal-momentum thinking in Coffee Mastery will feel familiar, and once you are comfortable holding a steady low temperature, Smoking for Beginners is the natural next step.