Helmet fit and visibility are not magic shields. They are the first boring layer of an everyday e-bike routine: a helmet that sits correctly, lights that are charged and aimed, reflective details that move with the rider, and route choices that do not depend on being noticed at the last possible second. The goal is not to look like a racing catalog. The goal is to leave the house with fewer preventable weak points.
Start with fit, not color
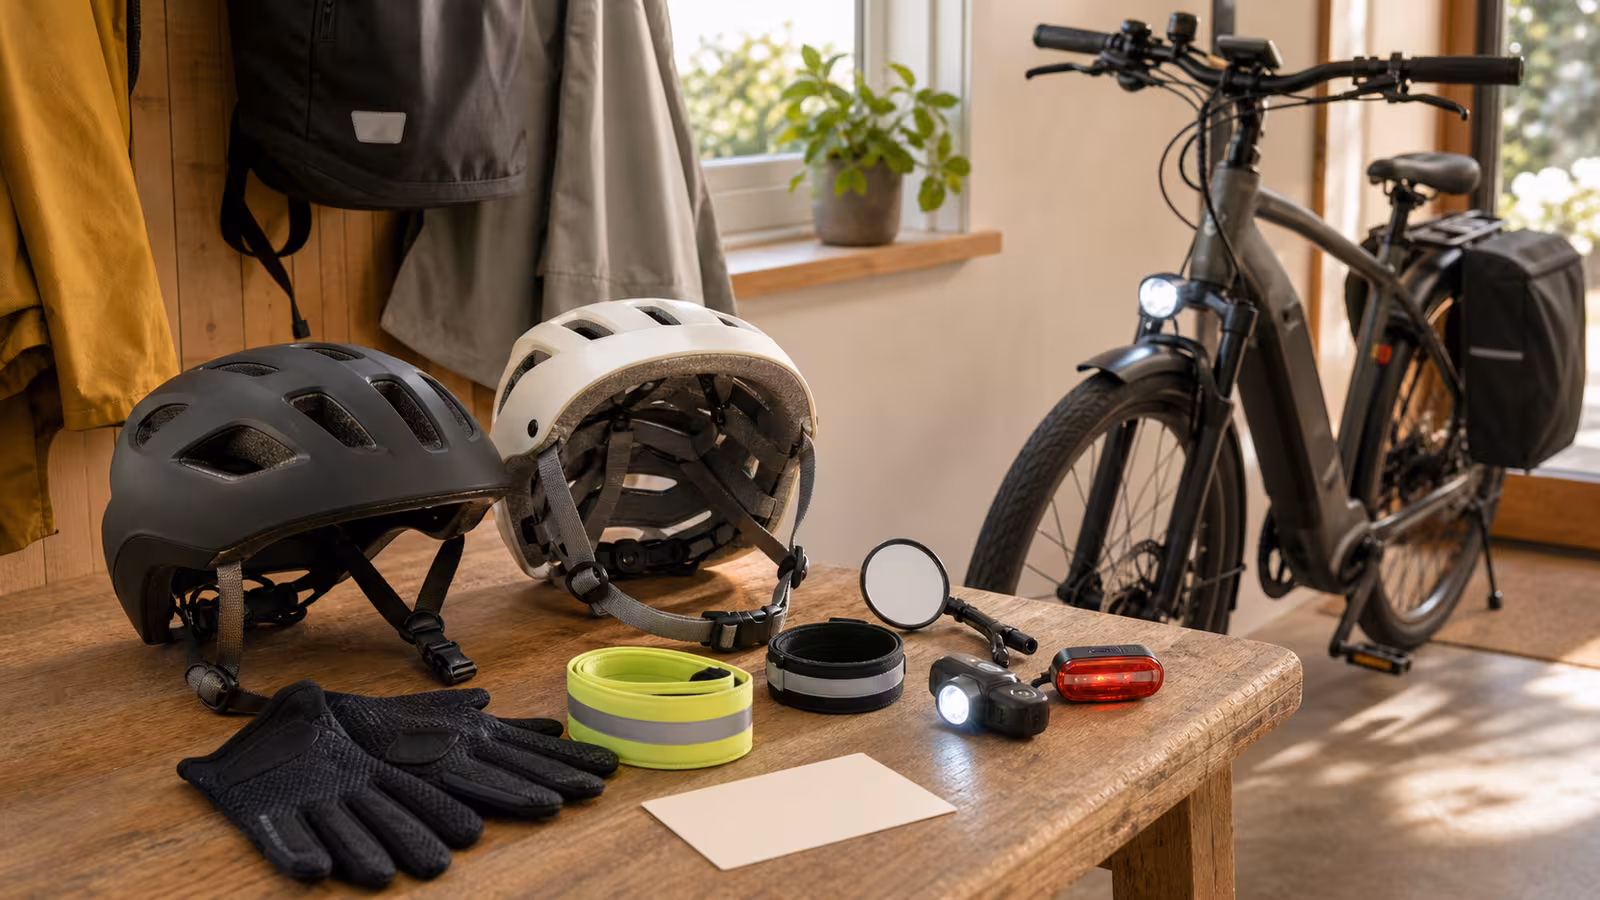
A helmet that is easy to wear matters more than a helmet that looks impressive on a shelf. Put it on before you adjust anything else. The shell should sit level, not tipped back like a hat and not pressed so low that it blocks normal vision. The front edge usually lands near the upper forehead, but exact fit depends on the helmet design and instructions. The retention system should hold the helmet steady when you gently shake your head. The straps should lie flat, form a clean V around the ears, and buckle without pinching.
Do the ordinary test: open your mouth wide, look down, look over both shoulders, and mimic the motion of checking traffic. If the helmet slides, lifts, blocks your glasses, rubs painfully, or makes you avoid shoulder checks, fix that before calling the setup done. Comfort is not vanity here. A rider who keeps loosening the helmet mid-ride has not solved the safety layer.
Make the helmet part of the departure point
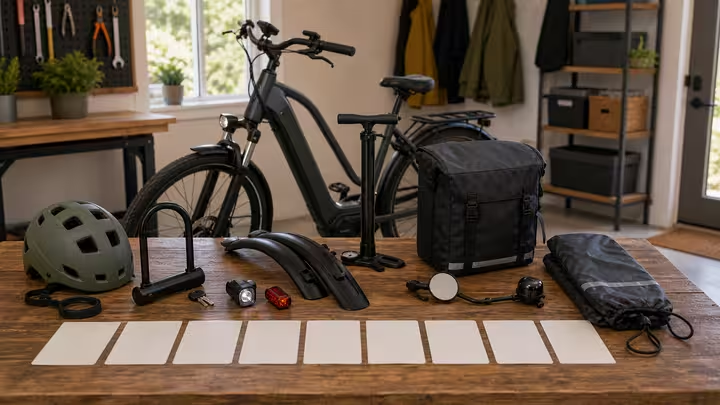
The best helmet is the one that is waiting where the ride begins. Put it with the lock key, glasses, gloves, lights, and bag, not in a closet where it becomes a separate decision. If multiple people use the bike, give each person a clear place for their helmet and a simple way to identify it without relying on memory. Do not leave helmets where they get crushed under groceries, knocked from a high shelf, baked in a hot car, soaked by leaks, or used as storage bowls.
After a fall or impact, follow the helmet manufacturer’s replacement guidance. If a helmet has cracks, crushed foam, damaged straps, a broken buckle, or unknown history, retire it. The same conservative thinking from the Keepers Guild applies: inspect the actual object, keep records where useful, and do not repair safety equipment by guesswork.
Use lights before darkness
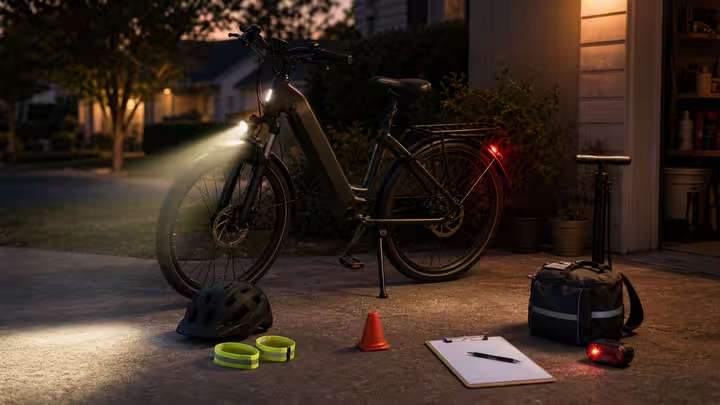
Lights are not only for night. A steady front light and visible rear light can help in shade, rain, low sun, tree cover, dawn, dusk, parking garages, and streets where a rider moves between bright and dark patches. Charge them before they are urgent. Aim the front light so it helps you see and be seen without blinding people. Check the rear light from the actual angle drivers, riders, and pedestrians will see, not only from one step behind the bike.
Build a charging habit. If the light is removable, decide where it charges and where it returns. If the light is wired to the e-bike system, learn what happens when the main battery is low and how the switch behaves. If local rules require certain lighting at certain times, treat those rules as a minimum, not as the whole visibility plan.
Put motion in the visibility stack
Reflective sidewalls, ankle bands, pedal reflectors, wheel reflectors, and bright gloves can show movement in ways a flat jacket does not. Drivers and other riders often recognize moving feet or hands faster than a stationary patch of color. This does not mean you need to glow from every angle. It means you should place a few useful signals where motion and line of sight meet: ankles, wheels, pedals, wrists, helmet, and rear rack.
Do a driveway or hallway scan. Stand twenty feet away from the bike and rider in normal ride position. Look from the front, rear, and both sides. Then crouch slightly, because many people see you from car height or child height. Ask what disappears behind bags, child seats, panniers, rain jackets, or the rider’s own body. Visibility gear that works on an empty bike can vanish once the real load is added.
Keep visibility separate from right of way
Being visible does not give you right of way. A bright jacket does not make a poor pass kind. A powerful light does not make a sidewalk legal. Reflective bands do not make a high-speed shared-path ride courteous. Use visibility to give people more time to understand you, then ride predictably. Signal early where signals are safe and expected. Slow before blind corners. Leave room around pedestrians, children, dogs, doors, and driveways.
This is where the Etiquette and Local Law Awareness guide connects directly to your helmet shelf. A rider can have excellent gear and still create confusion by weaving, rushing, or ignoring path rules. The setup should support calmer decisions, not excuse harder ones.
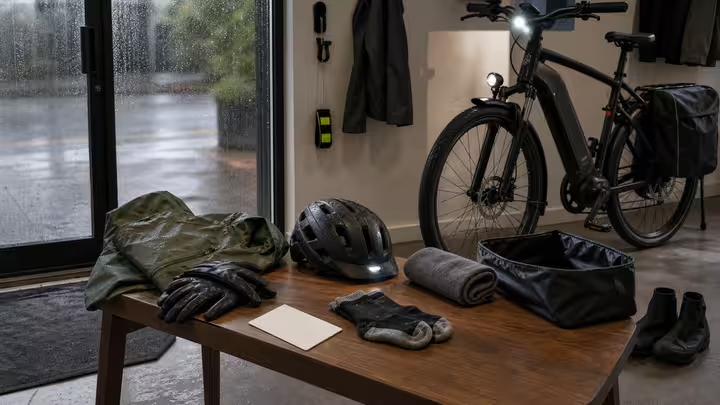
Tune the setup for weather
Rain changes helmet and visibility habits. A hood under a helmet can change fit. A rain cover can hide reflective material. Water on glasses can make a rider avoid shoulder checks. A bright jacket may be covered by a backpack. A rear light can be blocked by a loaded rack. Cold-weather gloves can make it harder to press tiny light buttons. Hot weather can make a rider choose not to wear a heavy shell even if that shell is the brightest item.
Use the Commute Comfort Audit after a wet or dark ride. The questions are practical: could you see the road surface, did others notice you early, did the helmet stay comfortable, did the rear light stay visible with the bag attached, did any strap flap into your face, and did the setup make the next ride more likely?
Add passenger visibility before carrying passengers
If your e-bike routine includes a child seat, longtail bench, trailer, or school run, visibility changes again. A child passenger may sit lower, higher, wider, or farther back than a solo rider expects. Their helmet fit, straps, clothing, and attention are part of the system. Follow the child seat, trailer, helmet, rack, and bike instructions. Check local rules about passenger age, helmet use, seating, foot protection, and school property before building the routine.
Practice without the passenger first. Then practice in a quiet place with the passenger before traffic or crowded paths. Watch for blocked lights, swinging backpacks, loose scarves, dangling straps, and passenger movements that change balance. Passenger visibility is not a decorative add-on. It is part of making the whole bike readable to everyone around it.
Create a five-point exit check
Before a normal ride, keep the check short enough to repeat. Helmet level and buckled. Front light on and aimed. Rear light visible with the actual bag or passenger setup. Reflective or bright detail present for the conditions. Route choice consistent with current local rules, weather, and comfort. That is enough for a departure habit.
After the ride, reset the system. Recharge the lights if needed. Hang wet gear. Put the helmet where it dries without heat damage. Note any visibility gap while it is fresh. The useful workshop is the one that makes the next ordinary ride easier, calmer, and less dependent on memory.
Related guidebooks
- The E-Bike Workshop Quickstart: Make the Bike Part of Real Life
- Commute Comfort Audit: Rain, Darkness, Hills, Surfaces, and Arrival Friction
- Rain Gear and Fenders: Arrive Dry Enough to Repeat the Ride
- Reality Check Desk for checking viral visibility claims and current safety summaries.