The machine arrived on a Tuesday. By Wednesday I had made six shots that tasted like burnt rubber dissolved in lemon juice, used a pound of coffee, and seriously considered returning everything.
Espresso looked easy on the internet. Grind, tamp, press the button, watch the beautiful auburn stream pour into a cup. Thirty seconds. Done.
What nobody mentioned was that every variable—grind size, dose, water temperature, pressure, time—is a dial, and they all affect each other. Change one, and the others shift. The cup remembers every decision.
This is the story of the weeks it took me to understand what my machine was trying to tell me—and the morning I finally pulled a shot that tasted like caramel, dark cherry, and something that made me sit down and smile.
Why espresso is different from everything else
Every other brewing method gives you room. French press forgives a coarse grind. Pour-over lets you adjust mid-stream. Cold brew has twelve patient hours to figure itself out.
Espresso has twenty-five seconds. Hot water, under nine bars of pressure, forces through a tightly packed bed of very finely ground coffee. The margin between a great shot and a terrible one is sometimes a single click on the grinder.
That sounds stressful. It is, at first. But it also means espresso rewards attention more than any other method. Small changes produce obvious results. Once you learn the language, the feedback loop is immediate and deeply satisfying.
Week one: the grinder matters more than the machine
My first mistake was spending most of my budget on the espresso machine and almost nothing on the grinder.
The machine was beautiful. The grinder was a blade grinder I already owned from my drip coffee days.
Here’s the thing about espresso: the grinder is the instrument. The machine just pushes water. The grinder determines whether that water flows through the coffee evenly or channels through weak spots, whether extraction is balanced or chaotic.
A blade grinder produces boulders and dust in the same batch. The boulders under-extract (sour), the dust over-extracts (bitter), and the shot tastes like both at once—which is a unique kind of terrible.
What I learned
After three days of undrinkable shots, I bought a decent burr grinder. Not the most expensive one. Just one with stepped adjustments fine enough for espresso.
The first shot from the burr grinder wasn’t good. But it was consistently not good—the same kind of not good each time. That consistency meant I could actually start adjusting.
Consistency is the prerequisite. Without it, you’re not dialing in. You’re guessing.
The dose: how much coffee goes in
I started by eyeballing the dose—scooping grounds into the portafilter until it looked “about right.”
About right is not a dose. About right is a wish.
What actually works
Weigh your coffee. Every time.
- Start with the basket’s rated dose. Most double baskets are designed for 18g. Some prefer 16g or 20g. Check the manufacturer’s recommendation and start there.
- Be consistent to within half a gram. 17.5g and 18.5g produce noticeably different shots.
- Distribute before tamping. Use a finger, a tool, or a gentle shake to spread grounds evenly in the basket. Uneven distribution means uneven extraction, and the water always finds the path of least resistance.
Once I started weighing the dose, the shots stopped being random. They were still bad—but they were bad in predictable, fixable ways.
The yield: how much liquid comes out
This was the concept that unlocked everything.
For the first week, I judged shots by color and time. If the stream looked dark and the clock said 25 seconds, I called it done.
The problem: volume and weight aren’t the same. Crema is airy. A shot that looks like two ounces might weigh 28g or 42g depending on how the extraction went. And that difference is the difference between concentrated intensity and watery bitterness.
The ratio
The standard starting ratio for espresso is 1:2. For every gram of coffee in, you want roughly twice that in liquid out.
- 18g dose → 36g yield
- 20g dose → 40g yield
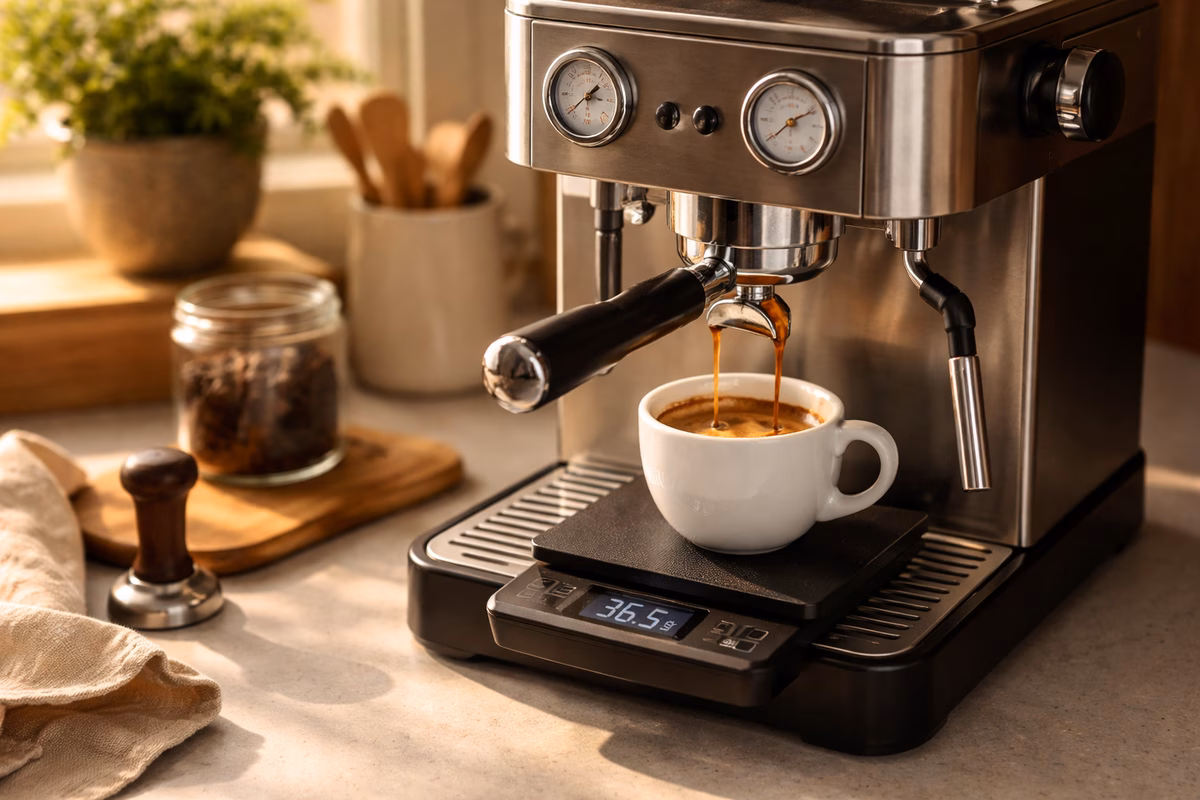
Put your cup on a scale. Start the shot. Stop it when the scale reads your target.
That’s it. That’s the method.
A shorter ratio (1:1.5) gives you a ristretto—intense, syrupy, concentrated. A longer ratio (1:2.5 or beyond) gives you a lungo—lighter, more transparent, sometimes tea-like.
I didn’t know any of this during week one. I was stopping shots based on vibes. Once I started stopping them based on weight, I could taste what the ratio was doing to flavor—and I started making choices instead of accidents.
The grind adjustment: the conversation with the machine
Here’s where espresso becomes genuinely interesting.
If your shot runs too fast (hits 36g in 15 seconds), the water is flowing through too easily. The coffee is under-extracted: sour, thin, hollow.
If your shot runs too slow (takes 40 seconds to reach 36g), the water is struggling to push through. The coffee is over-extracted: bitter, ashy, harsh.
The fix in both cases is the same tool: the grind adjustment.
- Too fast → grind finer. Make the particles smaller so the water has more resistance.
- Too slow → grind coarser. Give the water an easier path.
The single-variable approach
Change one thing at a time. If the shot ran in 18 seconds, go one click finer. Pull another shot. If it ran in 22 seconds, you’re heading the right direction. One more click. Pull again.
This sounds tedious. It is, for the first few sessions. But each adjustment teaches you something about how your grinder, your coffee, and your machine relate to each other. After a week, you start to feel where the right grind is before you confirm it with the timer.
The morning it finally worked
It was a Sunday. Three weeks in. I’d been adjusting one variable at a time, keeping notes on my phone like a scientist with a caffeine problem.
18g of a medium-roast Colombian. Grinder set two clicks finer than yesterday. Distributed with a few taps. Tamped level—not hard, just even. Placed the cup on the scale. Started the shot.
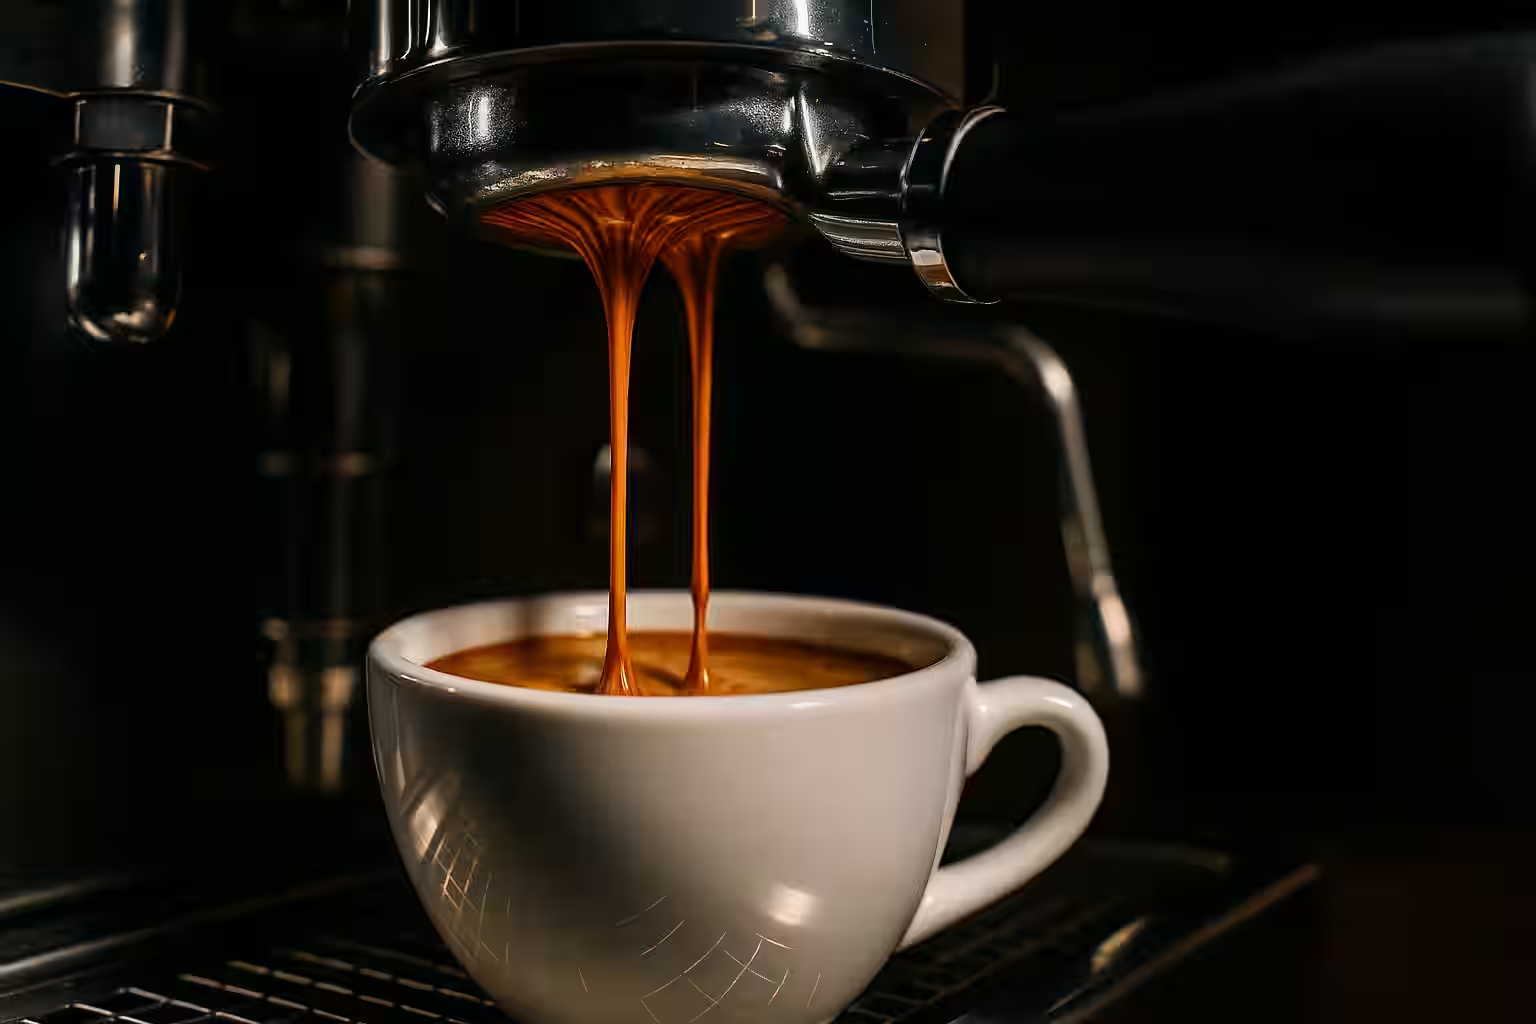
The first drops appeared at about four seconds. The stream was thin and dark, then opened into a warm auburn flow—not gushing, not dripping, just… steady. The crema was tiger-striped. The kitchen smelled like toasted sugar and dried fruit.
The scale hit 36g at twenty-seven seconds. I stopped the shot.
I picked up the cup. The crema was thick, reddish-brown, still swirling. I took a sip.
It was sweet. Actually sweet—not sugar-sweet, but the deep, rounded sweetness of caramel and ripe cherry that happens when extraction is balanced. There was a gentle acidity underneath, like the coffee was showing me its origin instead of hiding behind roast. The finish was clean. No bitterness. No sourness. Just flavor that lingered and then faded gracefully.
I sat down at the kitchen table and drank the entire shot in three slow sips.
That was the moment I understood why people care about this. Not the gear, not the ritual—the feedback. The knowledge that yesterday’s shot was slightly sour and today, by one grind adjustment, it became this.
What I’d tell myself three weeks earlier
Buy the grinder first. Budget 60% on the grinder, 40% on the machine if you have to choose. A good grinder with a modest machine will outperform a great machine with a bad grinder every time.
Weigh everything. Dose in, yield out. Every shot. It takes ten seconds and eliminates the biggest source of inconsistency.
Change one variable at a time. Grind size first. If the shot tastes good at the right time but still seems off, then adjust dose. Then yield. Never change two things at once—you won’t know which one helped.
Taste the failures. Sour shots teach you what under-extraction tastes like. Bitter shots teach you over-extraction. Those flavors become a vocabulary. Eventually, you taste a shot and know exactly which direction to adjust.
It gets fast. The first bag of beans takes a dozen shots to dial in. The second bag takes four. By the fifth bag, you’ll nail it in two shots. The learning curve is steep but short.
The quick-reference checklist
| Step | Target | What to adjust |
|---|---|---|
| Dose | 18g (or basket-rated) | Scale, consistent within 0.5g |
| Grind | Fine enough for 25–30 sec | Grinder setting, one click at a time |
| Distribution | Even bed, no clumps | Finger, WDT tool, or gentle tap |
| Tamp | Level and firm | Consistent pressure, not maximum force |
| Yield | 36g (1:2 ratio) | Stop shot by weight, not by time or color |
| Time | 25–30 seconds | Adjust grind if outside range |
Next steps
- Read How to Dial In Espresso for the full technical deep dive
- See Coffee Equipment Guide for grinder and machine recommendations at every budget
- Explore Grind Size for why particle size matters across all brewing methods
- Try The Morning Cup You Can Repeat if you want a consistent daily routine beyond espresso