Chocolate decorations are often treated as the last-minute flourish, the thing scattered over a cake when the real work is done. That is why they so often disappoint. Thick curls crack awkwardly. Shavings melt into fingerprints. Drizzles taste waxy. Shards look dramatic but eat like broken tile. A good chocolate finish should do more than signal that dessert is chocolate. It should add aroma, texture, and a clear first impression without making the slice harder to eat.
The useful distinction is between decoration and structure. A decoration sits on the surface. A structural chocolate element changes the bite. A dusting of shaved chocolate on whipped cream is mostly aroma and softness. A tempered shard on a mousse cake adds snap. A drizzle on cookies adds bitterness and visual rhythm. A curl on a tart adds lift and melt. Once you know which job the chocolate has, the technique becomes easier to choose.
If you want chocolate that sets glossy and firm, Tempering Chocolate at Home matters. If you only need a soft drizzle that will be eaten soon, temper may be less important. If melted chocolate has seized or turned thick, Melting Chocolate Without Seizing will save more decorations than a fancier piping bag.
Shavings are about temperature
Chocolate shavings are the easiest decoration because they ask for little equipment. A bar, a vegetable peeler, a knife, or a grater can make them. The hard part is temperature. Cold chocolate splinters into dust. Warm chocolate smears. Chocolate at a cool room temperature gives thin pieces that hold shape long enough to land on the dessert.
Use shavings where softness is welcome: whipped cream, pudding, tiramisu, ice cream just before serving, custard, cakes with cream filling, or hot drinks. They melt quickly, which is part of the pleasure. On a warm cake, they may disappear. On a wet surface, they may darken and clump. On a dry frosted surface, they can look elegant and taste clear.
The chocolate should be pleasant to eat on its own. Shavings are not hidden inside batter. They hit the nose first because their thin edges release aroma quickly. A stale bar will smell stale in shavings. A waxy compound coating will look tidy but may taste flat. Chocolate Texture and Mouthfeel helps explain why thin chocolate can reveal fat quality and melt so directly.
Curls need a flexible sheet
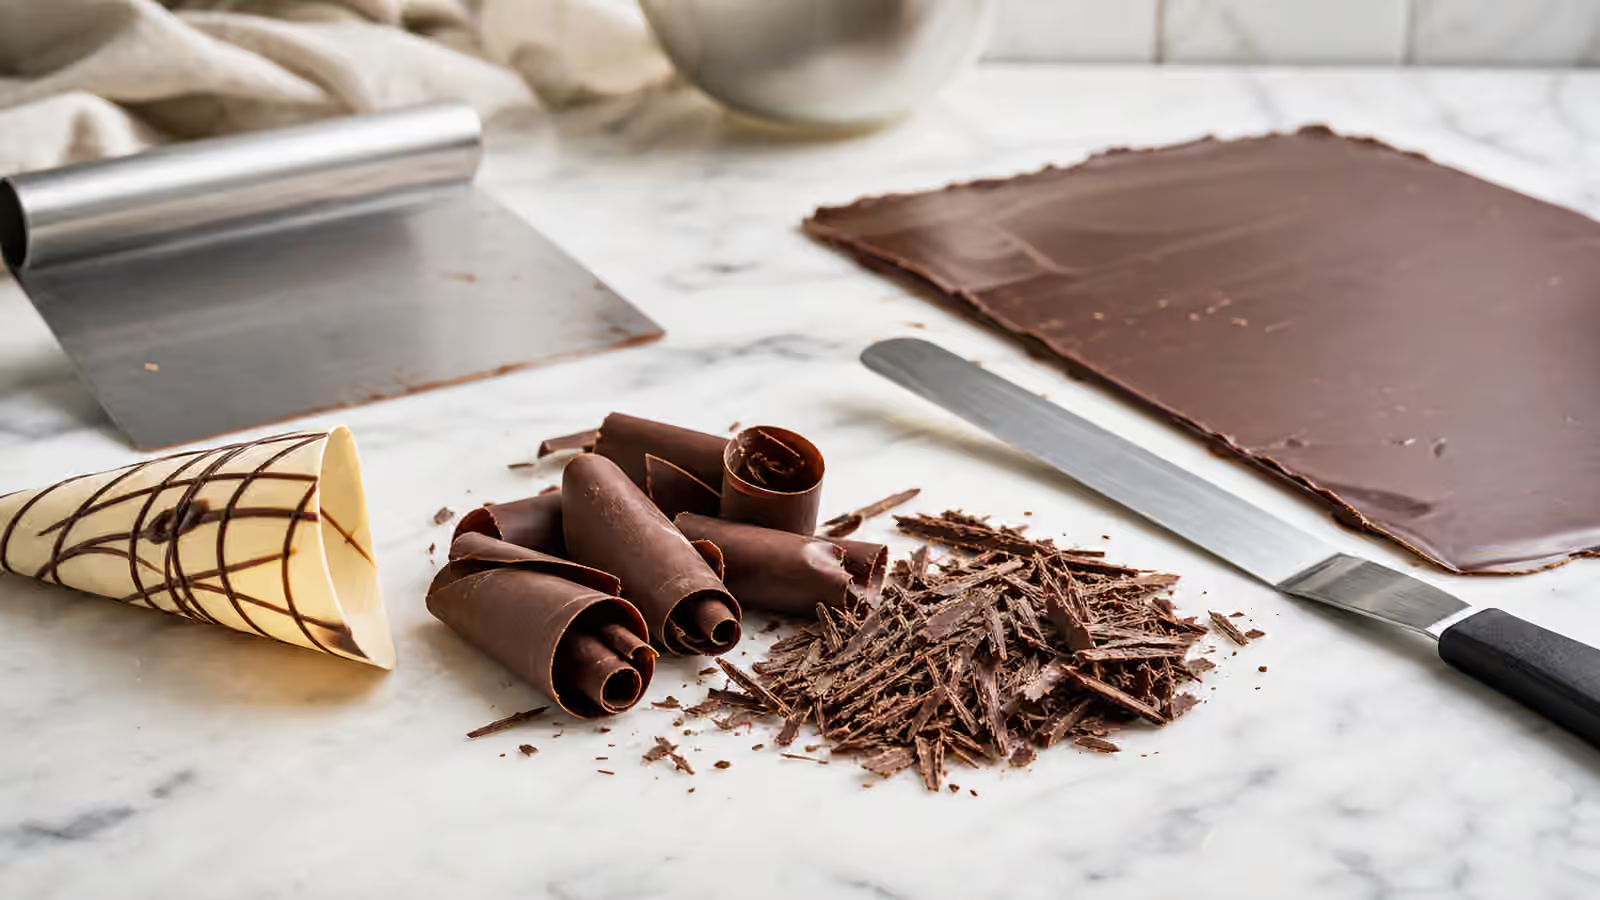
Chocolate curls look difficult because they collapse when the temperature is wrong. The chocolate must be firm enough to lift but flexible enough to bend. Pastry cooks often spread melted chocolate thinly on a cool surface, let it set until just pliable, then push a scraper through it at a shallow angle. If the sheet is too soft, it smears. If it is too cold, it breaks into flakes. If it is just right, the chocolate rolls away from the scraper into curls.
You can also make small curls from the side of a thick bar with a peeler. Warm the bar gently in your hands first, then peel along a broad edge. This produces looser, less formal curls, which can be perfect for a home cake. The result will vary with the chocolate’s thickness, cocoa butter content, temper, and room temperature.
Curls should be light. A heavy curl may look impressive but can make a bite awkward. The best curls collapse easily against cream or cake, releasing aroma and a little snap without requiring the diner to fight them. Store them cool and handle with a spoon or offset spatula if possible. Fingers leave heat marks quickly.
Drizzles should match the dessert
A drizzle is not automatically better because it is dark and shiny. A thick, cold drizzle can sit on a cookie like a raised cord. A thin drizzle can vanish into a warm cake. A sweet white drizzle can make an already sweet dessert feel louder without improving it. The drizzle should create contrast.
For cookies, biscotti, and bars, tempered chocolate gives the cleanest set and the least sticky finish. For cakes and ice cream, a softer sauce or ganache drizzle may be better because it cuts easily. The guide to Chocolate Sauces and Glazes goes deeper into pourable finishes, but the decoration rule is simple: set only when set texture helps.
Parchment cones, piping bags, spoons, and forks all work. A cone gives fine control. A spoon gives a more relaxed line. A fork can make thin threads but also flick chocolate where you do not want it. The chocolate’s viscosity matters more than the tool. If it is too thick, the line will break. If it is too warm and loose, it will spread. Test on parchment before decorating the dessert.
Shards and sheets need temper or a soft destination
Chocolate shards are thin sheets broken into pieces. They can be plain, marbled, sprinkled with nibs, brushed with cocoa, or layered with another chocolate. They work best when they are thin enough to bite and matched to a soft dessert such as mousse, cream, custard, or cake. A thick shard may look dramatic in a photo but become annoying at the table.
Tempered chocolate makes shards glossy and snappy. Untempered chocolate can still be used for a refrigerated dessert, but it may look dull, streaky, or soft at room temperature. If the shard is only a garnish for a chilled mousse that will be eaten immediately, that may be acceptable. If it is meant to stand upright on a cake for hours, temper is worth the trouble.
Inclusions complicate shards. Nuts, cacao nibs, dried fruit, and salt can add flavor, but they also change break lines and thickness. Large inclusions can make the shard hard to bite. Damp fruit can disturb the surface. Oily nuts can shorten freshness. The same logic from Chocolate Inclusions applies at a smaller scale: every addition changes texture.
Cocoa dusting should taste like cocoa
Cocoa powder dusting is common on truffles, tiramisu, cakes, and plates. It can look refined, but it can also taste dry and bitter if used carelessly. A dusting is the first thing the tongue meets, so the powder should be fresh and suited to the dessert. Natural cocoa gives sharper brightness. Dutch-process cocoa gives darker color and a smoother profile. Black cocoa gives dramatic color but can taste flat if it carries the whole finish.
Sift from a height for an even layer, but do not bury the dessert. Thick cocoa powder on a moist surface becomes paste. On whipped cream, it can bloom into dark patches. On truffles, it can protect the surface and add bitterness, but too much will make the first bite dusty. The guide to Cocoa Powder gives more detail on choosing the powder itself.
Powdered sugar and cocoa together are sometimes used for contrast, but they send different signals. Sugar softens the look and taste. Cocoa sharpens it. If the dessert is already sweet, cocoa alone may be better. If the dessert is very bitter, a lightly sweetened dusting may make the first bite more welcoming.
Decoration should not fight storage
Chocolate finishes suffer from heat, humidity, cold surfaces, and strong odors. Shavings wilt on warm cream. Curls break in crowded containers. Tempered shards can bloom if they sit through temperature swings. Drizzles can pick up refrigerator smells if left uncovered. Store the decoration according to its form, then assemble close to serving when possible.
Refrigeration deserves care. If a decorated dessert must be chilled, cover it in a way that protects it from odors and moisture. When removing it from the refrigerator, give it time in the closed container before exposing it to humid air. Condensation on chocolate can lead to sugar bloom, a rough surface, or sticky patches. Chocolate Bloom explains why the surface changes.
The final test is the fork. A decoration that looks impressive but shatters across the plate, sticks to the knife, or makes the bite clumsy has missed its purpose. Chocolate decoration should lead the senses into the dessert: aroma first, then texture, then flavor. A few fresh shavings can do that better than a heavy sculpture. A thin tempered shard can do that better than a thick slab. The cleanest finish is usually the one that understands the dessert beneath it.