Chocolate bloom looks more dramatic than it usually is. A bar that was glossy yesterday may turn gray, streaked, dusty, or chalky after a warm afternoon in a bag or a cold night in a refrigerator. The first reaction is often disappointment, because the surface looks old and the snap may feel less precise. The second reaction is confusion, because bloom can mean two different things that look similar from across the counter.
Bloom is a surface change. It is not one single flaw, and it is not the same as mold. Fat bloom comes from cocoa butter moving or crystallizing in the wrong form. Sugar bloom comes from moisture touching the surface, dissolving a little sugar, and leaving rough crystals behind as the water evaporates. Both can make chocolate look pale. Both can dull flavor and texture. The useful question is not simply whether the chocolate has bloomed, but what kind of bloom you are seeing and what job you still want the chocolate to do.
This guide sits beside Chocolate Texture: Snap, Melt, and Mouthfeel and Storage and Serving . Those guides explain how chocolate should feel and where it should live. Bloom is the troubleshooting chapter for the moment when the surface no longer tells the story you expected.
Why Bloom Happens
Chocolate is not only flavor in a solid block. It is a carefully organized mixture of cocoa solids, sugar, cocoa butter, and sometimes milk ingredients. Cocoa butter is especially important because it can set into several crystal forms. The desirable form gives chocolate its gloss, clean snap, and tidy melt. The less stable forms can rearrange over time, especially when chocolate warms, cools, warms again, or was never tempered firmly in the first place.
That is why fat bloom often appears after temperature swings. A bar left near a sunny window may soften slightly, even if it never becomes a puddle. As it cools again, cocoa butter can migrate to the surface and recrystallize there as pale streaks or a gray film. The same thing can happen to dipped chocolates, bark, or molded pieces if the chocolate was a little out of temper when it set. The surface may look acceptable at first, then bloom days later as unstable crystals continue to reorganize.
Sugar bloom needs a different trigger: moisture. Chocolate itself is low in water, but the air around it may not be. A cold bar taken from the refrigerator into a warm room can collect condensation, just like a chilled glass. That fine water layer dissolves sugar on the chocolate’s surface. When the moisture evaporates, the sugar remains as tiny rough crystals. The result is often paler, drier, and more granular than fat bloom.
Because the causes differ, the prevention differs. Fat bloom asks for stable temperature and better temper. Sugar bloom asks for dryness and slower transitions between cold and warm environments. Treating them as one problem leads to vague advice. Separating them makes the fix practical.
Reading Fat Bloom
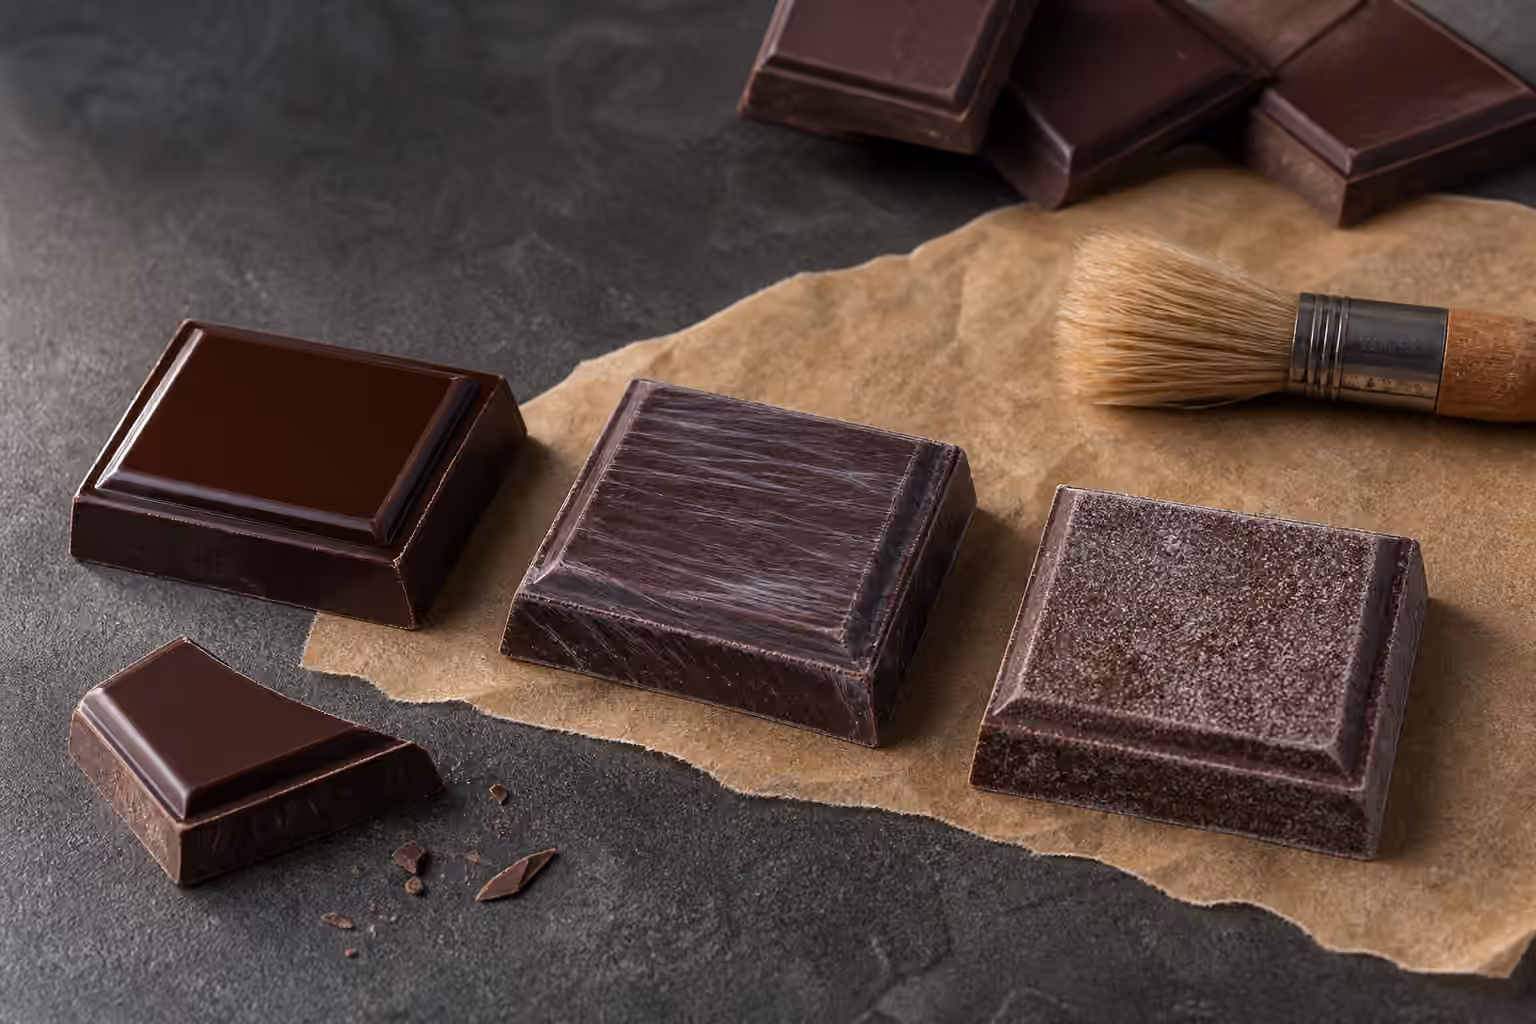
Fat bloom usually looks smooth rather than crusty. It can appear as gray swirls, soft streaks, cloudy patches, or a dusty film that seems to sit inside the surface rather than on top of it. If you rub it lightly with a fingertip, it may smear or become glossier from the warmth of your skin. The chocolate may feel slightly softer than expected, especially if it has spent time in a warm place.
The flavor of fat-bloomed chocolate is often still recognizable, but the texture changes. The snap can be weaker. The melt can feel waxier or slower. A bar that once opened with fruit or roast may now taste flatter because the surface no longer melts cleanly and the cocoa butter structure has lost some order. This is why bloom matters even when the chocolate is still usable. It interrupts the way aroma reaches you.
Fat bloom is common on chocolate that has been stored too warm, moved through large temperature swings, or tempered poorly. It can also show up on filled chocolates when fat from a nut paste, praline, or soft filling migrates into the shell. That kind of bloom is still about fat movement, but the source may not be only cocoa butter. A hazelnut filling, peanut butter center, or oily inclusion can push fat toward the surface over time, especially if the shell is thin or the piece sits warm.
If you are working with melted chocolate at home, fat bloom is the symptom that sends you back to Tempering Chocolate at Home or Tempering Troubleshooting . The remedy is not to polish the surface after the fact. It is to remelt, re-temper, and let the chocolate set in a cooler, steadier place.
Reading Sugar Bloom
Sugar bloom tends to feel rougher. The surface may look pale, speckled, chalky, or frosted. If you touch it, it can feel dry rather than greasy. Under bright light, it may look like very fine crystals scattered across the chocolate. It often follows refrigeration, freezing, or storage in a damp cabinet, especially when chocolate was not sealed well before being chilled or was opened before it had warmed back up.
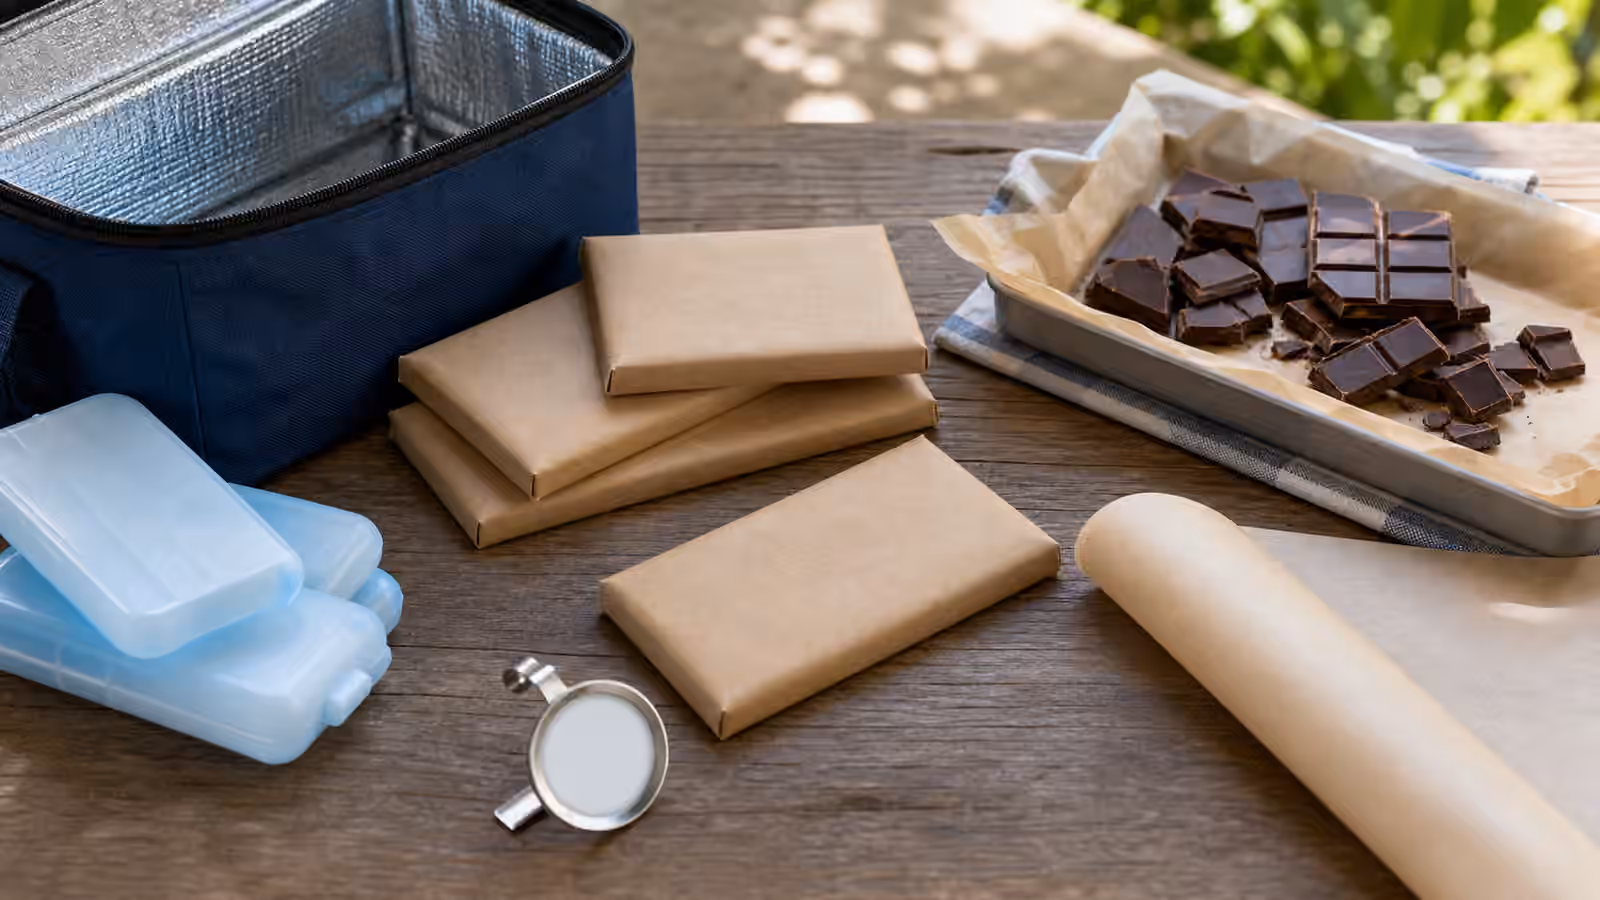
The refrigerator is not automatically forbidden, but it is risky because of condensation and odor. Chocolate absorbs smells readily, and cold air often cycles moisture. If you must chill chocolate because the room is warm, the safer method is to wrap it well, seal it in an airtight container or bag, cool it, then let it warm while still sealed before opening. The goal is to keep moisture condensing on the outside of the wrapping instead of directly on the chocolate.
Sugar bloom changes texture more sharply than flavor. A piece may taste acceptable after the rough surface melts, but the first impression can be sandy or stale. For slow tasting, that matters. When you are trying to read origin notes, acidity, roast, and finish, a rough sugar layer adds noise. The Chocolate Tasting method works best with chocolate that has a clean surface and a stable melt.
Sugar bloom is harder to undo gracefully in a finished piece because water has already disturbed the surface. If the chocolate is plain, melting it into a batter, sauce, or drinking chocolate is often the easiest path. If it is a filled bonbon that has been damp, sticky, or odorous, there is less to rescue. Filled pieces have more ingredients, more water activity, and shorter practical lives than plain bars, so treat them with more caution.
What to Do With a Bloomed Bar
The first step is to smell the chocolate. A bloomed plain bar that smells like cocoa, nuts, fruit, caramel, or ordinary chocolate is different from a bar that smells rancid, musty, strongly stale, or like the refrigerator. Odor matters because cocoa butter carries aromas from its surroundings. Bloom alone is a surface and texture problem. Bad storage odors are a flavor problem that baking may not hide.
For eating plain, bloom is a quality issue. You can still taste the bar, but do not use that tasting as your final judgment of the maker or origin. Let a small piece come to a comfortable room temperature and notice what remains after the flawed surface melts. If the flavor is still pleasant, enjoy it casually. If the bar was expensive or rare, the disappointment is real, but the lesson is mostly about handling rather than cacao.
For baking, plain bloomed chocolate can be very useful. Once it is chopped and melted into brownies, cake batter, ganache, or a sauce, the surface appearance no longer matters. Fat bloom is especially forgiving in this context because the cocoa butter will melt back into the mixture. Sugar bloom can also work if the chocolate tastes clean and dry, though a badly rough surface may make it less appealing for delicate ganache. For choosing the right destination, Choosing Chocolate for Baking is the better guide than the wrapper’s original prestige.
For tempering projects, fat-bloomed chocolate can often be re-tempered if it is plain and still tastes good. Chop it, melt it fully enough to erase the old crystal structure, then temper it properly. Sugar-bloomed chocolate is less ideal for tempering because moisture and sugar crystals can interfere with smooth flow. If it seems dry and only lightly affected, it may still work in a forgiving bark or drizzle. If it feels gritty or has been damp, use it in a recipe where water, dairy, or other liquids are already part of the plan.
For melted chocolate that has become thick, grainy, and paste-like because water got into the bowl, you are dealing with seizing rather than bloom. That problem happens in the moment, not days later on a set surface. Melting Chocolate Without Seizing explains how steam, wet tools, and a few drops of water can change melted chocolate almost instantly.
Bloom on Homemade Chocolate Work
Bloom is especially frustrating after you have dipped fruit, made bark, or filled molds, because the pieces may look fine at first. A day later, gray streaks appear. A week later, the shells look dusty. This delayed bloom usually points to temper, temperature, or filling migration.
For bark, the usual cause is chocolate that was spread while slightly out of temper or cooled in a room that was too warm. Toppings can add complications. Cold nuts or dried fruit can shock the chocolate. Oily nuts can encourage fat movement. Damp fruit can cause sugar bloom or seizing. The best habit is simple: keep inclusions dry, bring them to room temperature, and add them while the chocolate is still fluid but properly tempered.
For molded chocolates, bloom can come from molds that were not clean and dry, shells that cooled unevenly, fillings that were too warm, or finished pieces stored in unstable conditions. A glossy shell needs more than a good recipe. It needs a clean mold, well-tempered chocolate, a filling that will not melt the shell from inside, and a resting place away from humidity and heat. That sounds fussy until it becomes routine. Chocolate rewards steadiness.
For dipped strawberries, sugar bloom and condensation are constant risks because fresh fruit brings water. The berries must be dry on the surface before dipping, and they should not be refrigerator-cold when they meet the chocolate. Even then, chocolate-covered fruit is best treated as short-lived. It is a fresh dessert, not a shelf-stable chocolate project.
Preventing Bloom Without Overthinking It
The most reliable prevention is boring storage. Keep plain chocolate in a cool, dark, dry place away from ovens, windows, dishwashers, spice cabinets, and coffee. Keep it wrapped or sealed so it does not absorb odors. Avoid moving it repeatedly between cold and warm environments. If chilling is necessary, seal first, warm while still sealed, then open after the package has reached room temperature.
For finished chocolate work, steady cooling matters as much as steady storage. Do not rush a room-temperature project into a refrigerator unless the room is genuinely too warm for it to set. If you do use the refrigerator briefly, protect the pieces from moisture and remove them once set. Long cold storage is where condensation and odor problems begin.
For tasting bars, buy at a pace that matches how you eat. A drawer full of special bars sounds pleasant until the room warms, the seasons change, and the older bars begin to lose aroma. Dark chocolate often holds longer than milk or white chocolate, and plain bars hold better than filled pieces, but all chocolate tastes better when it has not spent months absorbing a room.
The useful attitude is not fear. Chocolate is resilient enough to survive ordinary kitchen life, but it is sensitive enough to show you when conditions were careless. Bloom is that visible record. It tells you that fat moved, moisture touched the surface, or the crystal structure was never stable. Once you can read the mark, the fix becomes less mysterious: steadier temperature, drier handling, cleaner temper, and a better destination for the chocolate already in front of you.