Introduction
Let’s be honest — you probably wouldn’t uncork a beautiful bottle of wine and leave it sitting in a hot sunny window, right? The same respect goes for your beer. Great beer deserves proper treatment, and how you store, serve, and pour it dramatically affects the flavor, aroma, and overall enjoyment. Whether you’re a new craft beer explorer or a seasoned hop-head, this guide will make sure every single beer you drink reaches its full potential. Think of it as the difference between listening to your favorite album through tinny phone speakers versus a great pair of headphones. Same music, wildly different experience.
Storage Essentials
The Three Enemies of Beer
Beer has three arch-nemeses, and unfortunately, they’re lurking everywhere in your home. Knowing your enemy is half the battle, so let’s get into it.
1. Light
Here’s a fun fact that might change how you look at the beer aisle forever: UV rays react with compounds in hops to create a chemical called 3-MBT, which produces that unmistakable “skunky” off-flavor. Yes, the reason skunky beer exists is literally because of light. Clear and green bottles are the most vulnerable — they’re basically sunbathing with no sunscreen. Brown bottles offer the best glass-based protection since they filter out most harmful UV wavelengths, but cans? Cans are the undisputed champions of light protection. They’re completely light-proof, which is one big reason so many craft breweries have embraced the humble aluminum can.
2. Heat
Think of heat as an accelerator pedal for everything bad that can happen to beer. It speeds up the aging process and breaks down delicate flavor compounds, creating oxidized, cardboard-like flavors that nobody asked for. And if you’re a hop lover, this one’s especially painful: heat degrades hop aroma at an alarming rate. That beautiful tropical, citrusy IPA you brought home? Leave it somewhere warm for a few weeks and it’ll taste like a shadow of its former self.
3. Oxygen
Oxygen is the silent assassin of the beer world. It causes staling and oxidation, transforming your once-vibrant beer into something that tastes like wet cardboard, old paper, or — in more advanced cases — sherry-like flavors that have no business being in your pale ale. Hoppy beers are especially sensitive to oxygen exposure, which is yet another reason to drink that IPA sooner rather than later.
Ideal Storage Conditions
So now that you know what you’re fighting against, let’s talk defense. The ideal setup is simpler than you might think.
When it comes to temperature, refrigerated storage between 35–50°F is the gold standard for all beer. If you don’t have room in the fridge, a cool cellar in the 50–60°F range is perfectly acceptable for most styles. What you really want to avoid is leaving beer at room temperature — anything above 70°F is basically a ticking time bomb for flavor degradation.
For light, the rule is dead simple: dark storage, always. A closet, a basement, or even just the fridge with the door shut — any of these will do the trick. Just keep those precious bottles and cans away from windows and fluorescent lights.
As for position, store your bottles upright. Always. This minimizes the beer’s contact with oxygen trapped in the headspace and prevents yeast from forming an unsightly ring along the side of the bottle. The only exception? Some traditional Belgian bottles that are designed to rest on their sides, but unless you know for certain, upright is your safe bet.
And then there’s the question of how long beer actually lasts. Most beers are best consumed within three to six months of purchase. IPAs should be treated with genuine urgency — drink them within 30 to 90 days for peak hop flavor. On the flip side, big, high-ABV beers designed for aging can actually improve over the course of years when stored properly. We’ll get to that in a moment.
Temperature Control
Let’s break this down into practical zones. Your refrigerator (35–40°F) is the ideal home for IPAs, Pale Ales, and light lagers — basically anything where you want to preserve freshness and hop character, plus any beer you plan on drinking relatively soon. A cellar (50–60°F) is where you want to keep beer you’re intentionally aging: Belgian ales, Barleywines, Imperial Stouts, and sours all do beautifully in this temperature range.
Now for the “never” list. Never store beer at room temperature (70°F or above) for extended periods. Never put beer in the freezer — it can actually freeze and the bottle or can can explode, leaving you with a sticky, sad mess and no beer. And perhaps most importantly, avoid temperature swings. Taking beer from cold to warm and back to cold again stresses the liquid and accelerates off-flavor development. Pick a temperature and stick with it.
Beer That Can Age
Not all beers are built the same, and some actually reward patience. Beers that improve with age over one to five-plus years include Barleywine (typically 8–12% ABV or higher), Imperial Stout (9%+ ABV), Belgian Quadrupels, sours and Lambics, barrel-aged beers, and strong ales in general. What do these all have in common? They tend to have high ABV (8% or more), high hop or sour character that acts as a natural preservative, and many are bottle-conditioned with live yeast that continues to work its subtle magic over time.
On the other hand, some beers should absolutely never be aged. IPAs and hoppy beers lose their defining character as hop compounds fade. Light lagers, Hefeweizens, and really most beers under 7% ABV are designed to be enjoyed fresh. Aging them won’t add complexity — it’ll just strip away what made them delicious in the first place.
Serving Temperature
Temperature profoundly affects flavor perception.
This is one of those things that sounds like snobbery until you actually try it and realize it’s just… science. The temperature of your beer changes which aromatic compounds volatilize, how your taste buds perceive bitterness and sweetness, and even how carbonation feels on your palate.
Temperature Chart
| Beer Style | Ideal Temp | Why |
|---|---|---|
| Light Lagers, Pilsners | 38-45°F | Crisp, refreshing |
| Wheat Beers | 40-45°F | Light, clean |
| IPAs, Pale Ales | 45-50°F | Balance hops & malt |
| Amber, Brown Ales | 50-55°F | Malt complexity |
| Stouts, Porters | 50-55°F | Roasted flavors |
| Belgian Ales, Saisons | 45-55°F | Yeast character, esters |
| Barleywines, Imperial Stouts | 55-60°F | Rich, complex, warming |
| Sours, Lambics | 45-50°F | Tart complexity |
Why Temperature Matters
When beer is too cold — we’re talking under 40°F — you’re essentially putting a muzzle on its flavor. Aromas become muted, bitterness feels harsher and more one-dimensional, and carbonation takes on a sharp, almost aggressive edge. It’s like drinking flavorless soda. Sure, marketing has spent billions convincing us that “ice cold” is the only way, but that approach works mainly for beers designed to be simple and refreshing. A nuanced craft beer deserves a chance to show off what it’s got.
Swing the other direction and serve beer too warm — above 60°F — and things get equally problematic. Alcohol flavors start to dominate, sweetness becomes cloying and heavy, and whatever refreshing quality the beer had simply evaporates. The whole drinking experience feels unbalanced and frankly unpleasant.
But when you hit that sweet spot? Magic. Full flavor expression. Balanced interplay between bitterness and malt sweetness. Proper aroma that actually reaches your nose the way the brewer intended. It’s refreshing yet complex — exactly what great beer should be.
Warming Beer from Fridge
If your beer is too cold straight out of the fridge, don’t panic — and definitely don’t reach for the microwave. Just pour it into your glass and let it sit for five to ten minutes. You can also cup your hands around the glass, letting your body heat gradually bring the temperature up. You’ll be amazed at how much flavor reveals itself as the beer warms even a few degrees. Most beers genuinely taste best slightly warmer than standard fridge temperature, which is a game-changer once you start paying attention.
Glassware Guide
Different glasses enhance different beers, and while it might seem like marketing nonsense at first glance, there’s real science behind the shapes. The width of the opening affects how aromas reach your nose. The shape of the bowl affects how carbonation behaves. The thickness of the glass affects temperature retention. Let’s walk through the major players.
Universal Glass: Pint Glass (Shaker)
The trusty pint glass — that straight-sided, slightly tapered cylinder you’ve seen at every bar in America. It holds 16 ounces (the standard US pint), and it works well enough for IPAs, Pale Ales, Ambers, and most ales in general. It’s simple, stackable, and shows off the beer’s color nicely. The downside? It doesn’t do much to capture or concentrate aromas. Think of it as the reliable sedan of beer glasses — gets the job done, but won’t blow anyone’s mind.
Pilsner Glass
Tall, tapered, and slender, the Pilsner glass is all about elegance. Holding 12 to 16 ounces, it’s purpose-built for Pilsners, light lagers, and Kölsch. The narrow shape showcases the beer’s clarity and lets you watch those beautiful streams of tiny bubbles rising to maintain a pristine white head. There’s something deeply satisfying about watching a perfectly poured Pilsner in its proper glass — it’s practically art.
Weizen Glass (Wheat Beer)
You’ve probably seen this one even if you didn’t know its name — that tall, curvaceous glass with a narrow base that opens up into a wide top. At 16 to 24 ounces, it’s generously sized, which is the point: it needs to accommodate the large, billowy head that wheat beers are famous for. It’s the glass of choice for Hefeweizen, Witbier, and other wheat beers, and many are designed to hold an entire 500ml bottle plus foam. The wide top also lets all those banana and clove aromas waft up beautifully.
Tulip Glass (Belgian Glass)
The tulip is where things start getting serious. With its bulbous body, flared rim, and elegant stem, it holds 10 to 14 ounces and absolutely shines with Belgian ales like Tripels, Dubbels, and Quadrupels, as well as IPAs and Saisons. The inward curve of the bowl captures and concentrates aromas before the flared lip directs them right at your nose. Many tulip glasses feature a nucleation point — a small etched mark at the bottom — that creates a steady stream of bubbles to maintain the head. It’s arguably the most versatile “serious” beer glass you can own.
Snifter
If you’ve ever had brandy, you know this shape: a short stem supporting a wide bowl that narrows at the opening. Holding 8 to 14 ounces, the snifter is designed for contemplation. It’s perfect for Barleywines, Imperial Stouts, and other strong ales. The shape warms the beer gently in your hand while concentrating intense aromas into the narrow opening. This is a sipping glass, meant for beers that deserve slow appreciation.
Goblet/Chalice
Wide bowled with a thick stem and substantial heft, the goblet (or chalice) holds 10 to 16 ounces and is the traditional vessel for Belgian ales, Abbey beers, and Trappist ales. The wide mouth encourages deep, generous sips, and there’s something undeniably ceremonial about drinking from one. It carries that monastic, old-world gravitas that makes your Belgian Dubbel taste like it was poured by monks — which, honestly, it might have been.
Stange (Cylindrical)
The Stange is a delightfully minimalist glass — a narrow, straight cylinder holding just 6 to 8 ounces. It’s the traditional glass for Kölsch, Altbier, and other delicate ales. The small size is intentional: it means your beer stays cold and carbonated to the last sip, since you’re drinking it quickly and getting a fresh one. In Cologne, Germany, servers traditionally carry trays loaded with Stanges, replacing your empty one with a fresh pour until you place your coaster on top to signal you’ve had enough.
Teku (Modern Craft)
The Teku is the new kid on the block — a stemmed glass with an angular, almost architectural tulip shape, holding 14 to 16 ounces. Designed through a collaboration between an Italian sensory expert and a brewer, it’s engineered for optimal aroma capture and comfortable holding. It’s become the go-to glass at craft breweries, beer bars, and competitions, and it works beautifully with virtually any style. If you’re going to own just one “nice” beer glass, the Teku is a phenomenal choice.
Mug (Stein)
Heavy, handled, thick-glassed, and unapologetically robust, the beer mug (or Stein) holds anywhere from 16 ounces up to a full liter. It’s the iconic glass of German beer halls, purpose-built for Märzen, Oktoberfest, Dunkel, and generally casual, convivial drinking. The thick glass helps keep the beer cold, the handle means your warm hands never touch the glass, and there’s a primal satisfaction in hoisting a full liter stein that no stemmed glass can match.
When Glassware Matters Most
Glassware becomes truly critical when you’re tasting or evaluating beer, when you’ve splurged on something special or expensive, when you’re drinking Belgian ales (where tradition is part of the experience), and during competitions or formal tastings. It matters less when you’re just casually hanging out, at outdoor events where breakage is a concern, or whenever clean proper glassware simply isn’t available. And here’s a secret worth knowing: in a pinch, a clean, clear wine glass works surprisingly well for almost any beer. The shape is naturally good at capturing aromas, and you probably already have one.
The “Beer Clean” Glass
Here’s an uncomfortable truth: a dirty glass can absolutely ruin an otherwise perfect beer. It’s the single most overlooked factor in home beer service, and once you understand it, you’ll never look at your glassware the same way again.
What is “Beer Clean”?
A “beer clean” glass is one that’s completely free from soap residue, grease and oils, dirt and dust, and lint. It sounds simple, but achieving it consistently requires a little more attention than you might think. Even invisible traces of these contaminants can destroy head retention, strip away lacing, and make your beer look and taste flat.
Testing Beer Clean Glass
There are three easy ways to check if your glass is truly beer clean. The sheeting test is the simplest: rinse the glass with water and watch how it behaves. On a clean glass, water will sheet evenly and smoothly down the sides. If water beads up or clings in droplets, there’s residue lurking and the glass isn’t ready.
The head retention test happens naturally when you pour your beer. On a clean glass, foam will stick to the sides as you drink, creating beautiful rings of lacing. The head should be persistent and stable, and you shouldn’t see large bubbles clinging stubbornly to the sides of the glass.
Finally, check the carbonation pattern. A beer clean glass shouldn’t have random streams of tiny bubbles rising from specific spots on the walls — those indicate nucleation points caused by residue or imperfections. The exception, of course, is glasses that have an intentionally etched logo or nucleation point at the bottom, which is there by design.
How to Clean Beer Glasses
The best method is straightforward but requires discipline. Rinse the glass immediately after use — don’t let residue dry and set. Wash it with hot water and just a tiny amount of unscented dish soap. Then rinse it thoroughly to ensure absolutely no soap residue remains. Air dry it upside down on a rack (never towel dry it, because lint from towels will destroy your head retention). Finally, store it upside down to prevent dust from settling inside.
What should you avoid? Don’t wash your beer glasses alongside greasy dishes. Be cautious with the dishwasher — it can leave residue, though some machines handle it fine, so test yours. Never towel dry. Never use heavily scented or heavy-duty soap. And try not to touch the inside of the glass or the rim with your fingers, since the natural oils from your skin are enough to cause problems. If you want to go full pro, invest in a dedicated beer glass brush. Your foam will thank you.
Proper Pouring Technique
How you pour your beer affects the head, carbonation level, aroma release, and ultimately the flavor. It’s one of those small things that makes a surprisingly big difference, and once you nail it, you’ll feel like a genuine pro every time you crack open a bottle.
Serving & Storage FAQs
How cold should I store beer? Refrigerate at 35-50°F; lagers on the colder side, strong/dark ales closer to cellar temp (50-55°F). Avoid temperature swings.
Do bottles need to stay upright? Yes. Store upright to minimize oxidation and prevent yeast rings on glass. Only some Belgian bottles are exceptions.
How long does beer last? Most beers: 3-6 months. IPAs: drink within 30-90 days for peak hops. Big/aged beers can last years if stored cool and dark.
Why does foam matter? Proper head releases aroma, smooths carbonation, and signals clean glassware. Aim for 1-2 fingers.
Can light ruin beer? UV light skunks beer quickly—keep bottles away from sunlight; cans and brown glass protect best.
How do I pour bottle-conditioned beer? Pour gently, stop before sediment enters the glass—or swirl and add it intentionally if you enjoy the yeast character.
Standard Pour (Most Beers)
The standard pour is a technique every beer lover should have in their back pocket. Start with a clean, appropriate glass — this sets the foundation for everything that follows. Hold the glass at a 45-degree angle and begin pouring the beer gently down the side. This initial tilt prevents excessive foaming and lets the beer flow smoothly into the glass. When the glass is about halfway full, gradually straighten it to an upright position and begin pouring directly into the center of the liquid. This deliberate shift is what creates that gorgeous, pillowy head of foam. You’re aiming for one to two finger-widths of foam on top.
Why go through all this trouble? Because that head isn’t just for looks. The act of creating it releases excess CO2 from the beer, which means less bloating in your stomach later. It activates and lifts aromatic compounds to your nose, making the beer smell (and therefore taste) better. And honestly? A properly poured beer with a beautiful head just looks stunning. It transforms the act of drinking from utilitarian to something genuinely pleasurable.
Bottle-Conditioned Beer
Bottle-conditioned beers contain live yeast sediment at the bottom of the bottle, which means they require a slightly different approach. Pour the beer carefully and smoothly, keeping the bottle at a gentle angle. As you near the end of the bottle, watch closely — when you see the sediment starting to migrate toward the neck, stop pouring. Leave the last half-inch or so of beer in the bottle.
But here’s where personal preference comes in. Some people love the added flavor and texture that the yeast sediment brings. If that’s you, give the remaining beer in the bottle a gentle swirl to suspend the yeast, then pour it right into your glass. The yeast is completely safe to drink and actually adds B vitamins and a subtle bread-like flavor that can complement the beer beautifully. It’s entirely your call.
Hefeweizen (Traditional Method)
Hefeweizen has its own special pouring ritual, and it’s a joy to perform. Start by pouring about three-quarters of the bottle into your glass using the standard technique described above. Then — and this is the fun part — pick up the bottle, give it a firm swirl to completely suspend all the yeast sediment that’s settled at the bottom, and pour that cloudy yeast slurry right into the glass. The result is a beautifully hazy, yeast-clouded beer with that authentic Bavarian appearance. This isn’t a flaw — it’s the whole point. That suspended yeast adds creaminess, complexity, and visual appeal.
Nitro Beers (Guinness-style)
Nitro beers use nitrogen instead of (or in addition to) CO2 for carbonation, which gives them that famously creamy, velvety texture. The pour is correspondingly unique. Hold your glass at a 45-degree angle and pour until it’s about three-quarters full. Then — and this is crucial — set it down and wait. Watch the mesmerizing cascade as millions of tiny nitrogen bubbles flow downward along the sides and upward through the center, gradually settling into a dense, creamy head. Once the cascade is complete, top off the glass to create a thick, luxurious dome of foam. The patience is part of the ritual, and rushing it means missing one of beer’s great visual spectacles.
Belgian Pour (Some Styles)
Some Belgian styles take the opposite approach to everything we’ve said about gentle, controlled pouring. For certain Belgian ales, you actually want to pour aggressively, almost violently, into the glass to generate a massive, rocky head of foam. Let that impressive tower of foam settle a bit, then top off the glass. The result is a dramatic, towering head that’s considered traditional and proper for these styles. It’s one of those beautiful moments where Belgian brewing tradition says “more foam is more better,” and who are we to argue?
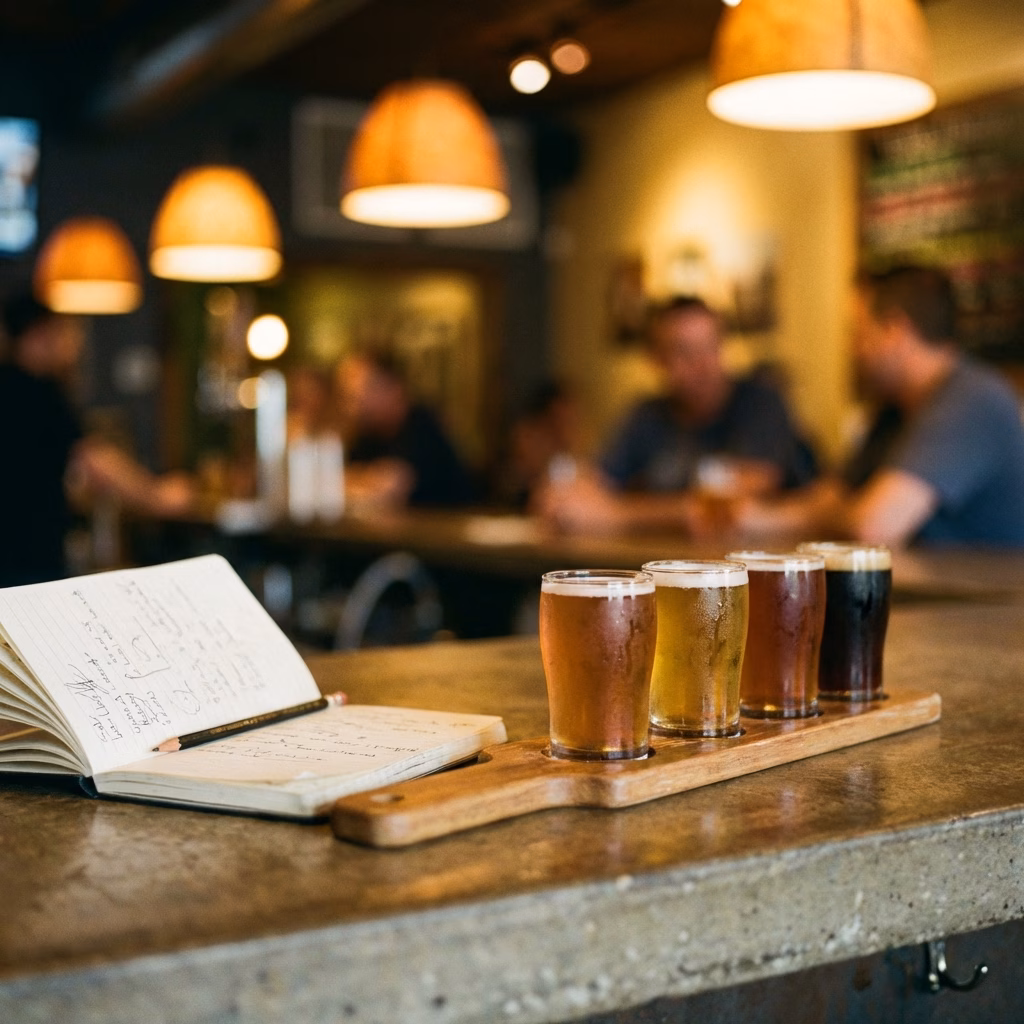
Serving Size
Standard Servings
| Format | Size | Best For |
|---|---|---|
| Taster | 2-4 oz | Sampling, flights |
| Half pour | 6-8 oz | Strong beers, sharing |
| Standard | 12 oz | Most beers |
| Pint | 16 oz | Session beers, casual |
| Large | 20-24 oz | Light beers, German styles |
When to Serve Less
Not every beer calls for a full pint, and knowing when to dial back the pour size is a mark of genuine beer wisdom. High-ABV beers at 8% and above are best enjoyed in 8 to 10 ounce servings — these are sipping beers, not session beers, and a full pint of an 11% Barleywine is more punishment than pleasure. When you’re tasting or comparing multiple beers, 4-ounce samples let you explore without getting overwhelmed (or, let’s be honest, too tipsy to appreciate what you’re drinking). Expensive or rare beers deserve to be savored in smaller, more deliberate portions. And when you’re sharing a special bottle with friends, pouring multiple smaller servings means everyone gets to experience the beer at its best.
Serving Beer at Parties
Pre-Party Prep
Throwing a beer-centric gathering? A little advance planning goes a long way. Chill your beer at least 24 hours ahead of time — the one exception being strong ales, which can stay at cellar temperature. Make sure you have a variety of styles on hand, because your guests will have diverse palates and moods. Wash and prepare your glassware in advance, and if you’re feeling fancy, chill the glasses too. As for quantity, plan on roughly two to three beers per person for a three- to four-hour event.
Serving Tips
When it comes to the order of service, think like a sommelier: start light and end heavy. Begin with a crisp Pilsner or wheat beer to ease people in, progress through Pale Ales and Ambers in the middle of the evening, and finish with a rich Stout or Porter as the night winds down. Offer a genuine variety — something light, something medium, something dark, something hoppy — so there’s a beer for every palate. Keep everything cold using ice buckets or coolers, especially if you’re serving outdoors. Provide glasses whenever possible — even plastic cups are better than drinking straight from the bottle, since you’ll get at least some aroma benefit. And don’t forget food pairings! Beer and food together is one of life’s great pleasures, and thoughtful pairings elevate both the beer and the meal.
Travel & Transport
Transporting Beer
Beer is surprisingly fragile cargo, and a little care goes a long way toward making sure those bottles arrive in the same condition they left the brewery.
For short trips of under two hours, a cooler with ice is your best friend. Keep bottles upright and try to minimize shaking — agitated beer is foamy, messy beer. For longer trips or shipping, pad your bottles well, keep them upright, and use temperature-controlled transport if at all possible. Extreme heat is the biggest danger here; a car trunk in summer can reach temperatures that will wreck your beer in hours.
Flying with beer is doable but requires extra care. Bottles and cans must go in checked bags only due to TSA liquid restrictions. Wrap each bottle individually with bubble wrap, put them inside sealed Ziploc bags (in case of breakage), and accept that there’s always some risk of arriving to a suitcase that smells like a brewery. It’s the price of being a beer enthusiast who travels.
Traveling to Breweries
If you’re planning a brewery crawl — and honestly, why wouldn’t you? — keep a cooler with ice packs in your car for purchases. Plan your route so the beer you buy isn’t sitting in a hot car all day while you visit more stops. Buy early and stash in the cooler, or save your purchasing for the last stop of the day. Your future self, cracking open those bottles at home, will be grateful for the forethought.
Common Serving Mistakes
Even seasoned beer lovers slip up sometimes. The most common error? Serving beer too cold. We’ve been conditioned by years of advertising to think ice-cold is ideal, but for most craft beers, it just numbs the flavor. Equally tragic is pouring without creating any head — no head means missed aromas and an overly carbonated, bloating drinking experience. Dirty glasses are silent killers of head retention and flavor, and using the wrong glassware can genuinely diminish what would otherwise be an excellent beer. Drinking straight from the bottle bypasses your nose entirely, which means you’re missing out on half the experience since so much of what we perceive as “taste” is actually smell. And on the storage side, keeping beer in the light creates those dreaded skunky flavors, while storing it warm accelerates staling faster than you’d think.
Quick Reference
Temperature Quick Guide
For everyday purposes, your fridge works great for the vast majority of beers. Reserve cellar-temperature storage for beers you’re intentionally aging. And if a beer feels too cold when you pour it, just warm it gently in your hand for five to ten minutes — the flavors will open up beautifully.
Glass Quick Guide
When in doubt, remember these core pairings: pint glasses for IPAs and Pale Ales, tulip glasses for Belgian ales, snifters for strong ales and Barleywines, and Pilsner glasses for (you guessed it) Pilsners. Get just those four and you’ll be set for virtually anything.
Pour Quick Guide
The essential technique in a nutshell: tilt the glass to 45 degrees and pour down the side, straighten the glass when you hit the halfway mark, finish by pouring into the center to build the head, and aim for one to two fingers of foam. That’s it — four steps to a perfect pour, every time.
Master the Fundamentals
- Take our Beer Tasting Quiz
- Read Beer Tasting 101
- Explore Beer Styles