Planted tanks change slowly until they suddenly seem different. A crypt sends up one new leaf, a moss pad creeps over a stone, the background stems lean toward the filter, and a pale dusting of algae becomes a green film while you are busy looking at the fish. A photo journal catches those changes before they become vague feelings.
The point is not to make every maintenance day into a photography project. The point is to build a small evidence trail. When the tank looks “off,” you can compare today to two weeks ago. When a plant finally settles in, you can see what changed around it. When algae improves after a light adjustment, you have proof instead of a hunch.
The journal does not need to be fancy. Consistency matters more than presentation. A repeatable phone photo, a short note, and a calm habit of looking back will teach you more than a beautiful album you only update when the aquarium is perfect.
Take Comparable Photos
Use the same angle, distance, time of day, and lighting when possible. The easiest version is a full-front photo from the same chair, floor mark, or tripod spot every week. Turn off room glare if you can. Wipe the outside glass. Let floating food, bubbles, and loose plant bits settle before the evidence shot unless those details are what you are documenting.
Take the photo before maintenance when the tank is honest: algae is visible, stems show their true height, floaters reveal how much surface they cover, and the substrate shows whether waste is accumulating. After a trim, water change, or rescape, take a second photo to record what you actually changed. The before image diagnoses the system. The after image records the intervention.
Close-ups are useful for algae, plant health, spawning behavior, pest snails, damaged leaves, or equipment issues, but the full-tank image gives context. A leaf close-up without a full-tank view can make one small problem feel like the whole aquarium is failing. A full-tank photo shows whether the issue is spreading, isolated, or simply more visible because the rest of the tank is improving.
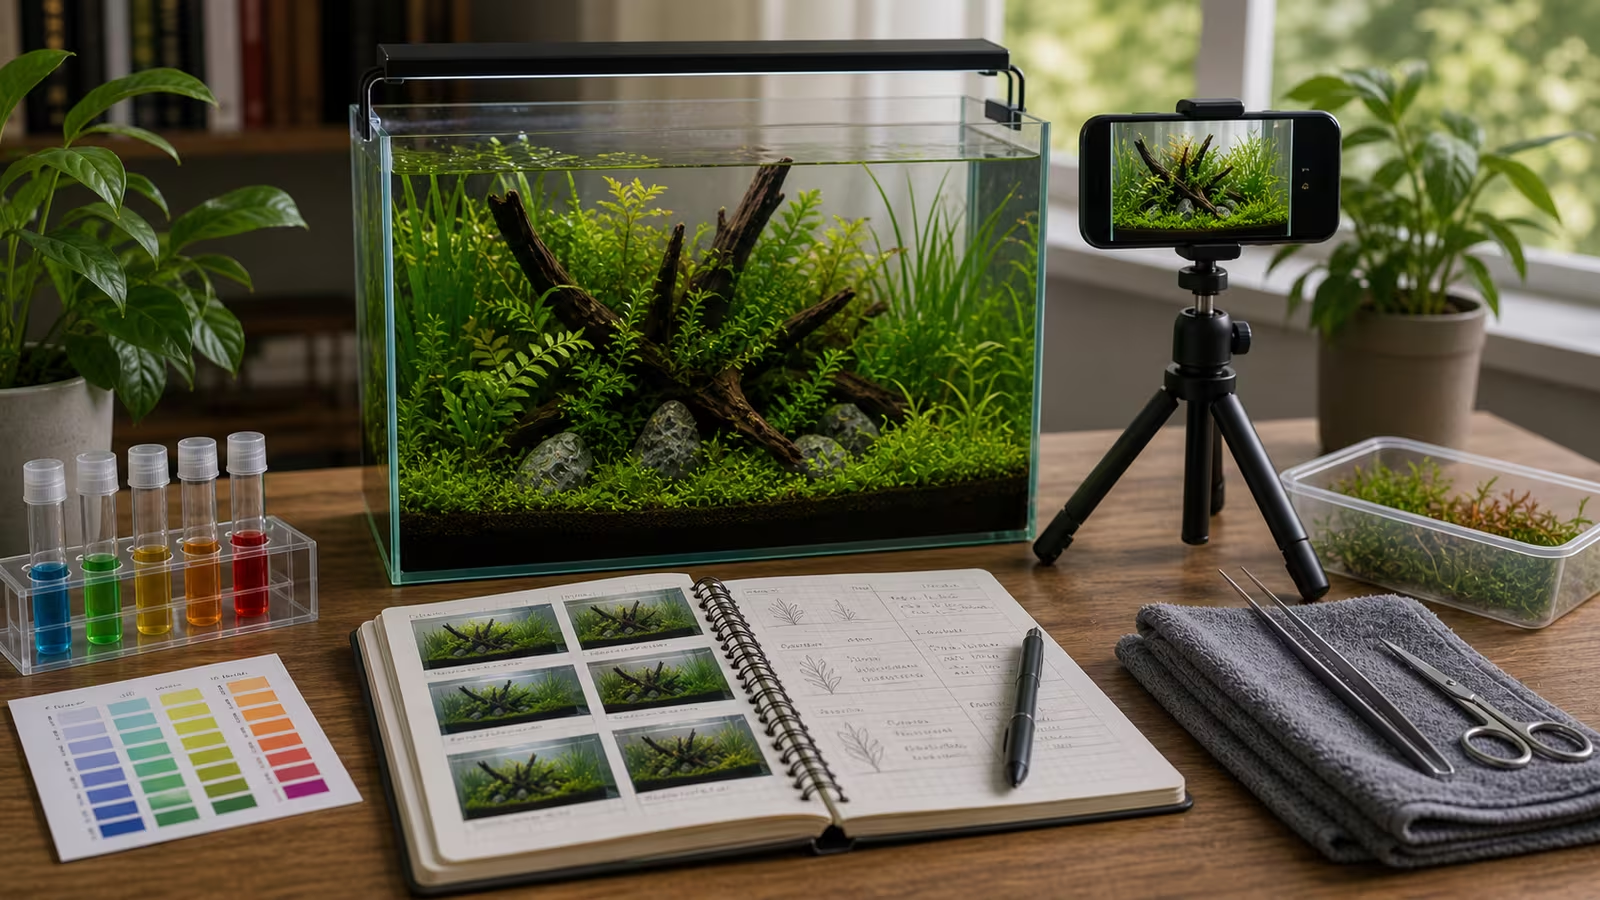
A simple phone tripod or marked floor spot can make comparison easier. If you do not want gear, put a small piece of tape on the floor or line the phone up with the same shelf edge each time. The habit should feel low friction enough that you still do it on an ordinary week.
Build A Useful Shot List
Think of the journal as a set of views, not a pile of random pictures. A strong weekly entry can be built from four images:
| Shot | Why It Matters |
|---|---|
| Full front | Shows overall plant mass, layout balance, algae spread, and water clarity. |
| Left or right side | Reveals depth, surface film, stem lean, and hidden clutter behind hardscape. |
| Problem close-up | Tracks algae, melt, damaged leaves, pests, or equipment symptoms. |
| Success close-up | Records new growth, rooting, pearling, color recovery, or livestock comfort. |
The success close-up is not vanity. It keeps the journal from becoming a complaint file. Planted tanks have problems, but they also reward attention in small ways. New root tips, shrimp grazing calmly, moss attaching to wood, or a plant producing smaller but healthier leaves are signs that your system is learning to stabilize.
If you are starting a new tank, take a bare-layout photo before planting, then another photo after planting, then weekly photos for the first month. Early photos are especially useful because new aquascapes often go through cloudy water, plant melt, diatoms, floating plant bits, and awkward empty spaces before they look settled.
What To Record
Write the date, water-change amount, test results, fertilizer dose, trimming, new plants, livestock additions, equipment changes, and anything unusual. Short notes are better than a perfect notebook you abandon. A good entry can be three sentences:
“Changed 25 percent of the water, trimmed the left background stems, and removed two melting crypt leaves. Nitrate was higher than last week, and the floaters covered about half the surface. Fish active after maintenance; hair algae still strongest near the front right rock.”
That kind of note gives your future self something to work with. It connects the photo to the care choices behind it. Without notes, a photo can show that the tank changed, but not why.
Track Decisions, Not Just Results
The most valuable part of a photo journal is the decision trail. If you reduce the light from eight hours to six, write that down. If you skip fertilizer for a week because algae scared you, write that down too. If you add fast-growing stems, change filter flow, remove floaters, move the tank away from a window, or feed less, record the choice.
This matters because planted aquariums react on a delay. Today’s algae may reflect the last few weeks of light, nutrients, stocking, plant mass, and maintenance. A journal helps you avoid the classic beginner loop: change something, wait two days, panic, change three more things, then no longer know which change helped or hurt.
Use the photos to ask better questions:
- Is the algae expanding, holding steady, or retreating?
- Are new leaves healthier than old leaves?
- Is plant growth dense in one area and stalled in another?
- Did water clarity change after filter maintenance, feeding changes, or a water change?
- Are animals behaving normally in the same areas of the tank?
The answers do not need to be dramatic. “A little better” is still useful evidence if it repeats across several entries.
How Photos Help Decisions
Photos show whether plants are stretching, whether algae is spreading or shrinking, whether floaters are blocking light, and whether hardscape is disappearing under growth. They also reveal if you keep changing too much at once.
A journal can make trimming decisions much easier. In person, a jungle of stems can look lush and healthy, but the side photo may show that lower leaves are shaded and the front plants are losing space. A weekly comparison can tell you whether to trim lightly, replant tops, thin the densest corner, or simply leave the tank alone.
It can also protect you from overcorrecting. A new tank with melting leaves may still be moving in the right direction if fresh growth is smaller, greener, and more upright than the original damaged leaves. A patch of algae may feel worse because you have started looking closely, while the photos show it is not spreading. Evidence turns the emotional volume down.
For livestock, photos and short notes help you notice routines. Are fish hiding only during maintenance, or all week? Are shrimp grazing in the open after lights come on? Are snails clustering near the surface after a change? A photo is not a substitute for water testing or experienced help, but it can preserve details you might forget when you ask for advice.
A Four-Week Starter Rhythm
For the first month, keep the system simple. On the same day each week, take a full-front photo before maintenance. Record light schedule, water-change amount, test results you are tracking, and any obvious plant or animal observations. Make only one meaningful adjustment if possible.
Week one is the baseline. Do not judge it too hard. Week two is for noticing what changed without rushing to fix every blemish. Week three is when patterns start to appear: algae zones, fast growers, shaded corners, floating plant coverage, or a plant that never really recovered. Week four is your first review. Put the four full-tank photos next to each other and describe the trend in plain language.
Useful review sentences sound like this:
- “The background grew quickly, but the foreground stayed open.”
- “Algae is still present, but it stopped spreading after the light change.”
- “The left side looks healthier because flow reaches it better.”
- “I keep trimming too much on maintenance day, then regretting the empty look.”
Those sentences turn photos into a care plan. They also make the hobby more satisfying because you can see progress that daily viewing hides.
When To Take Extra Photos
Weekly photos are enough for normal tracking, but a few moments deserve extra documentation. Take a picture before adding livestock, before and after a major rescape, when a plant first shows melt, when algae appears in a new place, when equipment changes, after a power outage, and before asking for help online or at a local shop.
If something urgent is happening, prioritize care over documentation. Test water, stabilize temperature, protect livestock, and address electrical or leak risks before composing a shot. A blurry photo taken after the situation is safe is better than a perfect photo taken while the tank needs attention.
Keep The Journal Easy To Search
Use filenames or album names that your future self can understand. A simple pattern like tank-front-2026-07-07 or right-rock-hair-algae-week-3 is enough. If you keep notes in a phone app, paste the same photo into the note or use the same date in both places.
Avoid scattering evidence across a camera roll, a chat thread, a notebook, and memory. The best system is the one you can find when the tank looks strange at 10 p.m. A single album plus a single note file is often plenty.
Common Mistakes
- Taking only pretty photos and no evidence photos.
- Changing camera angle every week.
- Forgetting to record light schedule or fertilizer changes.
- Comparing a day-after-trim tank to a four-week jungle.
- Using photos to chase perfection instead of stability.
- Deleting “ugly” stages that would have explained the improvement later.
- Photographing only problems and losing sight of growth, recovery, and calm animal behavior.
- Making several corrections between photos, then trying to credit one of them.
Related Fondsites Path
- Aquascape Composition Rules That Actually Help for reading layout changes.
- Beginner Mistakes and Reset Plan for troubleshooting evidence.
- Maintenance Day Checklist for pairing photos with a repeatable routine.
- Water Testing for Aquascapes for notes that explain what photos cannot show.
- Visual Prompt Lab for image thinking without misleading the care plan.
Try This Next
Take one full-tank photo today, then repeat it every maintenance day for a month. Add only three notes: water change, trimming, and one thing you noticed. At the end of the month, look at the four photos in order and write one sentence about what improved, one sentence about what got worse, and one sentence about what you will leave alone.